How to Build a Fire Pit

Fire. It's been a central player in the story of human progress for hundreds of thousands of years — plus it helps make a mean s'more. While our necessity for keeping a fire burning around the clock has waned as new sources of energy have emerged, what hasn't changed is the warmth, both figurative and literal, that can be derived from sitting next to a glowing collection of crackling firewood. Bringing that joy to your own home can be accomplished simply by adding a firepit to your yard or patio.
This May Also Interest You: How to Light a Gas Fireplace: A Step-by-Step Guide
While you can buy plenty of prefab fire pits, building one yourself could save you money, and also lets you create exactly the style that suits you best. Here's what you need to know:
Plan Twice, Dig Once
The first step in building your own fire pit is to choose its location. You'll want to be as far as possible from any structures. including your home, sheds, swing sets, pools and anything else that might be endangered by sparks or heat. You'll also want to be sure the fire pit isn't under any kind of roof or low-hanging branches. If you can also avoid areas where autumn leaves will gather, this’ll make it easier to keep the fire pit safe, as sparks can ignite dry leaves.
Also, you may want to check the prevailing wind direction in your yard. You wouldn't want to situate your firepit in a place where wind would consistently blow the smoke into your home — no matter how much you love the ambient aroma of a campfire. Getting a read on the wind direction in your area can be as simple as stepping outside a few times a day for three to four days and facing toward the wind, or you can check online wind-monitoring apps like Windfinder or the Department of Agriculture's Wind Rose Dataset.
It's also a good idea to check with your local building authorities or homeowners association to see if there are any related restrictions or codes before putting in a fire pit.
During the planning stage, you'll also want to decide how big you want your firepit to be. It's generally recommended that a firepit be between 36 inches to 44 inches wide, with walls that measure between 12 and 14 inches high. That should allow guests to comfortably put their feet up on the edge of the pit while seated around it.
Finally, simply choose the shape of your firepit — round or rectangular — get your supplies together, and get ready to build. If all goes well, installing a basic fire pit should take even amateur do-it-yourselfers no more than 4 to 5 hours to complete.
Prefab Vs. DIY
It's possible to purchase a fire pit kit from the major home improvement stores, and doing so certainly cuts down on the amount of planning, measuring and shopping you'll need to do. Such kits run between $500 and $1,100 for a quality setup, depending on the style of stone and insert you choose. If you decide to go with a kit, you'll have all you need to get the job done — including easy-to-follow instructions — and it might not even cost much more than going with a more freestyle approach. On the other hand, if you decide to execute your project without a kit, you'll have more creative freedom in designing exactly the type of fire pit you'd like, and you'll also be able to save a bit of cash, as decent materials for the job come in around $300.
In either case, building the fire pit requires the same basic steps.
Location, Foundation
- First, you'll want to use marking paint to designate the area of your firepit. If you’re building a round pit, you can accomplish this by driving a stake or piece of rebar in the center of the general area and attaching a string to it that is half the diameter of the fire pit.
- Holding the can of marking paint at the end of the string, walk around in a circle spraying downward until you have marked out the circumference.
- If you’re going with a square or rectangular fire pit, you can use small stakes and string to denote the edges while using a level to ensure that everything is straight, or you can lay down your first layer of stone and then trace around it with the edge of a shovel.
- Once the marking is done, remove all grass and soil inside the area down to a level of about 2 inches.
- Use a hand tamper to pack the remaining soil down.
- Next, pour in about 2 inches of gravel paver base, wet lightly and tamp down.
- Add roughly a half-inch more paver base on top of that, wet it down and tamp.
- Ensure that this base is completely level and rake out areas that aren't, and re-tamp if needed.
Now you’re ready to build the stone portion of the fire pit.
More Related Articles:
- Heating With a Fireplace: Most Common Questions
- Soot Yourself: Channel Your Inner-Dick Van Dyke and be Your Own Chimney Sweep
- Do You Need to Hire a Chimney Sweep?
- How Much Does a Gas Fireplace Cost?
- Wood-Burning Stove and Fireplace Safety
Stack Your Stones
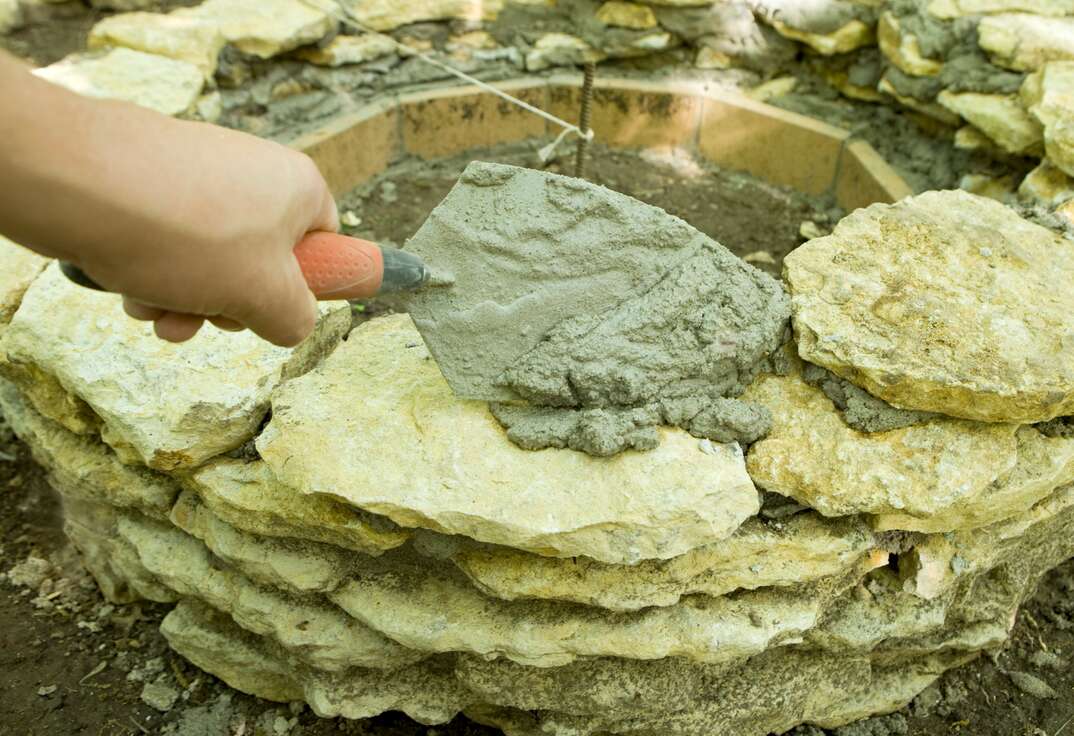
If you’re creating a round fire pit, you'll use retaining wall blocks that are tapered on one end so that the pattern curves as you place them together. Square or rectangular fire pits use rectangular blocks. When choosing your blocks, keep aesthetics in mind, but also be sure not to choose anything that might have a high water content like compressed concrete blocks, as they could explode once exposed to heat.
- Lay down your first layer of blocks on your compacted base, and check that everything lines up using a long level.
- If anything looks slanted, tap the blocks into place using a rubber mallet, or add more crushed gravel under blocks that are too low.
- Next, lay your second layer down making sure to overlap the areas where the blocks butt up against each other below.
- If you need to cut any blocks to make the fit accurate, you can do so by scoring the block with a circular saw fitted with a concrete blade, then tapping it apart with a large chisel.
- After the second layer looks good, remove each of the blocks one by one and place them back after applying rows of concrete adhesive to the lower blocks.
- Repeat the process for a third and fourth layer, if desired.
- As you lay your blocks, you'll want a good fit between them, but it's OK to leave small openings throughout to help your fire get air while it is burning.
Fire in the Hole
Finally, you'll want to decide what you'd like at the heart of your firepit. If you want to keep things looking natural, you can simply lay down more paver base and line the inside walls with fire bricks followed by lava rock to hold the bricks against your blocks. Alternatively, after you pour in the inside layer of paver base, you could place a pre-made steel fire ring inside your structure to protect your blocks from drying out and crumbling prematurely.
In both cases, you may find that your fire pit is difficult to clean, as the ashes will intermingle with the stone beneath. However, if you’re looking to put a cooking grate over your fire pit, this design would work best.
For easier cleanup, you can also fit a steel fire bowl into the top of your structure by resting its lip on the inside edge of the last row of blocks. When it comes time to clean up after your last fire, you can simply lift the bowl out and toss the ashes, and you'll be ready for your next glowing gathering.
Fire pits are a lovely aesthetic upgrade to your home, but you most likely want to address more practical home maintenance matters, as well. If so, consider being prepared with a plan from HomeServe. Once you have a plan in place and a covered issue arises, you can simply call the 24/7 repair hotline. A local, licensed and highly trained contractor will be sent out to you to get the job done to your satisfaction.


