How to Caulk Windows: 8 Easy Steps

Cracks or gaps around your window frames lead to air leaks, allowing warm air to escape your home during the winter and cool air during the summer. This places a heightened demand on your AC and heater, leading to increased energy bills year-round.
This May Also Interest You: How to Replace Your Windows
The good news is that you can quickly, easily, and affordably fix these air leaks with caulk — a flexible material used to seal gaps under a quarter-inch thick between building materials, like your window frames. Learn how to caulk windows to improve your home’s energy efficiency in eight simple steps below.
How to Caulk Windows: Step by Step
Things You’ll Need
- Caulk
- Caulk gun
- Long nail (if necessary)
- Utility knife (if necessary)
- Painter’s tape (optional)
- Paint scraper or putty knife
- Wood filler and putty knife (if necessary)
- Caulk smoothing tool or nitrile gloves (optional)
- Damp cloth or sponge
- Paint thinner or mineral spirits (if necessary)
Step 1: Choose the Right Caulk
Before starting your project, it's essential to choose the right type of caulk. Assess your specific needs and consider factors such as the material of your window frame, the climate you live in, and the level of exposure to the elements. Each type has its benefits and drawbacks, so take the time to research which one will best suit your needs.
- Polyurethane: Polyurethane caulk is a durable, flexible option that adheres well to most surfaces. It's paintable and resistant to extreme temperatures, making it suitable for both indoor and outdoor applications. However, it can be challenging to apply smoothly and should be painted over since it’s not UV resistant. In most cases, polyurethane caulk is the preferred option for sealing windows.
- Silicone: Silicone caulk is waterproof, flexible, and resistant to UV light, making it an excellent choice for exterior window applications. The main disadvantages are that it's not paintable, can have difficulty adhering to wood, and requires mineral spirits or paint thinner to clean up.
- Acrylic: Acrylic latex caulk is easy to apply, easy to clean up, and is paintable. Unfortunately, it’s not the best choice for sealing windows due to its low flexibility in response to temperature fluctuations, making it prone to cracking or otherwise failing.
- Siliconized latex: This hybrid caulk combines the benefits of acrylic latex and silicone caulk, offering excellent adhesion, flexibility, and paintability. It is suitable for both interior and exterior use. The primary disadvantage is that it tends to be the most expensive.
Step 2: Prepare the Window
Proper preparation of the window area is crucial for ensuring a secure bond between the caulk and the surface. Start by repairing any damaged areas around the window, such as cracked or rotting wood. You can replace the damaged sections or fill the cracks with wood filler, depending on the extent of the damage. Next, clean the surface by removing dirt, debris, and old caulk using a putty knife or scraper. After removing the old caulk, clean the area with a damp cloth or sponge and let it dry completely.
Step 3: Applying Painter's Tape (Optional)
For a cleaner and more precise caulk line, you can use painter's tape. Place the tape along the edges of the window frame and adjacent surfaces, leaving a gap for the caulk to be applied. This method ensures a clean, even line when applying caulk and can help prevent caulk from spreading onto unintended areas.
More Related Articles:
- How to Remove a Window
- How to Clean Windows to Get That Streak-Free Shine
- Save Yourself Some Pane With Our DIY Window Repair Guide
- How to Install or Replace a Window Well
- How to Insulate Windows
Step 4: Prepare the Caulk Tube and Gun
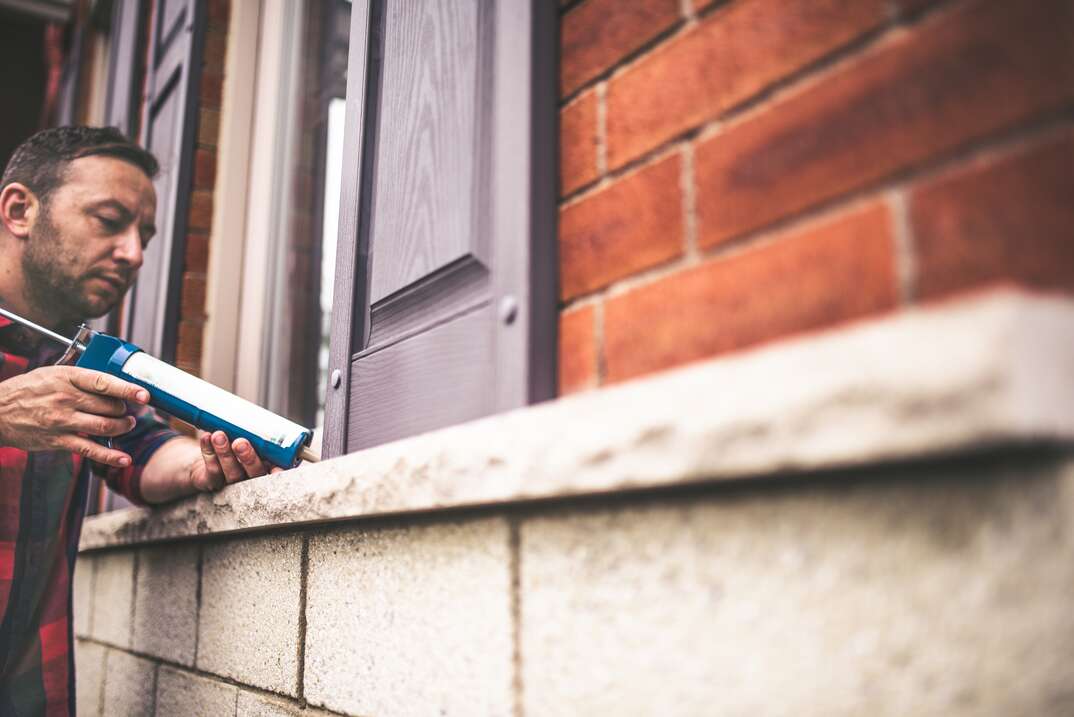
Before applying the caulk, you'll need to prepare the caulk tube and load it into the caulk gun. Use a utility knife or the tip cutter found on most caulk guns to cut the tip of the caulk tube at a 45-degree angle to create an opening that allows for a controlled flow of caulk. The size of the opening should match the size of the gap you're sealing. Puncture the inner seal of the caulk tube using a long nail or the puncture tool found on most caulk guns. Load the caulk tube into the caulk gun by pulling back the plunger, inserting the tube, and then pushing the plunger forward until it engages with the bottom of the tube.
Step 5: Apply the Caulk
Starting at an inside corner of the window, hold the caulk gun at a 45-degree angle, with the tip of the tube touching the surface where the caulk will be applied. Apply steady pressure to the gun trigger while moving the gun along the gap or joint. Try to maintain a consistent speed and pressure to create a smooth, continuous bead of caulk. If you encounter larger gaps, you may need to apply more caulk to fill them adequately.
Step 6: Smooth the Caulk
After applying the caulk, smooth it out for a clean, professional-looking finish. You can use a wet, preferably gloved, finger or a caulk smoothing tool to achieve this. Gently run your finger or the tool along the bead of caulk, pressing it into the gap and ensuring proper adhesion to both sides of the joint. As you go, clean any excess caulk off your finger or tool to avoid smearing or even spreading.
Note: If you’re smoothing silicone caulk with your finger, you will need to use paint thinner or mineral spirits instead of water.
Step 7: Remove Painter's Tape
If you used painter's tape, carefully peel it off while the caulk is still wet. Start at one end and pull it away from the window at a roughly 45-degree angle. This method helps ensure a clean edge without disturbing the freshly applied caulk. After removing the tape, inspect the caulk line for any inconsistencies or areas that need touch-ups. If necessary, use a wet finger or caulk smoothing tool to make minor adjustments, ensuring a consistent and professional appearance.
Step 8: Allow the Caulk to Fully Dry
Allow the caulk to fully dry. Drying times can vary depending on the type of caulk you used and the environmental conditions, so it's essential to follow the manufacturer's recommendations for drying time. In general, most caulks require at least 24 hours to cure fully, but some may take longer. Avoid using or disturbing the window area during the drying process, as this can compromise the caulk's adhesion and effectiveness. Once the caulk has fully dried, you can enjoy the benefits of improved energy efficiency, comfort, and cost savings that come with properly sealed windows.


