You Need to Change Your Whole-House Water Filter. Here’s How

You Need to Change Your Whole-House Water Filter. Here’s How
While using faucet-specific water filters or even countertop filter pitchers can help you drink cleaner water, installing a whole-house water filter is a wise investment to ensure clean and healthy water everywhere in your home. However, knowing where to find your filter, figuring out which replacement filter to use, and properly changing it can be daunting. But fear not! Here, we'll give you a step-by-step guide to help you locate your whole-house water filter, determine the right replacement filter, and perform the filter-replacement process efficiently and effectively.
Locating Your Whole-House Water Filter
The location of your whole-house water filter depends on the specific system installed in your home. Here are a few common areas where you might find the filter:
- Main Water Supply: Check near the main water supply line where it enters your home. Look for a large cylindrical or rectangular housing connected to the pipe.
- Utility Room or Basement: If your home has a dedicated utility room or basement, the filter might be located there. It could be attached to a wall or placed on a stand.
- Garage or Crawl Space: Some whole-house water filters are installed in the garage or crawl space. Look for a filter housing along the main water line in these areas.
The most likely location for your water filter is somewhere between where water enters your house from a well or public utility just before it branches off inside your home to feed your various rooms. If you're unsure about the location, refer to the user manual provided by the manufacturer or consult a professional plumber who can help you trace your main.
Determining the Right Replacement Filter
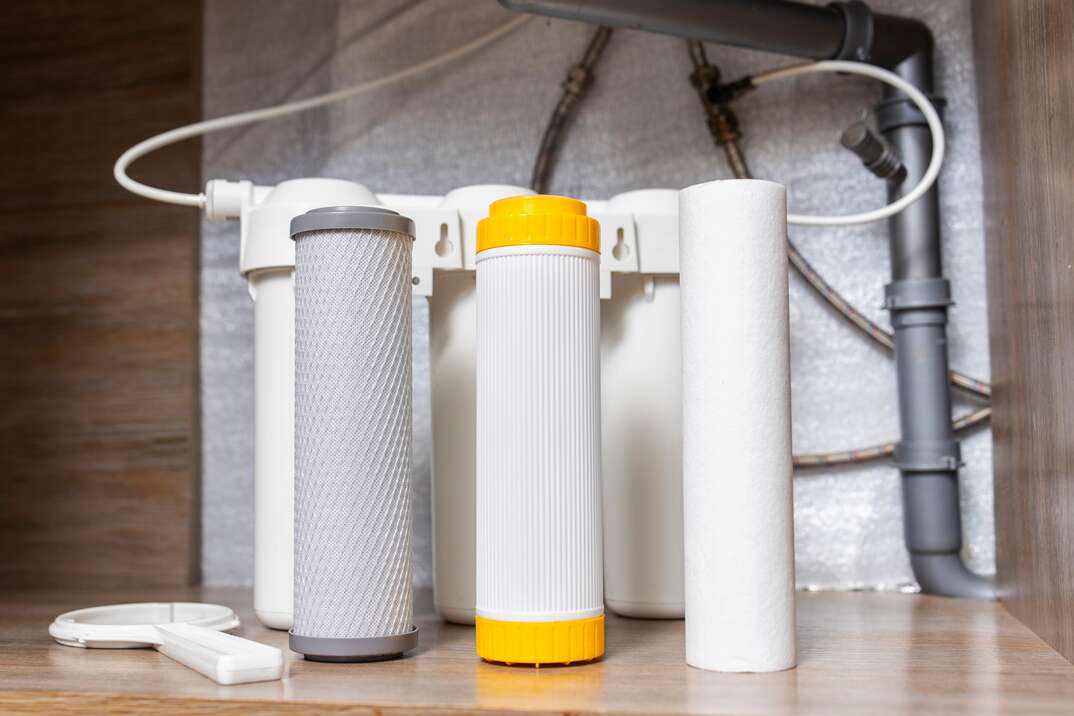
To ensure optimal filtration, it is crucial to use the correct replacement filter for your whole-house water filtration system. Whether you have a reverse osmosis system with a carbon and/or sediment filter, or a simpler system, as long as you match your new filter to the old one, you should be in good shape. Follow these steps to determine the right replacement filter:
- Check the Current Filter: Examine the existing filter for any identifying marks, model numbers, or labels. Note down this information.
- Consult the Manufacturer's Website: Visit the manufacturer's website and navigate to the product page for your specific filtration system. Look for a "Replacement Filters" section or search for your model number. Cross-reference the information from your current filter to find the appropriate replacement.
- Contact the Manufacturer or Supplier: If you're unable to find the necessary information online, reach out to the manufacturer or the supplier of the filtration system. Provide them with the details of your current filter, and they will guide you in selecting the correct replacement.
Step-by-Step Filter Replacement Process
Changing the filter in your whole-house water filtration system is typically straightforward but will rely on the specifics of your filter. Instructions should be included with the filer's manual. If you no longer have that manual or can't find it online, you can follow these general steps:
- Shut Off the Water Supply: Locate the shut-off valve for your main water supply and turn it off to prevent water flow during the replacement process.
- Release Pressure: Open a nearby faucet to relieve any pressure in the system.
- Remove the Filter Housing: Unscrew the filter housing by turning it counterclockwise. Be cautious as residual water might be present. Sometimes there is a special tool you can use to make this process easier. It should have come with your filter or be stored somewhere near it. If you don't have the tool, you may be able to order a new one online.
- Take Out the Old Filter: Carefully remove the old filter from the housing. Dispose of it according to local regulations.
- Prep the New Filter: If necessary, rinse the new replacement filter with clean water to remove any loose particles or carbon fibers.
- Install the New Filter: Insert the new filter into the housing, ensuring a proper fit and alignment.
- Reassemble the Filter Housing: Securely screw the filter housing back into place, ensuring a tight seal. Sometimes your filter will have rubber gaskets. If so, be sure they are properly aligned and completely contained in the filter housing when you screw things back together.
- Restore Water Supply: Turn on the main water supply valve and let the water run for a few minutes to flush out any air or loose particles.
How Often To Replace Your Filter
The frequency of filter replacement depends on various factors, including the manufacturer's recommendations, the quality of your water supply, and household usage. As a general guideline, whole-house water filters typically require replacement every three to six months.
Some signs that indicate it's time to change the filter include reduced water pressure, changes in water taste or odor, and visible sediment or discoloration in the water. Additionally, follow any maintenance schedules or indicator systems provided with your specific filtration system.
Remember, not changing your filter on a regular basis can cause contaminants to leach into your water supply effectively canceling the efficacy of the system. Avoid this with regular filter changes, which can give you months of clean, fresh water for just a few minutes of your time.


