No Hot Takes, Here: A Deep Dive on Deep Cleaning Your Oven
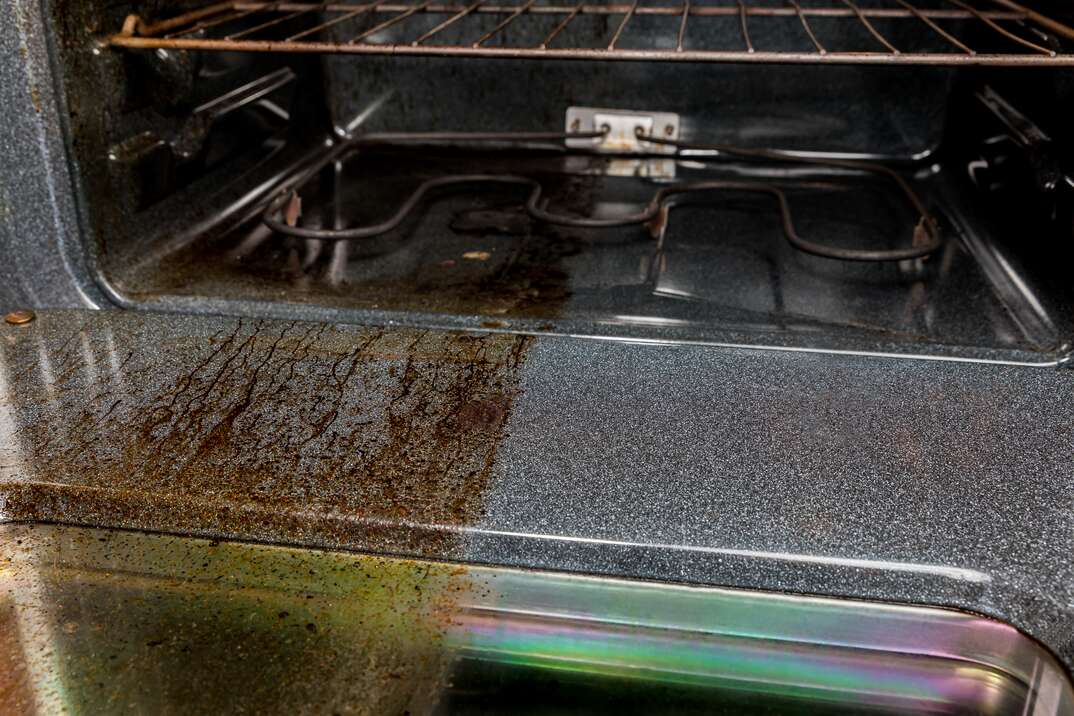
If you're like most people, cleaning the oven ranks high on your list of the Worst. Chores. Ever. Let's face it — nobody enjoys scouring away baked-on spills and months’ worth of grime, but dirty ovens can pose health and safety risks to your home and family. Leftover grease can ignite, causing oven damage and even household fires, and smoke caused by spilled food can irritate your eyes and lungs. By maintaining the cleanliness of your oven, you can reduce germs and pollutants, eliminate potential food contamination and minimize the risk of fire.
This May Also Interest You: Should You Use Your Oven’s Self-Cleaning Feature — and, If So, How?
When you incorporate oven cleaning into your regular household maintenance routine, you can also improve your oven’s performance, enhance its energy efficiency and minimize the chance of incurring costly repairs. Although many modern ovens include self-cleaning features, sometimes the most effective technique for a spotless appliance is good old-fashioned elbow grease.
If you’re just looking for speedy step-by-step instructions on how to clean your oven, go here. But for an in-depth guide to what you’ll need for the job, the different types of oven cleaners available and how to go about making this dirty deed a little less dreadful, keep reading:
1. Identify What Type of Oven You Have
Ovens aren't all the same (and that doesn't even include stove tops and ranges), and the type of appliance you have may dictate how it's cleaned. If you're trying to figure out what kind of oven you have, it probably falls into one of these three categories:
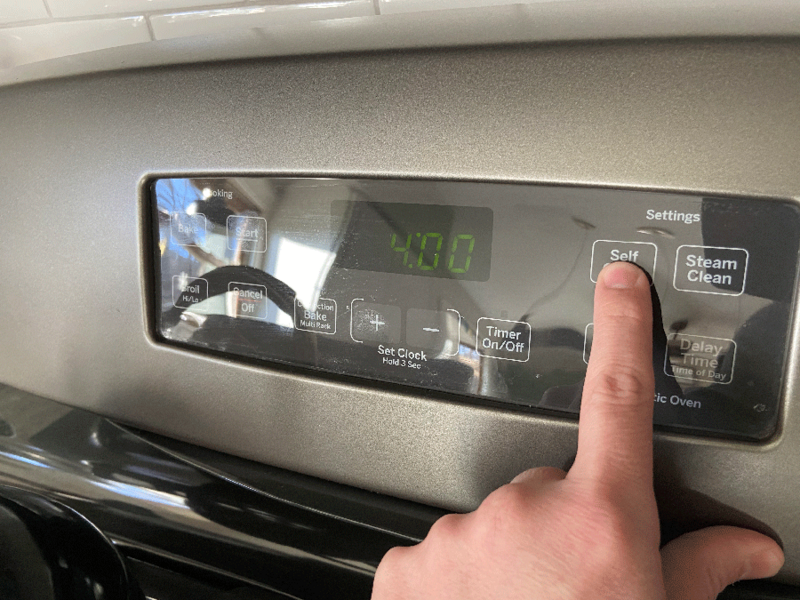
Self-Cleaning Ovens
This type of oven features a self-clean cycle, which cleans your oven automatically using high temperatures or blasts of steam, reducing food debris to ash, which can be easily swept away.
Textured Ovens
Also known as continuous-cleaning ovens, textured ovens have special surfaces that burn off food gradually and require only light wipe downs.
Non-Self-Cleaning Ovens
These traditional ovens require manual cleaning.
If you aren't sure what category your oven falls into, consult your manufacturer's manual. This helpful document can tell you what type of oven you have and should supply crucial information such as what cleaners are safe to use for your appliance and what components should and shouldn’t be cleaned. If you’re planning on using your oven’s self-cleaning cycle, the owner’s manual can guide you through the process.
2. Choose the Right Type of Cleaner
From heavy-duty degreasers to multitasking organic products, there are many types of oven cleaners available on the market today. In addition, a quick internet search can turn up a multitude of recipes for effective do-it-yourself cleaners made from ingredients in your pantry. And although the right cleaner can cut through the grease and grime in your oven to make the cleaning process easier, the wrong product may be ineffective — or, worse, cause damage to your expensive appliance.
Like many other household cleaning products, oven cleaners are varied. They can take the form of sprays, pastes, foams or sponges, and are often designed to serve different purposes. Oven cleaners generally fall into one of the following categories:
Spot Cleaners
Often designed to be sprayed on and wiped off, spot cleaners are typically intended for touch-ups or spill cleanups in between major cleanings.
Degreasers
Designed for more rigorous use, degreasers are formulated to cut through grease and food residue. They often come as a foam and are typically applied and left to work for a period of time prior to cleaning, as outlined on the product label.
Multipurpose Cleaners
As their name suggests, multipurpose cleaners have more than one use. In addition to cleaning your oven and its components, many are suitable for grills and microwave interiors.
Plant-Based Cleaners
The harsh chemicals in many commercial oven cleaners can be irritating to your skin, eyes and lungs, which is why many households prefer chemical-free cleaning products such as plant-based oven cleaners. Often organic and hypoallergenic, plant-based cleaners are typically safer around children and pets.
Erasing Pads
Created from melamine foam, this sponge-like cleaning product is great for removing stains when dampened. Because erasing pads are so effective, it's a good idea to test a small spot on your stove before engaging in a large-scale scrubbing effort.
DIY Oven Cleaners
Homemade oven cleaners are often made from baking soda, white vinegar or other pantry staples, using recipes found on the internet or passed along by family members and friends. Better Homes & Gardens recommends mixing 1/4 cup baking soda with just enough hydrogen peroxide to form a thick paste.
When using any type of store-bought cleaner, whether it's chemical-based or organic, make sure to read the instructions thoroughly and use the product accordingly to avoid injury to yourself or damage to your oven.
Are Cleaners Safe for Self-Cleaning or Textured Ovens?
Although store-bought chemical cleaners may be fine for many conventional ovens, they should never be used on self-cleaning or textured models, which typically have special coatings that can be corroded by harsh chemicals. For self-cleaning models, a better option is to mix up your own cleanser using pantry staples such as baking soda and white vinegar. If you don’t want to mix your own cleaner, look for an eco-friendly commercial cleaner that’s made from non-toxic, biodegradable ingredients.
If you have a textured oven, you should only need a damp cloth to clean the interior. Never use oven cleaners or other cleaning chemicals on textured ovens, and avoid abrasives such as scouring pads, which can harm the unit's surfaces.
3. Choose the Right Tools
When deciding how to clean your oven, choosing the right tools is essential. Having the proper tools on hand can make the process painless and efficient, leaving your appliance looking and smelling fresh and clean.
Keep these helpful tools at the ready:
Brushes
Both scrub brushes and soft-bristled brushes can be useful for cleaning your oven. Soft-bristled brushes are ideal for removing loose debris from your oven floor, and scrub brushes can help scour away baked-on food and other stubborn stains from the appliance’s walls, floor and ceiling.
Soft Cloths
A soft cloth dampened with warm water is the ideal tool for wiping down your oven's interior surfaces, especially if your unit has a special coating that's easily damaged. If you don't have a soft cloth, paper towels make for a good, disposable alternative.
Newspaper
Save your old newspaper for cleaning the glass components of an oven. Newspaper effectively absorbs cleaning fluid and leaves glass streak- and smudge-free.
Spray Bottles
If you’re preparing a DIY liquid cleanser, add it to a spray bottle. Some vessels have spraying and streaming options so you can better target the areas that need the most cleaning.
Protective Gear
If you have sensitive skin or respiratory problems, it may be helpful to don protective garments such as masks and gloves when cleaning your oven. Cleaners that include caustic chemicals may also call for protective gear and eyewear while using the product, so be sure to check the product instructions.
4. Prepare Your Oven for Cleaning
Once you’ve chosen the ideal cleaning products, you can prepare your oven for cleaning. Make sure it’s turned off and is completely cool for your safety. Remove any pots and pans from inside, and take out the oven racks, which should be cleaned separately. An empty oven means freer access to the interior walls, floor and ceiling.
5. Ensure Proper Ventilation
Unless you’re using homemade or plant-based products that don’t have harsh fumes, make sure to properly ventilate your kitchen prior to cleaning. Open up windows throughout the house, and use fans to redirect fumes away from you to reduce your exposure to caustic chemicals.
6. Remove Food Debris
If large chunks of food have collected on the oven floor, wipe them away with a soft cloth. Scraping gently with a plastic spatula should dislodge harder-to-remove debris. A paste made from baking soda and water may be needed to loosen baked-on particles.
7. Presoak All Cleanable Components
By presoaking oven components in your cleaner of choice, you can make your job easier. Presoaking can loosen stubborn, baked-on residue, minimizing the need for heavy-duty scrubbing. How you approach the presoaking process should depend on the individual component and how much cleaning it requires.
Here are the main oven components and how to tackle each:
Oven Racks
Ideally, place the oven racks in a bathtub or a large washing sink to presoak, and pretreat them with a grease-cutting dishwashing liquid. Some commercial cleaners conveniently provide bags for presoaking oven racks. If your oven racks won't fit in any of the above areas, set them on a tarp outside before applying the cleaning product. When using a commercial cleaner, follow the label's guidelines for the length of pretreatment.
Oven Interior
Foams and pastes may be applied directly to most surfaces of your oven's interior. You should typically avoid applying chemicals to heating elements, exposed light bulbs such as the thermostat bulb, and the flexible gasket, which is located inside the oven door. If the cleaning product accidentally gets on these items, carefully wipe it off as soon as possible with a soft cloth.
Window Glass
Your oven window typically only needs a cursory pretreatment with a cleaner that's suitable for glass.
8. Scrub Your Oven and Wipe It Clean
Presoaking your oven and its components should minimize the need for extensive scrubbing, and on standard, non-self-cleaning ovens, a scrub brush or scouring pad should easily remove any remaining residue. Once you're satisfied, use a damp cloth to wipe down the oven's walls, floor, ceiling and door, making sure to remove all traces of cleaning products. Once everything is clean and dry, you can replace the oven racks.
More Related Articles:
- How to Clean an Oven: Wipe Away Your Kitchen’s Dirty Secret in 8 Steps
- Choosing the Right Oven/Cooktop for Your Kitchen
- Did You Know an Oven, Range and Stovetop Are Different?
- The Pros and Cons of Induction Cooktop and Ranges
- Wood-Burning Stove and Fireplace Safety
9. Don’t Forget the Exterior
Your oven’s exterior can become coated with the greasy residue that occurs as a byproduct of cooking and baking. Hot, soapy water and a soft cloth are often your best bet for a clean appliance, but be sure to rinse away all traces of soap once you’ve finished. Complete the exterior cleaning with a spritz of glass cleaner on the oven window and wipe it clean using paper towels or old newspaper.
If your oven has a stainless-steel finish, consider a commercial stainless-steel cleaner. It's usually the best option for properly maintaining this finish and keeping your appliance looking great.
How to Clean an Oven Using a Self-Clean Cycle
Self-cleaning ovens require a different maintenance routine. These appliances have a self-clean setting that typically uses high heat or steam to remove grime and debris from your oven’s interior. For heavily soiled ovens, running the self-clean cycle can be a no-fuss alternative to manual scrubbing, but it can keep your oven occupied for up to several hours, depending on your model. It may also release burning odors and other fumes into your home, and although this is a normal byproduct of the process, it can be unpleasant. That's why it's best to run this cycle when you aren’t planning on using your kitchen for a while.
You should always consult your appliance's owner’s manual before using the self-clean cycle to avoid damage to your oven. On some units, this cycle shouldn’t be used more than a few times per year. Your owner's manual can also tell you if you need to remove the oven racks before starting the cycle. Ovens that feature a steam-clean cycle may require the addition of water prior to cleaning.
When the self-clean cycle is complete, you should be left with a layer of gray ash on your oven floor. Use a damp rag to wipe away the remaining ash and debris, but only after making sure your oven has sufficiently cooled and is safe to touch.
Alternative Between-Cleaning Refreshes
If you're wondering how to clean your oven in between major scrubbings, several simple techniques offer effective options for a quick refresh. If you want to eliminate buildup and keep your oven smelling fresh, try these great oven cleaning hacks:
Steam Cleaning
Fill an oven-safe pan halfway using a mixture consisting of two parts water to one part white vinegar and place it on your center rack. The Home Depot recommends setting your oven temperature between 300 and 350 degrees Fahrenheit for the best outcome, and letting it run for about 30 minutes. The steam created should loosen grime and debris so you can easily wipe it away with a soft cloth once your oven cools.
Go Natural
Mix lemon juice with water and spray it onto the walls of your oven. Then let it sit for a few minutes. The acid should cut through the grease, making it easy to wipe away any grime.
How Often Should You Clean Your Oven
How often you should clean your oven depends on how much you use it. If you regularly cook or bake, it should be cleaned at least every few months to keep it functioning at its best. For less-prolific cooks, cleaning your oven once or twice a year, plus spot-cleaning spills, should suffice.
If you notice any of the following signs, it may be time to clean your oven:
- Crust, excessive debris or residue lining your oven floor
- Splatters on the oven walls
- The oven door is greasy or sticky to the touch
- Odors occur when your oven is turned on
- Your oven smokes when it's turned on
Your oven is an essential part of your household, letting you cook and bake for your family, so oven breakdowns can be inconvenient. Keeping your oven clean is a great way to make sure it stays in good working order, but it's impossible to eliminate the need for repairs completely. Having an appliance repair plan can ensure you're prepared when an issue arises. Learn more about plans from HomeServe today.
