How to Install Floating Shelves (It’s Not as Hard as It Looks)

How to Install Floating Shelves (It’s Not as Hard as It Looks)
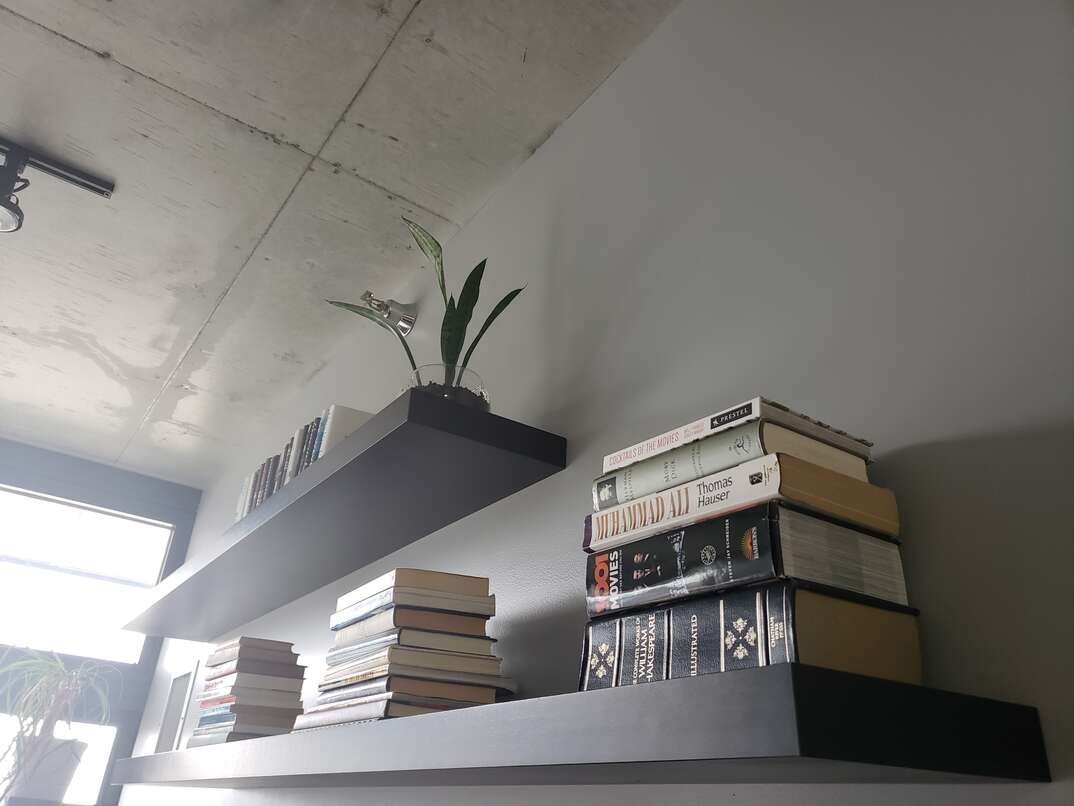
We all could use a little extra space, couldn't we? One of the most aesthetically pleasing ways to maximize the space in your home or apartment is by installing floating shelves. Floating shelves have brackets that are hidden from view, creating a clean and graceful look that’s as functional as it is nice to look at. They can also create space in your home by giving you storage areas in places where bulky cabinets or shelves might not be able to fit. In terms of form and functionality, floating shelves are a win-win.
This May Also Interest You: Organize Your Closet and Make Your Life So Much Easier
With hidden hardware and sleek designs, you might find yourself intimidated to try to install them on your own — but don’t be. By following our simple instructions, you’ll be able to install floating shelves in no time at all.
Gather Your Supplies
As with all do-it-yourself projects, it’s always a good idea to collect all the materials that you’ll need before you begin. Not having the right tool available can cause unneeded frustration and might even lead to you accidentally damaging your wall. Read the manufacturer’s instructions carefully and make sure you have all the necessary hardware included with your shelves. In general, to install floating shelves properly, you’ll need:
- A level
- A stud finder
- A pencil
- A drill
- A screwdriver
Find the Studs
It’s always advisable to install your floating shelf into a wall stud — even if your shelf is light and you don't intend for it to hold anything heavy. Drywall can wear out over time and send your shelf and its contents crashing to the floor. Use a stud finder to determine the location of the stud behind the drywall and make a light pencil mark on the wall. If there isn’t a stud available where you’d like to put your shelf, you’ll need to use drywall anchors to support the weight of the shelf instead. Once you determine where you’d like your shelf, make a light outline of the bracket with a pencil to use as a guide.
Attach the Bracket
Once you figure out where you want to place your shelf, it’s time to attach the internal bracket to the wall. Here are the steps:
- First, line up the bracket to the chosen location.
- Then, drill pilot holes into the wall where the bracket’s screw holes are. (Again, if you’re attaching the bracket directly to a wall stud, you won’t need any additional wall anchors, but if you’re attaching to drywall or plaster, you’ll need the anchors to support the full weight of the shelf.)
- After drilling the pilot holes, go ahead and attach the bracket to the wall.
Depending on how many shelves you’re installing, you may need to repeat this process several times.
Install Your Shelf
Once the shelves are installed and secure, it’s time to hang the shelf on the internal bracket.
- The bracket that’s attached to the wall is inserted into the back of the shelf; with this in mind, line up the holes on the back of the shelf with the extensions of the bracket.
- Then, slide the shelf onto the bracket on the wall.
- Some shelving units have screws on the bottom of the shelf that work to fasten the shelf to the bracket; if this is the case, tighten those screws now.
- From there, add your knickknacks, books, houseplants or whatever you’re displaying, and enjoy your new floating shelf!
DIY Floating Shelves
Another option for the craftier among us is to build your own floating shelves. While buying prefabricated floating shelf kits is sure to get the job done, building your own really allows you to customize and develop the style you’re looking to achieve.
To go this route, you’ll need a bit more in the way of tools and materials. And, as always, it’s advisable to collect your tools before you begin work. To build your own floating shelves, you’ll need:
- A 2-inch x 12-inch pine board (or the size and material of your choice)
- A router with a dado bit
- A saw
- Adjustable invisible bracket supports
- A pencil
- A drill
- A level
Customize Your Size
Before you begin, you should have a good idea of the length of the shelves you’d like. These are completely customizable, so go ahead and determine where you’d like the shelves to go and decide how you’d like them to appear on the wall.
It’s always a good idea to use a single, longer piece of wood and cut your shelves out of it using a saw. An electric circular saw, or miter saw, is the quickest and cleanest option here, but other options such as a hand saw or jigsaw could work too.
After you cut your boards, you’ll want to stain or paint the shelves. Because you want to limit the probability of getting paint or stain on your wall, it’s a good idea to go ahead and do this before attaching them to the wall.
From there, you’ll want to make sure that you create a notch in the back of your boards to fit the hardware. This depends entirely on the type of invisible brackets that you use. The brackets should include their precise measurements with the packaging. If not, you may need to do some trial-and-error work. A good place to start is with a half-inch notch and go up from there. You’ll need a router with a dado bit for this, but if you’re careful, you can use a chisel to achieve your desired notch, as well.
Drill and Attach
After you’ve properly cut and notched your boards, it’s time to drill holes into them, which will slide over the hanging supports on the bracket. Again, be sure to check the hardware manufacturer’s instructions for the specific lengths required for the bracket holes.
Next, attach the brackets to the wall:
- First, place the brackets where they need to be on the wall and use a pencil to mark the pilot holes.
- Drill your pilot holes and then attach your brackets to the wall.
- Once you have your brackets on the wall, it’s as simple as sliding your boards into place.
Again, make sure you use a level and a stud finder for extra precision. As mentioned earlier, hanging shelves directly on drywall or plaster without an anchor is asking for trouble. Always use an anchor if you’re not hanging directly into a stud.
Float On...
Floating shelves can be a home-decor dream come true. They save space and look beautiful. Without the awkward bulk of traditional bracketed shelves or cabinets, floating shelves offer a clean and streamlined look that’s sure to open up your living space in a big way.
While the aesthetic appearance of your home is important, you'll also want to make sure that it remains in good working order. Being prepared with a home repair plan from HomeServe is a way to be ready for home maintenance costs and fixes. Once you have a plan in place and a covered issue arises, you can simply call the 24/7 repair hotline. A local, licensed and highly trained contractor will be sent out to you to get the job done to your satisfaction.


