How to Make and Mount a Custom Facemask Rack

HomeServe photo by Matt Schmitz
It's time to get the kids to school in the morning, and you're already running late. You need everyone to grab their masks and head out the door ASAP — but a fight breaks out over who the black mask belongs to.
This May Also Interest You: Does My HVAC Filter Protect Against COVID-19?
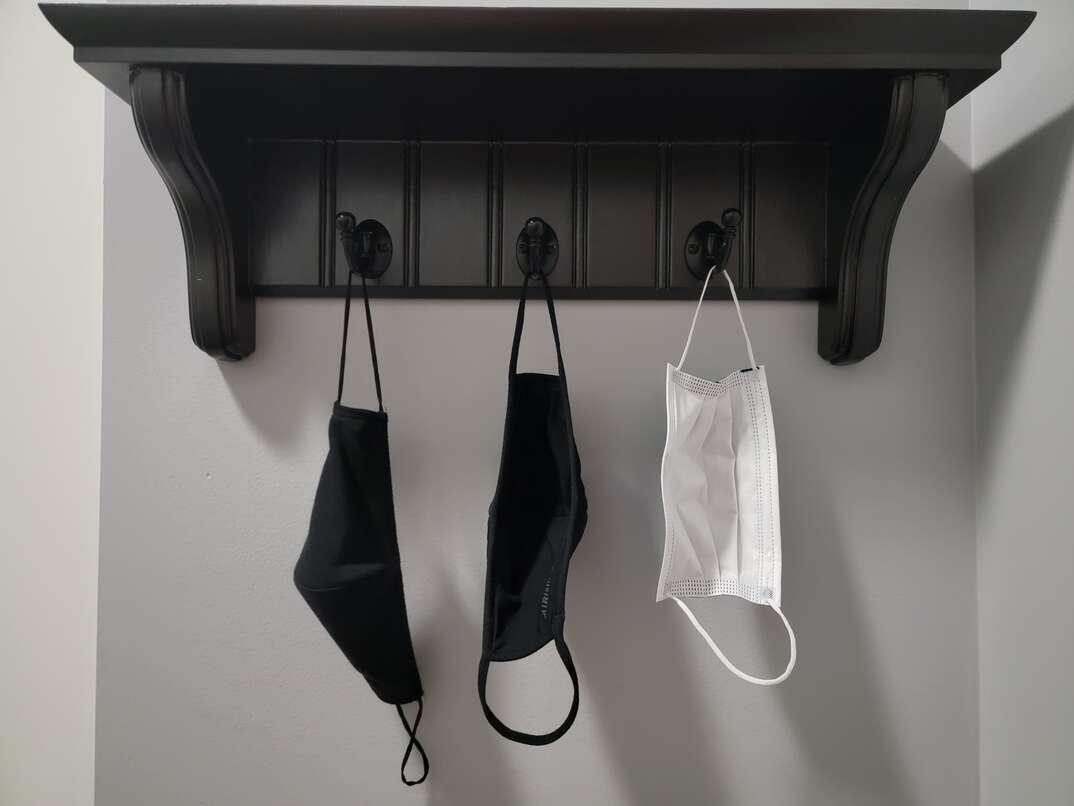
If you need a solution to keep everyone's masks separated for easy identification, a face mask storage rack can help. Making a face mask storage rack is easier than you may think, and it keeps your space neat and organized.
Why Should You Make a Storage Rack for Your Face Masks?
A storage rack allows everyone in your home to know which masks are clean and available for use, and it lets you organize them by person (with each family member getting a hook), so there's no figuring out who left their mask on the floor. It also saves you the time needed to search for your mask when you’re in a hurry.
How to Make a Face Mask Storage Rack
To make your own facemask storage rack, you’ll need the following materials:
- Custom vinyl design or vinyl sheet with removable backing
- Transfer tape
- Screwdriver
- Screws
- As many hooks as you prefer
- Precut wood or blank sign
- Cricut Maker or utility knife
- Squeegee or credit card
- Wall mounting materials of choice
Begin by creating whatever design you want to place on the rack in a photo editing program and print it onto the vinyl sheet. If you’d like, you can purchase a design that arrives already prepared to transfer onto the surface of your rack. Make sure that the dimensions of the design fit the size of the wood or blank sign you’ve selected.
If you’re using wood, you can paint it whatever color you’d like before applying the vinyl to it. If you’re creating your own design, you need to cut the letters using the Cricut Maker or utility knife to make a stencil out of the letters and ornamental objects in the design. You’re now ready to transfer it to the board.
Transferring the Vinyl
The easiest way to transfer a vinyl design onto a wall or sign is by using transfer tape. This keeps everything in place when you peel the back of the vinyl so that the spacing remains the same and you don’t accidentally damage any of the letters. Follow these steps:
- Remove the vinyl that isn’t part of the design if you’ve printed your own decal.
- Apply the transfer tape to the top of the decal.
- Use the squeegee or credit card to flatten the tape and push all the air bubbles out.
- Remove the backing from the vinyl and center the design.
- Press down and remove the air bubbles as you did before.
- Pull the transfer tape off carefully.
Take your time removing the transfer tape just to be sure that the vinyl is sticking properly. If you need, you can press the transfer tape back down and use the squeegee to keep it in place as you peel the tape.
Attaching the Hooks
Purchase the hooks you’d like from any hardware store. They’ll come with their own screws. To ensure proper spacing, use a ruler or tape measure and mark the locations you’re going to screw the hooks into ahead of time. Make sure to provide enough space between the hooks to allow the masks to hang freely so they don’t get tangled. After you’ve screwed all the hooks into place, you’re ready to mount the rack to your wall.
More Related Articles:
- Leaving Home to Go to Work for the First Time Since 2020? Here’s How to Prepare to Not Be There
- Post-Lockdown Parties: Outfit Outdoor Space for All-Weather Entertainment
- How to Use 3M Claw and Similar Drywall Mounts
- Anchors, a Way: How to Properly Use Drywall Anchors
- How to Fix Drywall Cracks on the Wall or Ceiling
How Do You Mount It to the Wall?
How you mount the rack to the wall depends on whether it’s going to be there permanently or if it’s a temporary solution you want to keep up only until the pandemic has abated. If you choose a more permanent mounting solution, keep in mind that the rack can also be used for keys, dog leashes, coats and other items.
Here are two ways you can mount your rack to the wall:
Temporary Mounting
If you’re not sure whether you want to keep the rack mounted to the wall indefinitely, a temporary solution may be best. Purchase hook-and-loop mounting strips to adhere to the back of the rack and the surface of the wall. When you’re purchasing wall mounting strips, check the weight rating for the strips before buying them to make sure they’re able to hold the rack.
Apply the strips to the back of your rack first. Peel off the backings of the strips and use a level while pressing the rack to the wall. Apply pressure for at least 30 seconds to make sure that the strips stick. If you ever need to move the rack, you can pull it off the wall and remove the strips without damaging your paint or drywall.
Permanent Mounting
You can also mount the rack to the wall the same way you’d mount just about anything else. The first step is to locate the studs in the wall. It's a good idea to mount light things directly to studs just as you would a heavier object. You’ll need to create notches in the back of your rack that fit the brackets you purchase using a router with the appropriate bit.
It’s important to read the packaging to get the exact dimensions for the notches. If you’re planning on mounting your rack to the wall, creating the notches before you paint or apply the vinyl is easier. Test the brackets before attaching them to the wall to see if they slide properly into the notches you’ve made.
Drill pilot holes into the wall studs and then screw the brackets into place. Slide the notches into the bracket, and you’re done.


