How to Fix Your Toilet Handle in 6 Simple Steps

Replacing an old toilet handle is an easy way to update the appearance of your toilet — not to mention get rid of that irritating looseness or jiggling, making it easier to flush. Fixing a toilet handle is a simple home plumbing task. If your toilet handle flops around or doesn't spring back up after you flush, it could be that a new handle is the easy DIY fix you've been looking for.
This May Also Interest You: 6 Common Reasons Why Your Toilet Won’t Flush
Read on for our step-by-step guide on how to replace the flush handle on your toilet.
Step-by-Step Toilet Handle Replacement
Step 1: Gather Your Gear
To complete this job, you’ll need:
- A towel
- A crescent wrench
- A replacement handle
Step 2: Open the Tank
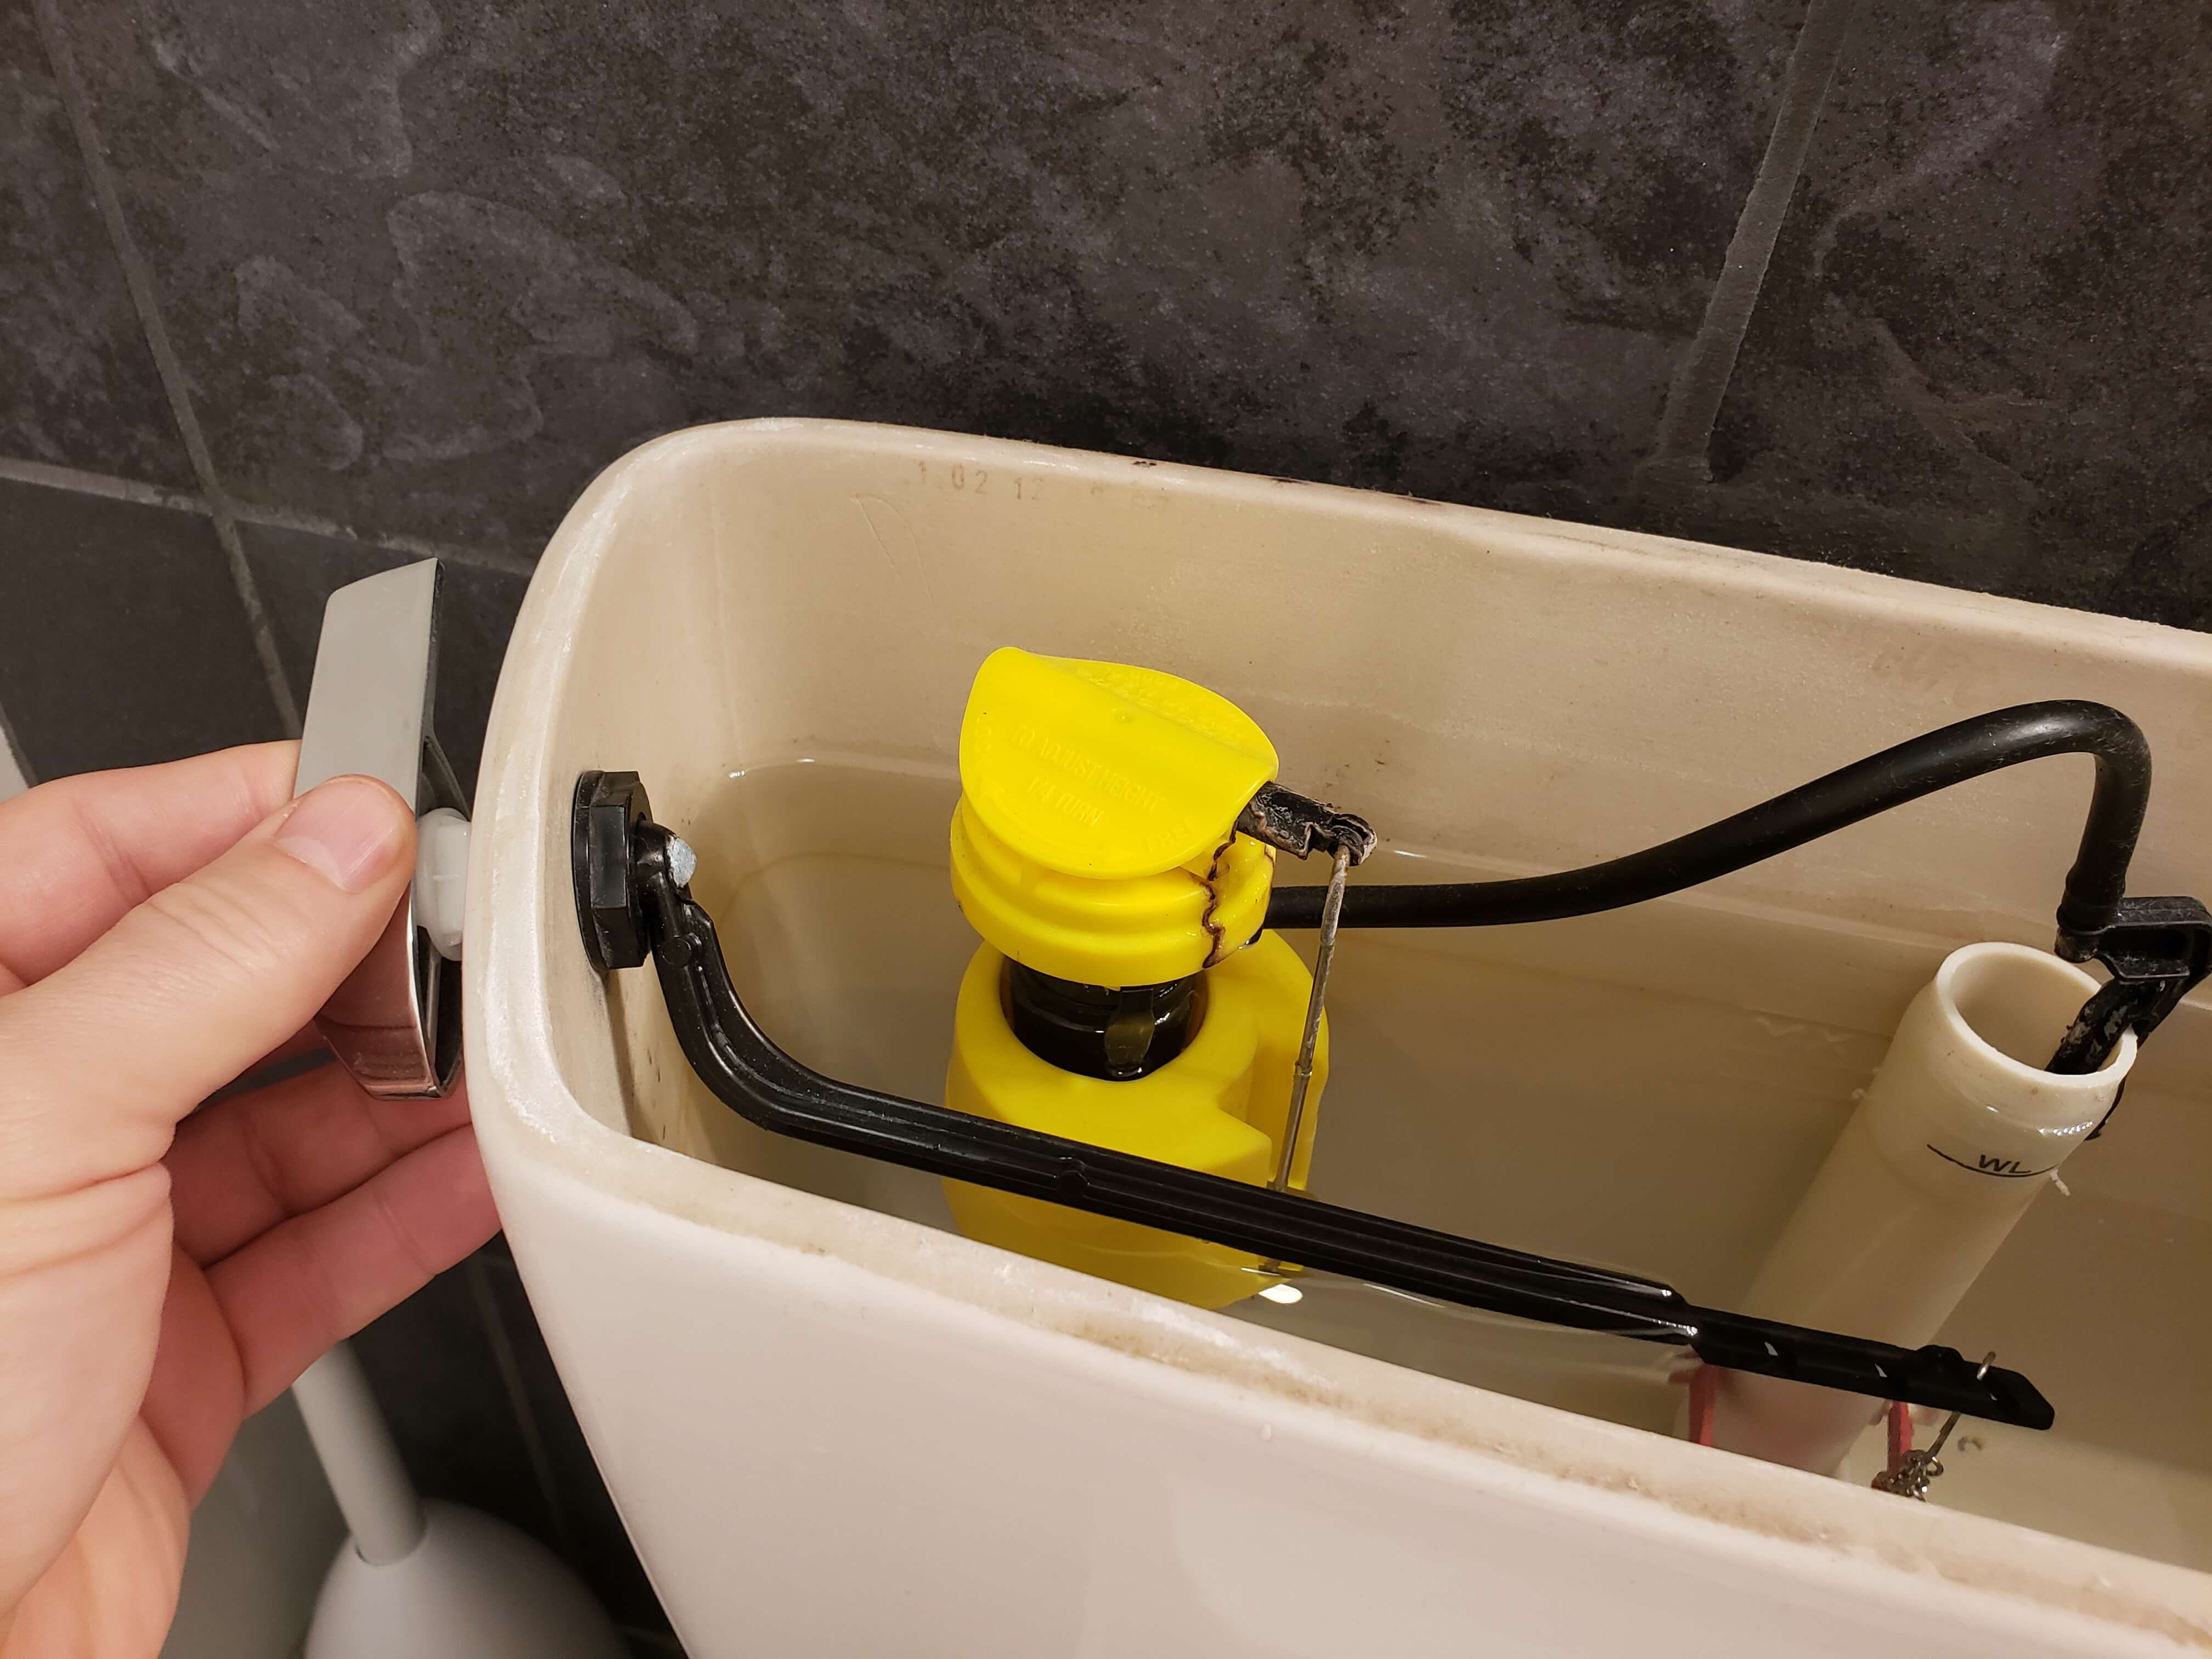
Open the tank to access the nut on the inside, which lets you remove the old handle. If you have a porcelain tank, be careful when you remove the tank lid. Some lids simply lift off; however, there may be a screw in the center of the lid to hold it in place. Porcelain is heavy, but brittle. Set the tank lid down gently on a spread-out towel so as not to damage it.
You should see a model name or number printed on a label or stamped onto the inside of the tank. Write down the name and number of the tank so you can find a compatible toilet handle.
Step 3: Remove the Lift Chain
The next step is to unhook the lift chain. You should see a long arm, or tank lever, inside the tank, and that lever is attached to a chain that lifts the flush valve when you push the handle. Before you remove this, make a note of which hole the chain is attached to so you can put it back in the same place when you replace the handle.
Step 4: Remove the Handle
Remove the toilet handle by using a crescent wrench to turn the nut that holds the handle in place. To loosen the nut, turn it clockwise. This may seem counterintuitive, but most toilets have left-handed threads, so they turn in the reverse direction versus typical nuts.
Again, be careful and work gently. If the nut has rusted shut, use WD-40 to lubricate it and work gently to remove it. If you turn the nut too forcefully, you could damage the porcelain. Once you've removed the handle, take it with you to the hardware store to purchase a replacement, and then you can find one that's compatible with your toilet.
It's particularly important to note whether you have a front-mount toilet or an angle-mount toilet, since the shape of the handle is important. If your toilet has a curved front, you need a handle that lines up with it properly. Ask for advice before buying a handle if you're unsure whether it's compatible. Taking photos of the chain may help with this.
Step 5: Install the New Handle
Once you have the new handle, you can install it. Use a scrubbing sponge to clean inside the porcelain tank near the hole. Remove the nut from the replacement handle, and slide the arm through the hole from the front side. Screw the nut back over the arm and tighten it, again bearing in mind that it's probably a left-handed thread.
Use a wrench to ensure the nut is tight, but take care not to overtighten it. A couple of turns with the wrench should be all that is required to secure the handle in place.
Step 6: Reattach the Chain
Finally, clip the chain back on to the same hole as it was on with the previous handle, and test the toilet flush mechanism a few times. If the chain is too loose, the tank can't drain fully. If the chain is too tight, the toilet trip levers may not trigger properly. Try different holes to find the correct position so that the chain is not tight.
Once you're satisfied that the chain is in the correct position, you can replace the lid, taking care not to damage the porcelain as you do. The lid should simply slip back into place and any screw should go in without difficulty.
Replacing a toilet handle is a simple do-it-yourself job and is also one of the least expensive ways to improve the look of your bathroom. However, there are many other bathroom jobs that are best left to the professionals. An interior plumbing plan from HomeServe helps you keep your bathroom and kitchen functioning properly, giving you access to local expert technicians 24 hours a day for emergencies. Call us today to learn more about plans from HomeServe and get the peace of mind you’re looking for.


