Catch a Bad Break? Fix Chips in Your Granite Countertops in 6 Simple Steps

Granite Countertop Repair at a Glance
- Tools and materials: Ammonia-based cleaner, masking tape, thick superglue or clear epoxy, a razor, sandpaper or steel wool, granite polish or sealant
- Step 1: Clear out and clean area around chip
- Step 2: Tape off area around chip
- Step 3: Fill in chipped area with superglue or epoxy
- Step 4: Wait at least 24 hours
- Step 5: Scrape off excess filler with razor
- Step 6: Buff, polish, seal
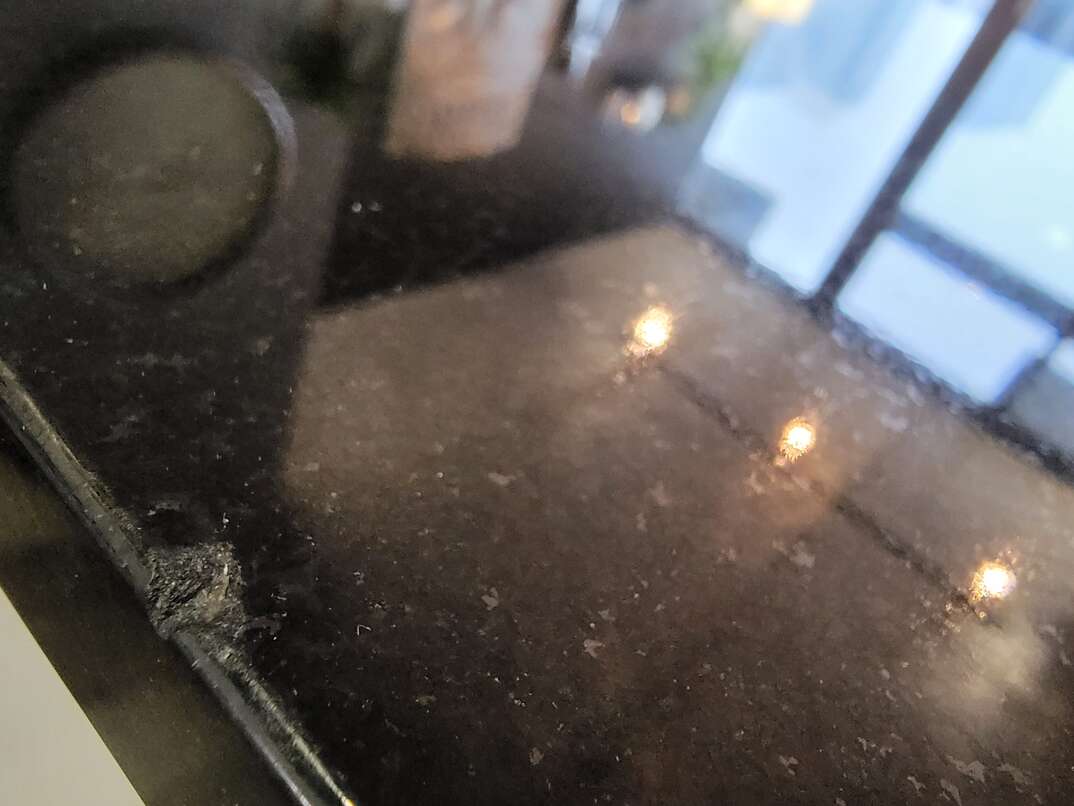
Your granite countertop may be the pride of your kitchen or bathroom. You most likely spent a lot of time and money carefully choosing the perfect shade and design. But one unfortunate slip causes you to drop something heavy and, just like that, a small chip somehow ruins the entirety of your beautiful, expensive, meticulously selected countertop. But there’s no need to have a breakdown over a chip. Even if you typically prefer to call in home repair professionals to handle the finer details, if your chip is small, you can take on this project yourself.
This May Also Interest You: How Much Does It Cost to Repair, Resurface or Refinish Countertops?
Read on to learn what you need to know to fix a chip in your granite countertops.
What You'll Need
The plan is to fill the chip with a glue or epoxy mixture. After allowing it ample time to dry, you’ll scrape off any excess mixture so that you once again have a smooth surface that blends flawlessly with the rest of your granite countertop. The supplies you’ll need for this are surprisingly easy to find, and you might just have most — if not all — of them at home already. All that’s required is an ammonia-based cleaner, masking tape, thick superglue or clear epoxy, a razor, sandpaper or steel wool, and granite polish or sealant.
Granite Countertop Repair: Step-by-Step Guide
Now that you have the proper implements on hand, follow these steps to fix that chip in your granite countertop:
1. Clean and Clear
Clean the area around the chip with the cleaner and allow it to thoroughly dry. This is very important, as you don’t want to accidentally get any dirt or dust in your repair. It’s best to clean the entire counter and completely clear it of any dishes, small appliances and other obstructions.
2. Mark Your Territory
Use the masking tape to mark off the area just around the chip. This’ll help you create a more level finish and prevent glue from getting on the non-chipped area.
3 Fill ’Er Up (Carefully)
Carefully fill the chipped area with superglue until the liquid is level with the surface. It’s important to go slow with this, as you don’t want to overfill the chip.
4. Hurry Up and Wait
Now, be patient. You must allow the glue to thoroughly dry for at least 24 hours. This is crucial, as the glue’s surface may be damaged if you touch it before it’s dry; also, glue could spread outside the chipped area. Once the glue is dry, you can remove the masking tape. (You may choose to use a hardener spray designed specifically for granite countertops that can help set the glue and strengthen the area around the chip repair, but be sure to follow manufacturer’s instructions.)
5. Scrape Off the Excess
Now it’s time to clean up the surface in order to make the repair even with the rest of the countertop. Take the razor blade and hold it at a slight angle to the countertop. Use the counter’s surface to guide you. Gently and carefully scrape away any excess glue from the area. If you can, and if needed, delicately scrape away any glue above the chip.
6. Buff, Polish and Seal
Now, you want to make sure the area around the repaired chip has the same lovely gloss as the rest of your granite countertop. You can buff the area with sandpaper or steel wool. If you need a bit more shine, try finishing sandpaper. As the finishing touch, use a granite polisher or sealer to add a gleam to the area and to help prevent future chipping.
Should You Use Colored Fillers, Instead?
Most countertops can be repaired quite well using a clear epoxy or superglue. The natural color and texture of the granite shows through the clear material. Colored epoxies are available — however in most cases they aren’t necessary. If you can’t find an exact shade, you can purchase different shades and mix them yourself. Use caution, though: When the filling material is tinted, if the coloring isn’t a perfect match, the repair could be more noticeable.
More Related Articles:
- How Much Are Granite Countertops?
- Countertop Costs Depend on the Grade of Granite You Choose
- Kitchen Cabinet Refacing: Pros and Cons
- How to Install Kitchen Backsplash in 7 Simple Steps
- How to Clean an Oven: Wipe Away Your Kitchen’s Dirty Secret in 8 Steps
Repair Kits
You can also buy chip repair kits online or in a home improvement store. The kits usually include a clear epoxy, sometimes in an applicator, and the tools needed to fill in the boo-boo. There might also be some colored epoxies you can use to match your countertop. If you go this route, closely follow the instructions that come with the kit. As mentioned, be sure to wait until the epoxy is fully dry before you touch it. If it’s even slightly sticky, your countertop might not come out smooth and the repair will be noticeable. It might be practical to have one of these kits on hand for the next time a chip occurs.
When to Call in a Pro
If you have a very large chip or crack, it might be better to consult with a granite marble repair expert. Professional assistance might also be a good idea if your granite is an unusual color or has a speckled design. Pros have access to a wider range of colors and shades of epoxy, and they’re experts at mixing and properly filling in a larger chip. It’ll be worth it to have your gorgeous granite countertop returned to its dazzling glory.
Your home is your castle, and for the most part small repair jobs and home improvement projects can be enjoyable. Some, though, are just too big to tackle on your own. When it comes to things like plumbing and electricity, a licensed and highly trained professional is what you want. To cover a range of worry-free home maintenance repairs, you might consider getting a plan from HomeServe. When a covered issue arrives, you simply call the 24/7 repair hotline and let the professionals take it from there.


