How to Install an Over-the-Range Microwave

Embarking on an over-the-range microwave installation is a simple way to free up valuable counter space. Performing an over-the-range microwave installation, on the other hand, can seem complicated if you've never done it before.
This May Also Interest You: 4 Surefire Methods for Cleaning the Crud Out of Your Microwave
Read on to learn the simple do-it-yourself steps for installing an over-the-range microwave — without frying your brain.
Cost of Over-The-Range Microwaves
Before you begin learning how to install or replace over-the-range microwaves, you’ll first want to consider the price. The cost of the microwave itself can range anywhere from $200 to more than $800, depending on which brand, color and features you select. Frigidaire and Cafe are among some of the higher-end brands, while an LG microwave is generally priced around $400. While stainless-steel models tend to be more expensive because they're trendy at the moment, you can find white microwaves for less than $100.
Many companies that sell microwaves also offer to install the microwave over the stove for an additional fee. This service varies by company, and you'll often have to request a quote from the website for installations from, for example, Lowe's, Home Depot or other big-box retailers. But if you're confident in your DIY abilities and are prepared to learn how to install the microwave above the stove yourself, then you can spare yourself those additional costs.
Over-The-Range Microwave Installation
If you have an appropriate-sized space to install a microwave above the stove, and you have cabinets that adjoin the space, this task generally takes only a couple of hours. If you're going to replace an existing over-the-range microwave, then your project may require some basic tools and an extra set of hands.
- Mounting brackets
- Instructions
- Templates
- A list of parts
Have the following tools on hand:
- A level
- A stud finder
- A drill with multiple drill bits
- A screwdriver or wrench
Getting Started
Confirm that the list of parts included with the microwave matches up with the parts you have. If you have all the required parts, you can begin the installation process.
The first thing you'll need to do is locate the circuit breaker for the range hood and flip it to the “off” position. Turning this power off guards against electrical dangers while you're installing the microwave.
Replacing an Over-The-Range Microwave
If you're removing an existing over-the-range microwave before installing the new one, you'll need to ask someone for help. To remove the old appliance:
- Unplug the microwave
- Remove the support screws
- Carefully pull out the old microwave
- Remove the existing mounting bracket
If you want to clean your old microwave before donating or selling it, the simplest solution is — before unplugging it and removing it — to microwave a water and vinegar solution, then wipe down the inside using a damp cloth.
Preparing for an Over-The-Range Microwave Installation
- Locate the power outlet that you'll be plugging your microwave into, likely located inside a cabinet or behind the existing range hood. You may need to drill a hole in the bottom of the cabinet to feed the cord to the outlet.
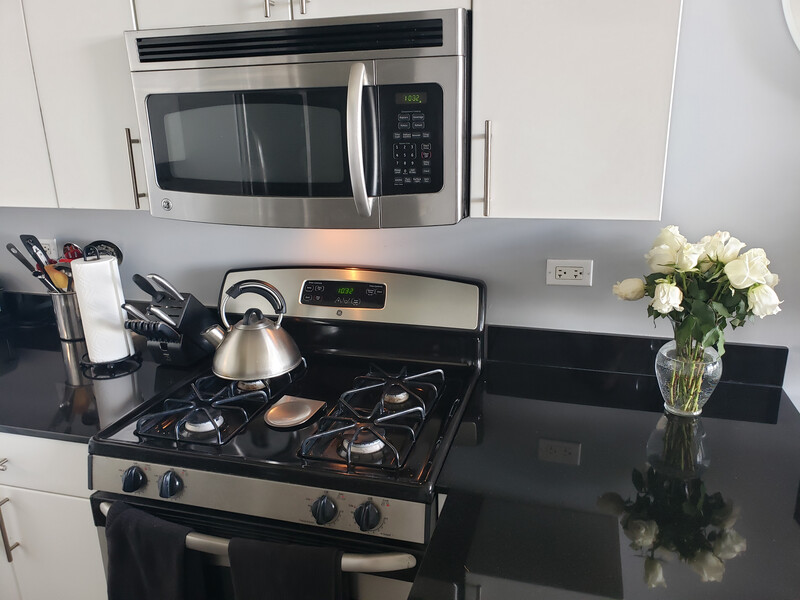
- Once you've confirmed you have access to a suitable outlet, you'll want to measure to ensure the microwave will be positioned at the correct height. The bottom of the microwave should be a maximum of 54 inches from the ground, and there should be 20-24 inches of space between the microwave and the range so that both can operate safely.
- Mark your measurements with a pencil on the wall or cabinets so you can install the microwave at the desired height.
- If you have an existing ventilation system, refer to the installation instructions of your microwave model for whether the appliance is intended to ventilate vertically or horizontally. If you do not have existing ventilation from a previous range hood or over-the-range microwave, you'll need to have a professional install one before proceeding.
Refer to Your Template
Your microwave should come with a framing template that provides guidelines for appropriate support. If you have sturdy kitchen cabinetry, it may be enough, but depending on how heavy the microwave is, you may need to add two-by-four wood sections for additional support.
If the latter, use the template provided with the kit to find out where to cut into the drywall and be sure to use your stud finder before making any cuts in the drywall. The two-by-four sections are then placed as bracing between studs to reinforce its strength and ability to support the over-the-range microwave. You may want to get the help of a professional for this step if you're not confident in your ability to add bracing. If not, follow these steps:
- Pre-drill holes according to your template to make the installation of the toggle bolts easier.
- Use tools recommended by the instructions, and if you have a wall plate, install it at this point using the provided mounting hardware.
- Following the top template, drill pilot holes in the top cabinet and then, using the pilot holes, drill down inside the cabinet.
- Then, install the mounting bracket.
Installing a Microwave Above the Stove
- Lift the microwave into place, and make sure it's aligned with the bottom of your kitchen cabinets. Have someone on hand to help you out for this step so they can hold the microwave level.
- Feed the power cord through the cabinet as necessary and plug it in — but do not turn the power back on yet.
- At this point, you'll need a screwdriver to feed the bolts or screws into the holes you pre-drilled and secure the microwave in place.
- If you have space between the bottom cabinet and the top of your microwave, some manufacturers recommend cutting wood blocks to fill in the recessed space; this helps prevent any damage to the cabinet when you tighten the mounting screws.
- An essential piece of your kit should include an exhaust fan you received with the microwave. Align the fan with the exhaust duct. To do this, you may need to remove screws from the plate and rotate the fan before replacing the plate. Always follow the manufacturer's directions about sealant for securing the exhaust fan. Because over-the-range microwaves recirculate air, you may require a charcoal filter that should be replaced every six months to a year. Refer to your manufacturer's instructions for more information.
- Once you secure the microwave on the mounting bracket, turn the power back on and test out your microwave to be sure it works.
A home repair plan from HomeServe is an easy and affordable way to have an expert at your home quickly when you need it. The HomeServe hotline is open 24/7 for repair calls, and if you're unsure how to proceed with an installation or perform a repair, it's always best to let a professional handle it safely. Give yourself peace of mind by contacting HomeServe today to find out about our home repair plans.


