How to Knock Down a Wall: A Step-by-Step Guide

Knocking Down an Interior Wall at a Glance
- Tools: Reciprocating saw, sledgehammer, pry bar, drill, utility knife
- Step 1: Check for pipes and wiring
- Step 2: Prep area
- Step 3: Remove drywall
- Step 4: Remove studs and plates
- Step 5: Patch floor and ceiling
There are many reasons why you might want to knock down an interior wall. Whether you want an open floor plan, better views of certain areas or just to get around the house easier, knocking down a wall is a great way to meet those goals.
This May Also Interest You: Tear the House Down: A Guide to House Demolition
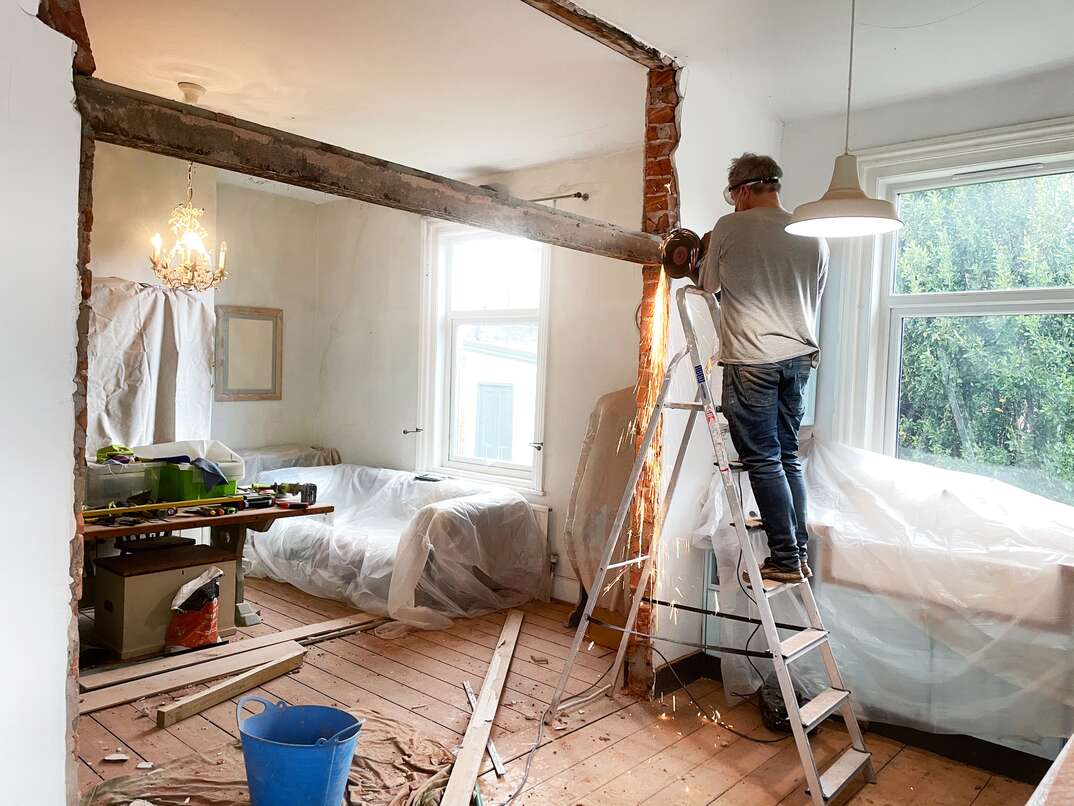
Now, ripping out a wall is certainly not the easiest home project to accomplish, and depending on your circumstances, you might be better off hiring an experienced contractor to do it. Regardless, here is a step-by-step guide on how to knock down a wall — plus the essential things you need to know to avoid damaging your house.
How Do You Know If a Wall Is Load-Bearing?
To figure out whether a wall is load-bearing, check if it’s parallel or perpendicular with the joists above it. If it runs parallel, it’s almost certainly not load-bearing says Jason Larson, owner of Lars Room Additions. If it’s perpendicular, there is a high degree of probability that it’s load-bearing.
Walls with structural support, external walls and those that continue up to the next floor are almost always load-bearing. The main difference between non-load-bearing and load-bearing walls is that you can safely remove a non-load-bearing wall. A load-bearing wall must be replaced with adequate beams, columns or other structural supports that can withstand the same weight and pressure as the wall itself.
How Much Does It Cost to Tear Down a Wall?
Non-load-bearing walls are cheaper to remove than load-bearing walls, costing between $300 to $1,000, according to Larson. Non-load-bearing walls are sometimes hollow, so removing them is much cheaper.
Removing a load-bearing wall can be pretty expensive, ranging from as low as $1,500 to as high as $10,000. This is because load-bearing walls support the house's roofing and framework. The removal process is much more complicated as additional support must be built. Exterior walls are almost always load-bearing since the house's framework rests on its structural walls. The price for external wall removals in multi-story houses is usually double what you would have to pay for wall removal in a single-story home. The wall's material seriously affects the price of knocking it down.
If you want to save on labor costs, you can remove a non-load-bearing wall yourself. However, if the wall is load-bearing, this is not something you can do on your own. If you’re not confident in your carpentry skills, it might be a better idea to hire a professional to knock down a wall for you, whether it’s load-bearing or not.
Another thing to keep in mind is that, if a wall is load-bearing, you might need to get a permit from the government before you knock it down. You will also need to hire a structural engineer since local governments will sometimes require beam calculations before approving the permit, which an engineer can help you figure out. If you hire a company or contractor, they will often help you with this process.
How to Knock Down a Wall
Tools You’ll Need
Knocking down a wall isn’t the simplest DIY project, so there are plenty of tools you’ll need to get it done. You will need a reciprocating saw, sledgehammer, pry bar, drill and a utility knife. You will also need a protective face mask, safety glasses, heavy-duty gloves and ear protection.
Step 1: Figure Out What’s Inside the Wall
Larson suggests checking that there are no water or gas pipes in the wall. Make sure you know where the electric wiring is located. If you do find any, it’s best to consult with a professional so they can determine how to remove or move any of these fixtures. After making that determination, you should turn off the power and water. You can turn off the breakers for that specific area using your breaker box. You will have to turn off the water if there are any water pipes in the wall.
Step 2: Prepare the Area
You can then proceed with the preparation of the area. You don't want to damage the floor when knocking down a wall, so use a tarp covering or a sheet for protection. Move any furniture out of the area or cover it if you can’t move it out of harm's way.
You should also clear the room on both sides of the wall. Cover the floors and entryways with enough plastic sheets or tarp. Seal the edges of the sheets with masking tape. Be aware that tearing down a wall can release a lot of dust and dirt, so try to keep the room sealed off as tightly as possible. Make sure you wear safety equipment.
Step 3: Remove the Drywall
Start by cutting a line where the wall meets the ceiling using a utility knife. This way, you'll prevent the ceiling from being damaged or pulled down with the wall.
Next, find a hollow area of the wall where there aren’t any studs. You can usually tell by knocking against the wall. Once you find one, take a sledgehammer and start bashing to create holes in the wall. Go with smaller holes in order to check the wiring and potential pipes in the wall.
Then starting at the hole, use a reciprocating saw to cut out sections of the drywall. You can cut out entire sections going from stud to stud. Once you have finished one side of the drywall, repeat the process on the other. If the wall is made of brick, use a similar technique and remove smaller parts until the whole wall is torn down.
More Related Articles:
- Trash Cash: Here’s How Much It Costs to Rent a Renovation Dumpster
- What Is a Home Improvement Loan and How Do You Get One?
- How Much Does a Basement Remodel or Renovation Cost?
- 5 Finished Basement Ideas For Your Home
- How Much Does a Kitchen Remodel Cost?
Step 4: Remove Studs and Plates
After the drywall has been removed, the studs will now be visible. Use a reciprocating saw to cut the studs in the middle. You should have a firm grip on the saw for safety purposes. Once a stud has been cut through the middle, removing it from the top and bottom is quite straightforward. Just pry it to the side, and it should come off with ease. Pull off any nails it’s still attached to.
When you remove plates and studs, be careful with any nails that point upwards. Hit them with a hammer, so the nails are pointed sideways instead of upwards. After removing the studs, remove the ceiling and floor plates. Use a pry bar and hammer to remove any plates that are attached to the floor. For the ceiling plates, use the reciprocating saw to cut any long plates or those stacked in two. Then, use a pry bar and hammer to remove any of the boards still left.
Step 5: Patch the Ceiling and Floor
With the studs and plates removed, you will have holes left in the ceiling and exposed subflooring. To cover up the holes in the ceiling, you can use wood board strips and drywall compound. Use a drill to attach the strip to the ceiling. Then, cover it with a drywall compound.
With regards to the floor, you can use any type of flooring material to cover the area. The easiest thing to cover it with is carpet if you already have carpet or linoleum. Otherwise, if you want to install hardwood, you should hire a flooring contractor; making this new patch match your existing floor is much more complex.


