How to Relight Your Water Heater's Pilot Light

If there isn’t any hot water coming out of your faucets or showers, the first place to look is your water heater. There are a number of reasons that your gas water heater may have stopped working, but one of the most common — and one of the easiest to fix — is an extinguished pilot light.
This May Also Interest You: The 5 Types of Water Heaters?
Relighting the pilot light can be done in a matter of minutes, regardless of whether your water heater uses an electronic ignition or needs to be manually lit. Read on to learn how it’s done.
Can I Relight the Pilot Light Myself?
In most cases, you should be able to light the pilot light yourself without any issues. However, you shouldn’t attempt to light it if you suspect a gas leak in your home, since propane and natural gas are highly combustible and can start a fire — or even cause an explosion — when exposed to an open flame or electric spark. If you smell gas (usually a sulfurous odor like rotten eggs) or hear a hissing noise coming from a gas line, leave your home immediately. Call your local fire department or gas company for guidance and assistance.
Also, don’t hesitate to call a professional to light the pilot for you if you have any safety concerns or you’re having a difficult time lighting it yourself.
How to Relight the Pilot Light: Step-by-Step
Things You’ll Need
- Flashlight
- Long barbecue lighter
- Screwdriver
Step 1: Turn Off the Gas
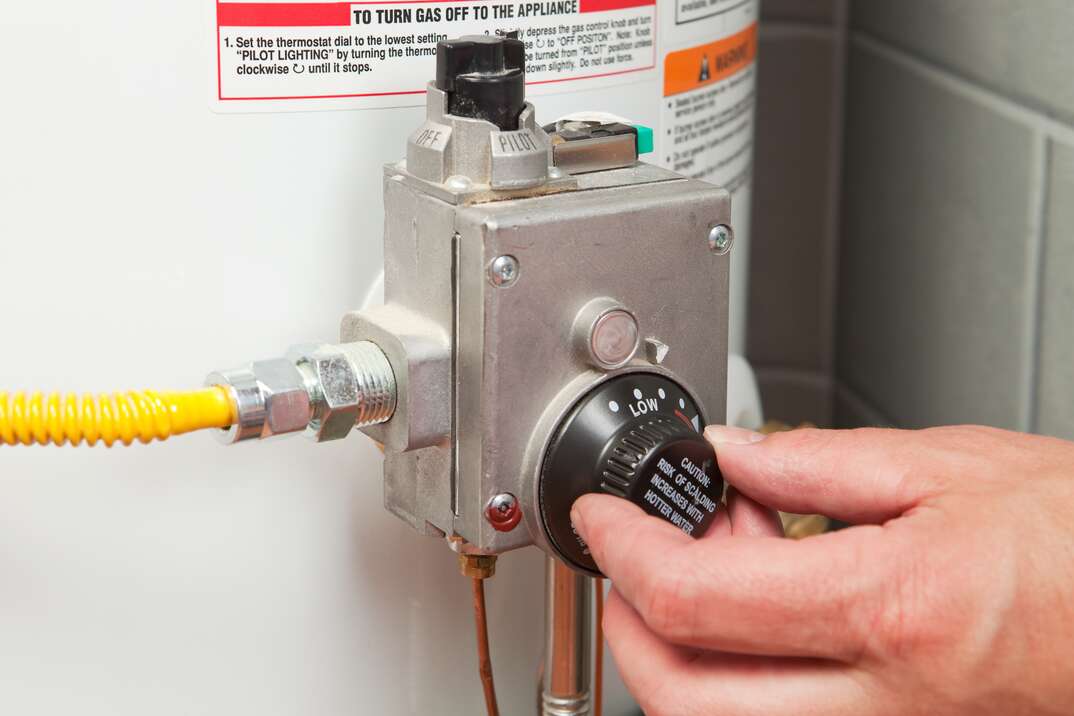
Locate the gas regulator knob with the markings ‘On,’ ‘Pilot’ and ‘Off’ around its base. The knob will usually be on top of the gas control valve, which is a square or rectangular box on the front of the water heater with gas and electrical lines connected to it. Turn the knob’s indicator dial to ‘Off’ and wait 10 minutes for any residual gas to dissipate.
Step 2: Access the Pilot
The pilot is usually found at the base of the water heater, below the gas control valve, and behind a rectangular access panel. Remove the panel by lifting it up and off of its mounting tabs, or by removing any screws holding it in place. Once removed, shine a flashlight into the exposed cavity to find the pilot. It will have two small gas lines connected to it.
More Related Articles:
- Why Is My Tankless Water Heater Banging?
- How to Flush Your Tankless Water Heater: A 7-Step Guide
- A Tankless Job? Decide Whether a Tankless Water Heater Works for Your Home
- How to Install a Tankless Electric Water Heater: A 10-Step Guide
- How Much Does It Cost For a Tankless Water Heater?
Step 3: Turn Regulator Knob to ‘Pilot’
Turn the regulator knob so that the indicator dial is set to ‘Pilot.’ Press down on the knob to send gas to the pilot in preparation for being lit.
Step 4: Light the Pilot
The method you use to light the pilot will largely depend on the age of your water heater. Pilot lights on older water heaters need to be manually lit with a flame. Newer water heaters use electronic ignition that lights the pilot with the press of a button. You can tell whether your water heater uses electronic ignition by the presence of a square-shaped black or red igniter button and indicator light on the control valve.
Manual Lighting
If your water heater needs to be manually lit, hold the lit tip of a long barbeque lighter up to the pilot while continuing to hold down on the regulator knob. Hold the lighter up to the pilot until it ignites, then remove the lighter.
Electronic Lighting
For electronic ignition, press down on the regulator knob while repeatedly pressing the igniter button. Continue pressing the igniter button until the indicator light turns on, notifying you that the pilot is lit.
Step 5: Test
Once the pilot is lit, continue holding down the regulator knob for 90 seconds to clear the air out of the gas line and warm up the heat sensor. Slowly release the regulator knob while monitoring the pilot light to ensure that it doesn’t go out.
If the pilot goes out, wait about 10 minutes, and try again. If it won’t stay lit, or if it continues to go out after repeated attempts to relight it, your water heater may need to be professionally inspected and repaired to address the underlying cause.


