How to Remove a Toilet Seat

Removing a Toilet Seat at a Glance
- Tools & Materials: Flathead or Phillips screwdriver, socket wrench, pliers, gloves, duct tape, penetrating oil
- Step 1: Tape seat and cover together
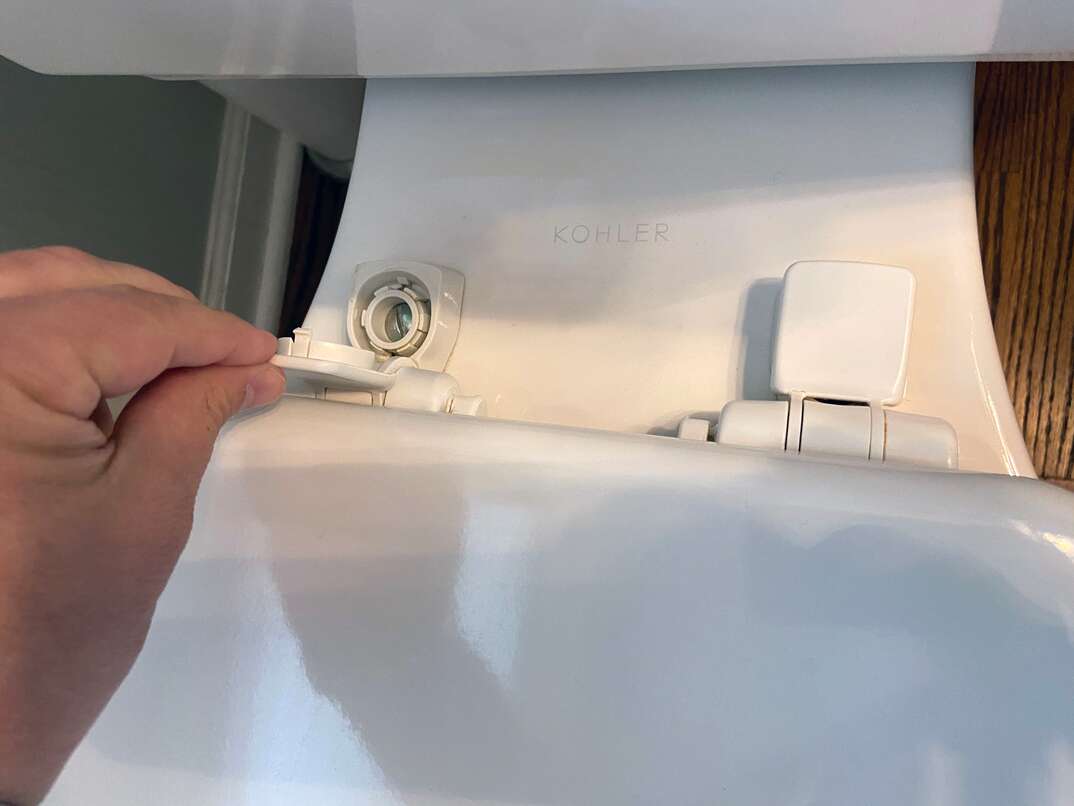
- Step 2: Pop off protective caps
- Step 3: Loosen nuts and bolts
- Step 4: Clean toilet seat
- If your toilet has hidden fixings: Remove caps and slide seat off hinges
- If your toilet has a quick-release: Press button and pull seat away
If your current toilet seat is wobbly, chipped or just plain dingy, it's likely time to replace it. Doing so is a simple job that can have a big impact on the look and feel of your commode. The entire process shouldn't take longer than 30 minutes and can be accomplished with tools you probably already have on hand.
This May Also Interest You: Taking Out a Toilet? Be Sure to Drain It First
There are several different types of toilets and seats. The type you have will determine how you’ll go about removing your toilet seat. Let’s get to work.
Prep Work
If you’re replacing your old toilet seat, be sure to measure your toilet bowl so you purchase the correct fitting seat. Most toilet seats and bowls fall into three categories: round, elongated or D-shaped.
Toilet seats and covers may also be attached to the bowl in different ways. No matter which type of toilet bowl you have, in general, you’ll need a flathead and a Phillips screwdriver plus a socket wrench or a pair of pliers to remove the toilet seat. You may also want to have protective gloves and duct tape. If you see rust on metal parts, get some penetrating oil, too. Be careful when using the screwdriver and other tools around your toilet as you don’t want to chip the porcelain.
You most likely have either a bottom-fixing toilet or a top-fixing toilet. This refers to where on the toilet your screws for the toilet seat are located. If it’s a bottom-fixing unit, you’ll see the hinges at the back of the toilet seat. To remove a top-fixing toilet seat, raise the seat 90 degrees and lift it off. Read on for more specifics.
How to Remove a Toilet Seat with No Visible Screws
On many toilets, it’s quite obvious how the seat is attached to the bowl – with hinges or screws that are visible. For aesthetic and safety reasons, some toilets have protective coverings concealing the hinges. You’ll need to remove those plastic caps to get to the hinges. First, tape the toilet seat and cover together to ensure no smashed fingers while you are working. Examine the caps to see how to open them. Some may only require a pop with a flathead screwdriver to remove. More complicated ones may require the socket wrench to loosen nuts and bolts. Be careful not to damage the hinge cover when removing it.
Once the cover is removed, you should see how the toilet seat is attached to the bowl. Typically this will be with a bolt and nut. Go ahead and loosen these to remove your old toilet seat. If you’ve discovered that you have a bottom-fixing toilet, the nuts will be under the toilet tank. Take care when loosening the screws that you don’t lose anything. Clamp the screws firmly with your pliers in one hand to hold the nuts in place. Using your other hand, unscrew the bolts with a screwdriver.
The shape of the screw will determine if you need a flathead, Phillips or star screwdriver. If your seat is old and attached using metal screws, you may need to use penetrating oil on the bolts to loosen them. Let the oil sit for about 10 minutes before attempting to unscrew the bolts again. If the screws are really tight, try using a pair of pliers to loosen them. Be careful doing this; you don’t want to damage the toilet. If a lot of force is required in getting the screws off, you should use new screws when reattaching the toilet seat. Reusing old or loose screws means your seat won’t fit properly and will likely slip around.
More Related Articles:
- Condensation on Your Toilet? Don’t Sweat It
- How to Properly Clean Your Toilet in 4 Steps ... and Don’t Forget No. 2!
- What’ll a New Toilet Do to Your Bottom Line? Here’s What It Costs
- How to Fix Your Toilet Handle in 6 Simple Steps
- How to Use a Drain Snake and Unclog Your Toilet
How to Remove a Toilet Seat with Hidden Fixings
Some toilets have hidden fixings, which means you won’t see the screws, nor how the seat is connected to the toilet bowl. A toilet seat attached this way will be easier to remove. Typically, once you’ve popped the protective cap, the seat will slide right off the hinges.
If none of these descriptions fit your toilet, you may have a newer version featuring a quick-release design. Look for a button on the underside of the toilet seat. Press it, then pull the seat away from the toilet tank. Your seat may slide out without any unscrewing or other work on your part.
Clean Your Toilet Seat
Cleaning may have been your primary purpose for removing your toilet seat. If not, you should still give the area a nice scrub before putting on a new seat. Keeping your toilet generally clean with an all-purpose cleaner will help keep the screws and other parts from rusting or degrading. If the metal parts on your toilet get rusty, your seat won’t be as stable. Also, be sure your cleaning product is non-abrasive so it doesn’t scratch the porcelain of the seat or bowl.
Once your seat is off and everything is cleaned up, simply follow the manufacturer’s instructions included with your new seat to get it firmly attached and ready for business.


