How to Replace a Fridge Door Seal

All refrigerators have gaskets that line the perimeter of the door, creating a tight seal when the door is closed. By preventing the cool air inside your fridge from escaping, a good fridge gasket will help keep your unit running smoothly.
This May Also Interest You: Here’s Why Your Fridge Is Warm — and How to Fix It
It’s unsurprising, then, that a leaky refrigerator gasket will overwork your fridge and quickly lead to other problems down the line, including expensive repairs or replacements. Furthermore, a leaky fridge door seal will also waste energy, leading to higher power bills. If you suspect you’ve got a leaky gasket, your best bet is to replace your refrigerator door seal as soon as possible.
How Do You Know It’s Time to Replace a Fridge Door Seal?
If you’re noticing condensation inside your fridge on the walls or ceiling, it’s likely that warm air is entering your unit, most likely through your faulty gasket. Similarly, if your refrigerator is having trouble maintaining a cold temperature and is constantly running, your refrigerator gasket could be to blame.
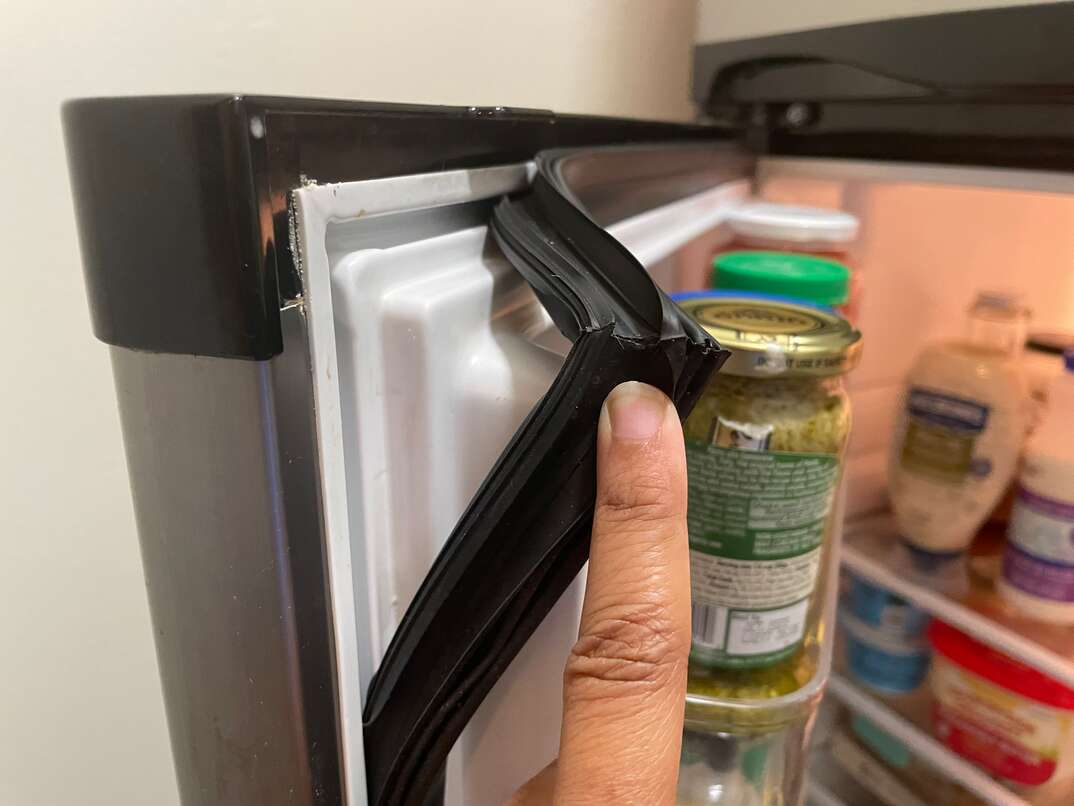
That said, if your fridge is experiencing any number of these symptoms, you’ll want to conduct a quick inspection of your refrigerator door seal to confirm that it indeed needs replacing. Start by looking for any obvious cracks or splits in the seal or any areas where the seal is coming loose and not adhering to the refrigerator door. Sometimes, dirt, crumbs and other food debris can keep your gasket from sealing properly. If you think that might be causing your fridge gasket issue, wipe the seal down with warm water and see if your problem improves before continuing.
Replacing a Fridge Door Seal: 5 Simple Steps
If you determine that the fridge seal needs replacing, you’ll want to first make sure that you purchase the correct gasket for your unit. You’ll be able to find the right gasket to buy in the owner’s manual. However, if you don’t have the manual anymore, you can probably find the correct gasket by researching the make and model number of your unit on the internet. If all else fails, head to your local hardware store. They should be able to help you locate the right-sized gasket. Refrigerator door seal replacements typically cost less than $100 (CAD 130) and should only take you about 30 minutes to install.
Next, follow this step-by-step guide to keep all that cold air inside your refrigerator once and for all:
Step 1: Soak the New Gasket in Water
Place the gasket in warm water while you remove the old one from the fridge. The hot water will make the new gasket much easier to maneuver.
Step 2: Remove the Old Gasket
While the new one is soaking, remove the old gasket from the refrigerator door. Gaskets are typically locked into a metal retainer using hex-head screws. Pull back on the old gasket to reveal the screws, then, using the correct hex-head screwdriver, loosen the retainer screws around the door. Be careful not to remove the screws; simply loosening them will allow you to pull the old gasket off. Also, try to be gentle when you’re removing the gasket. Being too forceful might damage some of the plastic lining on the refrigerator door.
More Related Articles:
- How to Clean Your Icemaker and Change the Filter
- Ever Cleaned Your Refrigerator Coils? Sure, We Believe You (But Here’s How, Just in Case)
- We Gotta Move These Refrigerators: A Step-by-Step Guide to Moving Your Fridge
- Fridge Filthy? Here’s Your 7-Step Deep-Cleaning To-Do List
- Iced Out? Why Your Fridge Is Freezing Over
Step 3: Position the New Gasket
After you’ve loosened the screws and removed your old freezer door gasket, position one of the corners of the new seal replacement on the top of the refrigerator door and work the gasket lip behind the metal retainer. Continue to push the lip of the seal behind the retainer for the entire perimeter of the door. Then, use the hex-head screwdriver to tighten the retaining screws, but be careful here not to over-tighten the screws.
Step 4: Check the Fit
Once the refrigerator door seal has been fully installed, close the door and check to see if any warping has occurred during the installation. If you need to, straighten it by pulling the top and the bottom at the same time (you'll need an extra set of hands to help with this). Repeat this as many times as you need to make sure the alignment of the gasket is correct. When the gasket is properly aligned, finish tightening the retaining screws.
Step 5: Help the Gasket Form to Your Fridge
It can take a while for your gasket to form into place and eliminate any gaps that might still be present. If your replacement gasket still appears wavy and warped, use a hair dryer to blow hot air over the gasket and speed along the process. You may also want to try applying a thin layer of petroleum jelly to the hinge side of the gasket. This will help prevent the gasket from folding in when the door closes. Sometimes, a new gasket might stick to the inside of the door after a new installation. In that event, add a small amount of baby powder to the gasket to prevent the sticking.
Seal the Deal
If your fridge isn’t keeping things as cool as it used to, or you're noticing other signs that your fridge gasket is failing, a new door gasket might be what you need to keep things running smoothly. Luckily, this is a simple, stress-free task that can typically be completed in under an hour.


