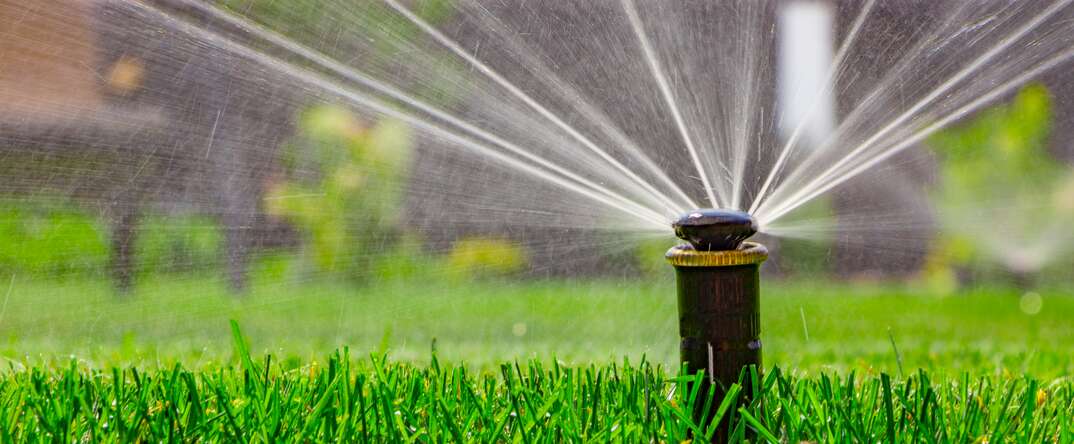
How to Replace a Sprinkler Head: A 7-Step Guide

Replacing a Sprinkler Head at a Glance
- Step 1: Buy replacement head
- Step 2: Clear area for removal
- Step 3: Remove old head
- Step 4: Check riser height
- Step 5: Install new head
- Optional: Flush sprinkler head
- Step 6: Test
- Step 7: Replace dirt or sod
There are several reasons a sprinkler head might need to be replaced. If the head doesn’t fully extend, retract or rotate — or if there’s a constantly leaking component — it may be time for a replacement. Some homeowners may feel intimidated by the prospect of replacing a sprinkler head themselves, but that fear is wholly unfounded.
This May Also Interest You: How Much Does a Sprinkler System Cost?
Sprinkler heads are one of the easiest and cheapest components to install in an irrigation system, and the replacement process is simple and straightforward. Read on to learn how it’s done.
Step 1: Get the Right Replacement Sprinkler
You don’t need to buy the exact same sprinkler head as the one you’re replacing, but there are certain factors that should match your existing one. These include:
Type of Sprinkler Head
The two types of sprinkler heads are pop-up and impact. There are also stationary, rotor-driven and gear-driven types within the category of pop-up sprinkler heads.
Delivery Rate
This is a measurement of the amount of water supplied to the sprinkler head. This will either be in inches-per-hour (IPH) or gallons-per-minute (GPM).
Spray Pattern
The most common spray patterns are full-circle, half-circle (“0.50-circle”), and quarter-circle (“0.25-circle”). Some spray heads feature adjustable spray patterns, allowing you to choose any pattern between quarter-circle and full-circle.
Throwing Distance
The distance the sprinkler head can spray water is its throwing distance. Typically, the throwing distance is between 4 and 15 feet. Some sprinkler heads feature a throwing distance adjustment that offers greater flexibility and customization.
Failing to match up these specs can result in under- or over-watering the section of the lawn the head’s installed in. All of these factors are listed on either the top or side of your existing sprinkler head. If in doubt, you can remove the head and take it to your local hardware store or irrigation professional.
Step 2: Access the Existing Sprinkler Head
First, shut off the water supply to your irrigation system. Once the water is off, you need to clear an area around the perimeter of the sprinkler head to make it visible and accessible. This can be done by digging a small area around the sprinkler head, or by prying back the dirt around the sprinkler head with your hand. For the latter method, it’s best to knock down the grass around the sprinkler head with a weed whacker before pulling the remaining sod and dirt away from the head.
For the digging method, use a spade shovel or hand trowel to dig roughly 2 inches around the entire perimeter of the sprinkler head. Try to make clean cuts into the sod so that you can remove that patch of grass in one piece. You will be installing the sod in the same spot after the new sprinkler head is installed, so you should do your best to prevent damaging it. Dig down until you get to the vertical pipe attached to the sprinkler head (riser), being careful not to hit the PVC pipe or poly tubing (supply line) the sprinkler head connects to.
Step 3: Remove the Old Sprinkler Head
Sprinkler heads are screwed, or “threaded,” onto a single riser that is, in turn, threaded onto the water supply line. Turn the old sprinkler head counter-clockwise to unthread it from the riser. This is easier to do if you dug out an area around the sprinkler head because more of the sprinkler head is exposed that you can grab onto. You might have to use a large set of pliers to get a good hold on the exposed portion of the sprinkler head if you didn’t dig around it.
There’s a possibility that the riser will come off with the sprinkler head. If that happens, you can simply unthread the riser from the sprinkler head and thread it back onto the supply line. It’s also a good idea to inspect the riser for damage while it’s disconnected.
More Related Articles:
- Au Revoir, Standing Water! How to Install a French Drain in 8 Steps
- How Much Does a French Drain Cost?
- Mow Money: Here’s How Much Lawn Care Services Cost
- How Much Does Sod Cost to Install?
- A Grassroots Effort: How to Lay Sod in 4 Steps
Step 4: Check the Riser’s Height
The top of the new sprinkler head should be level with the ground, not with the grass. The sprinkler head is susceptible to damage from weed whackers, mowers and foot traffic if it’s installed any higher. Test the riser’s height by screwing (dry-fitting) your new sprinkler head onto the riser. If the top of the new head is too high, you may also have to replace the riser.
The riser can be replaced by a “cut-off” riser with multiple sections of threads. These risers allow you to establish the perfect height by cutting them at the section of threads corresponding to the desired length. Once you’ve cut the riser at the desired length, you can thread one end onto the water supply line.
Step 5: Install the New Sprinkler Head
Thread the new sprinkler head in a clockwise direction onto the riser until it’s snug. Don’t over-tighten, or you risk damaging the plastic threading on either the riser or spray head. You should also verify that the spray nozzle is pointed in the desired direction.
To ensure a leak-free seal, you can wrap the threads with PTFE thread seal tape (AKA “plumber’s tape”) unless the manufacturer says otherwise. You should not, however, use liquid thread sealant (AKA “pipe dope”) on sprinkler heads or any other aspect of your irrigation system.
Optional: Flush Out the Sprinkler Head
Regardless of how carefully you removed the old sprinkler head, it’s likely that some dirt or mud fell into the riser. While this step isn’t essential, flushing the line before installing the new sprinkler head can prevent clogs in the new sprinkler head caused by dirt in the system.
Unthread the cap on the very top of the sprinkler head, and turn the water on for a few moments to allow water to spray out the top. This should blow out any residual dirt out of the system. Shut the water off and thread the cap back on.
Step 6: Test the Sprinkler Head
Turn the water on to inspect the sprinkler head’s functionality. Make any adjustments to the spray head (i.e., spray pattern, throwing distance, etc.), and look for leaks. Be especially mindful of leaks coming from the threaded connections between the riser and water supply line, and the riser and sprinkler head. If you see evidence of leaking, gently tighten the connection by hand. If that doesn’t work, you can try disconnecting the leaking component and wrapping the threads with more nylon tape.
Step 7: Replace the Dirt and Sod
If you dug a hole around the sprinkler, place the dirt you removed back into the hole. Gently compact the dirt with your hand until it’s level to the sprinkler head, and lay the piece of sod you removed back into its original location. Water the grass immediately afterward to help reestablish the root system.
If you didn’t dig, just press the dirt and grass you pried away back towards the new sprinkler head. Compact gently by hand and water the grass.
Since we’re all home now more than ever, being prepared for unexpected home repairs with a plan from HomeServe is important. Having a plan in place gives you peace of mind knowing that you can simply call our 24/7 repair hotline for covered breakdowns. See what plans are available in your neighborhood.


