Backed Up in the Garage? Here’s How to Unclog Your Floor Drain

When you notice that stagnant, sludgy liquid sitting on top of your garage floor grate, you might suddenly feel fear bubbling up inside you. What's scarier is, if you don’t get it fixed fast, it could wind up damaging whatever items you have stored nearby. But rest easy: Unclogging your garage floor drain is pretty simple with a little bit of know-how and effort.
This May Also Interest You: Snake’s in a Drain! How to Unclog Your Sink With a Drain Snake
Read on to learn about the common causes of garage drain backups and how to eliminate them.
What Kind of Drain Do You Have?
There are two basic drain designs your garage can have: a standard floor drain or a trench drain.
Standard Floor Drain
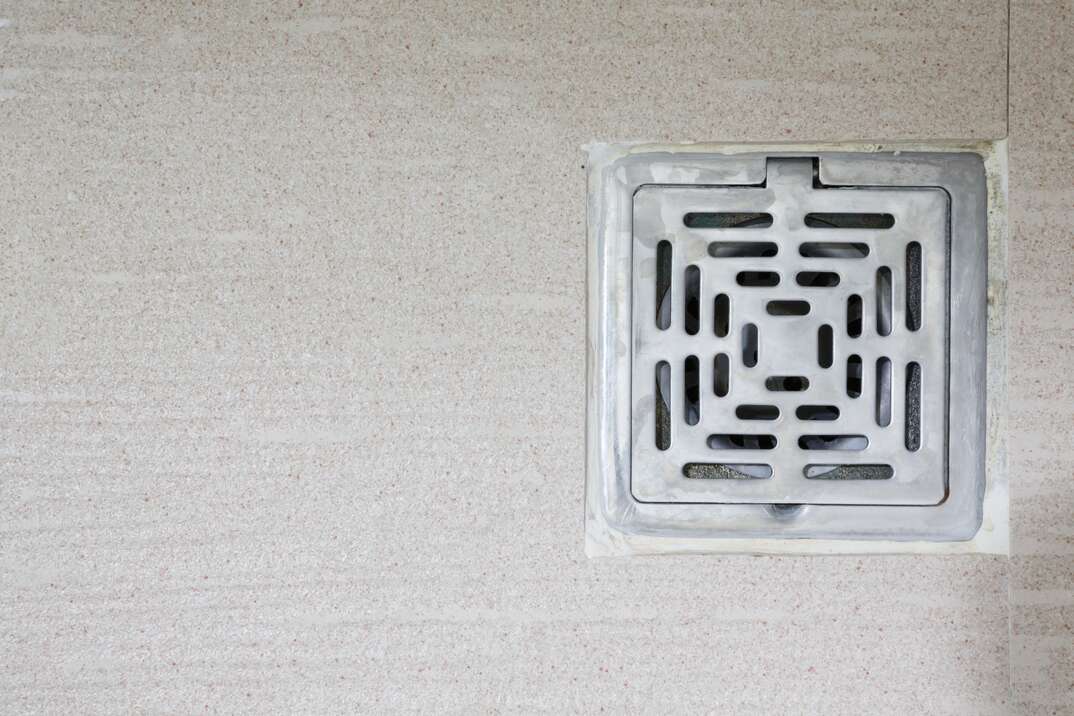
The standard floor drain is common in many home garages. It's typically in the middle of the floor, which is sloped in all directions to allow gravity to move the fluid across a smooth surface. The beauty is that this overall design is relatively straightforward, especially if it’s sized and pitched correctly.
Trench Drain
A trench drain, also known as a channel drain, is located at the garage’s perimeter or at the opening. This type comprises long metal grates and is ideal in regions where there's a lot of snow, debris or water. Just like your home's gutters, this type of drain is built for heavy precipitation, but that doesn’t mean it can’t get clogged.
Common Causes of Clogged Garage Floor Drains
Trench drains don’t get clogged often because they’re better at handling heavier influxes of debris and fluids. However, there are two reasons they will get backed up — lack of maintenance and weather — in addition to the tendency for the U-shaped pipe trap to clog.
Lack of Maintenance
If you don’t regularly clean it out every few months, debris accumulates and can cause a backup that could lead to staining as well as mold if left unattended.
Weather
Because trench garage floor drains are more popular in colder areas, the water that flows through the channel can freeze when the weather gets cold in the winter.
U-Shaped Pipe Trap
By contrast, a round drain typically has a U-shaped pipe trap, and while it prevents sewer gases from backing up in the garage, it's also the most common source of a clog. The problem here is figuring out what type of clog it is, and that means a bit of trial and error.
Tools and Supplies to Start
To unclog a garage floor drain, you'll need:
- A screwdriver to remove any grates
- A chisel to help you access the grate's screws, if needed, or lift a heavier grate, such as over a trench drain
- A plumber's snake
- A wet/dry vacuum
- Towels
- A bucket
- Access to fresh water (such as a hose spigot)
While it might not be necessary, you may also need:
- A wrench for loosening the clean-out plug
- Penetrating oil for lubrication
- A rubber clean-out plug
How to Unclog a Standard Garage Floor Drain
Take the following steps:
1. Remove the Grate
With the help of the screwdriver, and maybe the chisel, remove the grate and look into the drain to see if there are any obvious clogs.
2. Suck It Up!
Stick the vacuum hose in the hole to suck out the detritus. In some cases, you may find pieces of wood, bugs, or even some screws that slipped through the grate, in the gunk that's been accumulating over the months and years.
3. Check Your Work
If the vacuum suction feels looser than when you started, test your theory with a bucket of water down the drain. If the water slips down quickly, you’ve successfully solved the problem.
If the suction method didn’t work, it’s time for Phase 2.
Snaking the Drain
Follow these drain snaking steps:
1. Open the Clean-out Plug
Open up the clean-out plug, which is that square-top notch beside the drain. This feed bypasses the U-shaped drain and goes straight down the line. Sometimes this plug is a metal fixture that needs some penetrating oil and a wrench to budge it, depending on its age, or it could be the rubber type. Either way, make sure that any debris is cleared before opening it or you could create a second clog in the main line.
2. Send in the Snake
Insert the snake into the drain until you reach the clog. It’ll feel like a firm mass that has some elasticity.
3. Pull It Out
Manipulate the snake to pull it out, regardless of the resistance it gives.
4. Move on to the Clean-out Pipe Valve
Repeat this process in the clean-out pipe valve after you're finished working on the main drain. The clog will come out in chunks, and it’s important to get every piece of it.
5. Flush ’Em
Flush the drains with fresh water.
6. Replace the Plug
Finally, put back the old clean-out plug or replace it with a new rubber one, making sure it’s tightly sealed.
7. Follow-up Flush
Once more, flush the drain to see if it’s free-flowing. If it is, this water will stay in the trap and act as a buffer against the flow of sewer gas through the line.
More Related Articles:
- Got a Clogged Sewer Line? Here’s What to Do
- How to Unclog a Shower Drain
- How to Unclog Your Garbage Disposal
- Kitchen Sink Not Draining? Here Are 6 Ways to Unclog It
- Considering an Epoxy Garage Floor? You’ll Want to Read This First...
Unclogging a Trench Drain
After you unscrew or lift the grate that’s directly above the drain, remove any debris with a small hand shovel. In the case of a frozen pipeline, use a deicing solution to melt the ice beforehand. If it’s still clogged, follow the same steps as you did with the standard drain, starting with the wet/dry vacuum. One thing to note: Trench drains don’t usually have a clean-out plug.
Using a Chemical Solution
If manually cleaning your drain still doesn’t help, you can use a chemical solution. Drain cleaner usually breaks down the gunk that’s stuck to the sides of the pipes, and there’s no way for a snake to get that out. Just pour it in and leave it overnight.
You might wonder why drain cleaner wasn't suggested first. The primary reason is that drain cleaners are toxic, and to do that before trying a manual fix would expose you to gases that are trapped in the line.
If your garage drain is still clogged, even after executing these manual steps and trying a chemical cleaning solution, it might be time to call a professional. At this point, be proud that you did all you could, but it’s just time to hand it off. For this purpose, you might consider how plans from HomeServe can help you be prepared for the costs associated with covered plumbing repairs.


