Why Your Vacuum Cleaner Sucks at Sucking (and How to Fix It)

Why Your Vacuum Cleaner Sucks at Sucking (and How to Fix It)
Vacuum cleaners are a homeowner's first line of defense in the battle against dust and dirt, but sometimes they seem to lose their superpowers, leaving you frustrated with lackluster performance. Fear not! Here's a comprehensive guide to some common reasons your vacuum cleaner may lose suction and how to restore it to its full cleaning glory.
1. Blocked Hose
The Problem: A blocked hose is a common culprit for reduced suction. Dust, debris, or even small objects can obstruct the hose, hindering airflow.
How to Fix It:
- Inspect the Hose: Remove the hose from the vacuum and visually inspect it. Use a flashlight to check for any clogs.
- Clear Obstructions: Use a broom handle or a straightened wire hanger to dislodge and remove any debris. If using a hanger, be careful as you work so that you do not puncture the hose.
- Reverse the Flow: If possible, blow air through the hose in the opposite direction to dislodge stubborn blockages. If you can, remove the hose from the main body of the vacuum and take it outside before trying this method.
2. Clogged Filter
The Problem: Filters are critical components of vacuums, especially in their ability to fight against dust and allergens. Over time, they can become clogged, impeding airflow and reducing suction power.
How to Fix It:
- Check the Filter: Consult your vacuum's manual to locate the filter. Remove and inspect it for dirt and debris.
- Clean or Replace: Depending on the type of filter, clean it with water or replace it as recommended by the manufacturer. If your filter is cleaned with water, be sure it is completely dry before reinstalling.
- Regular Maintenance: Make it a habit to clean or replace filters at regular intervals to maintain optimal performance.
3. Overfilled Canister or Dust Bag
The Problem: A vacuum cleaner with an overfilled canister or dust bag will struggle to maintain suction power as there's less space for the air to pass through.
How to Fix It:
- Empty the Canister or Replace the Bag: Check your vacuum's capacity indicator or the canister/dust bag for fullness. Empty the canister or replace the bag if necessary.
- Follow Manufacturer Guidelines: Be mindful of the recommended fill levels provided by the manufacturer to ensure efficient operation.
- Replace: If your vacuum uses bags, insert a new one before operating it again. If it is a canister style, simply replace it according to the manufacturer's directions.
4. Dirty or Worn Brushes/Rollers
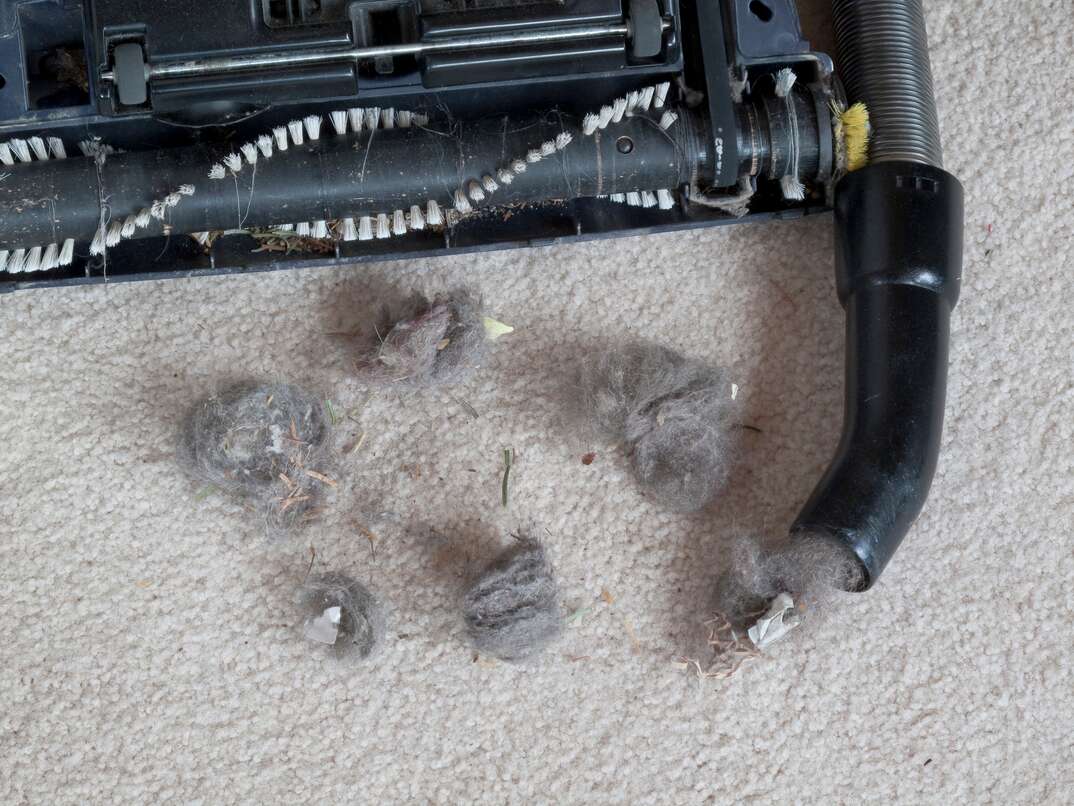
The Problem: The brushes or rollers responsible for agitating and lifting dirt off surfaces can accumulate hair, debris, and dust, leading to reduced suction.
How to Fix It:
- Turn Off and Unplug: Ensure the vacuum is turned off and unplugged before proceeding.
- Remove the Brushes/Rollers: Refer to your vacuum's manual to locate and remove the brushes or rollers.
- Clean Thoroughly: Use scissors or a knife to cut away hair and threads, and wipe off any accumulated dirt.
- Check for Wear: If brushes or rollers are worn, consider replacing them following the manufacturer's guidelines.
5. Leaking Seals or Gaskets
The Problem: If there are leaks in the vacuum's seals or gaskets, suction power can be compromised, because the tight seal that creates the flow of air would be compromised.
How to Fix It:
- Inspect Seals and Gaskets: Carefully examine the vacuum for any visible damage or wear in the seals and gaskets.
- Replace Damaged Parts: If you identify any issues, replace the damaged seals or gaskets with genuine replacement parts.
- Regular Checkups: Periodically inspect the seals and gaskets for wear and tear as part of routine maintenance.
6. Incorrect Height Adjustment:
The Problem: Using the wrong height setting for your vacuum on different surfaces can hinder its ability to effectively pick up dirt.
How to Fix It:
- Refer to the Manual: Check your vacuum's manual to determine the correct height setting for the type of flooring you're cleaning.
- Adjust Accordingly: Modify the height setting to match the flooring – a lower setting for carpets and a higher one for hard surfaces.
- Test and Readjust: Vacuum a small area and assess the results. If suction is still lacking, readjust the height until you find the optimal setting.
7. Worn or Damaged Belts:
The Problem: A vacuum cleaner's belts are responsible for driving the brushes or rollers. If these belts are worn or damaged, suction efficiency can suffer.
How to Fix It:
- Turn Off and Unplug: Ensure the vacuum is turned off and unplugged.
- Locate and Inspect the Belt: Refer to your vacuum's manual to locate the belt. Inspect it for wear, damage, or misalignment.
- Replace as Needed: If the belt shows signs of wear or damage, replace it with a new one according to the manufacturer's instructions.
- Regular Replacement: Make it a habit to replace belts at recommended intervals, even if they appear to be in good condition.
By identifying and addressing these common issues, you can ensure your vacuum cleaner maintains optimal suction power, keeping your home spick and span. Regular maintenance and proper care will not only extend the life of your vacuum but also enhance its performance, making your cleaning routine more efficient and effective.


