How to Change a Whole-House Humidifier Filter

Changing a Whole-House Humidifier Filter at a Glance
- Step 1: Turn of humidifier
- Step 2: Remove top cover
- Step 3: Inspect and clean pad
- Step 4: Replace pad
- Step 5: Reassemble unit
Dry indoor air. It’s one of those aspects of the winter season that you might not think about too often. Sure, there’s the snow, ice and frigid outdoor temperatures to contend with, but maintaining optimum humidity levels in your home should be another important part of your wintertime agenda. When your furnace or heating system kicks into gear, your indoor air can turn dry, resulting in a milieu of undesired effects like scratchy throats, sinus congestion and dry, cracked skin.
This May Also Interest You: Does Your Home Need a Whole-House Humidifier?
Installing a built-in humidifier is an effective way to combat this seasonal malady — that is, if it’s maintained properly. Luckily, whole-house humidifiers require very little regular maintenance, with one caveat: The humidifier’s water filter must be changed on a frequent basis. This will ensure your humidifier is working properly, providing your home with adequate moisture levels (and clean air) all winter long.
How Often Should You Change Your Humidifier Filter?
Changing your humidifier’s filter — also called a humidifier pad — is an important step in keeping the air quality of your home in great shape. Keeping a fresh pad will keep your humidifier operating at its full potential and will help keep the air in your home smelling fresh and mold-free. Most humidifier manufacturers recommend changing your filters every six months to a year. That said, during times of heavy usage (the winter months), your system might require monthly filter checks. Fortunately, changing your humidifier’s filter is a fairly straightforward process.
How to Change a Whole-Home Humidifier Filter
Home humidifier filter pads are generally pretty simple to replace, but humidifiers can vary slightly depending on the type and manufacturer of humidifier you have, so before you start changing your filter, make sure you consult the instructions that came with your unit, if you still have them. That said, each humidifier will typically follow this step-by-step process:
Step 1: Turn off the Humidifier
Before you can access your furnace humidifier's filter pad, you’ll first need to disconnect power to your unit. Find the humidifier’s power cord and unplug it from the outlet. If you can’t find the cord, then you can turn off the corresponding breaker in your electrical panel, if you’d like.
Step 2: Remove the Top Cover
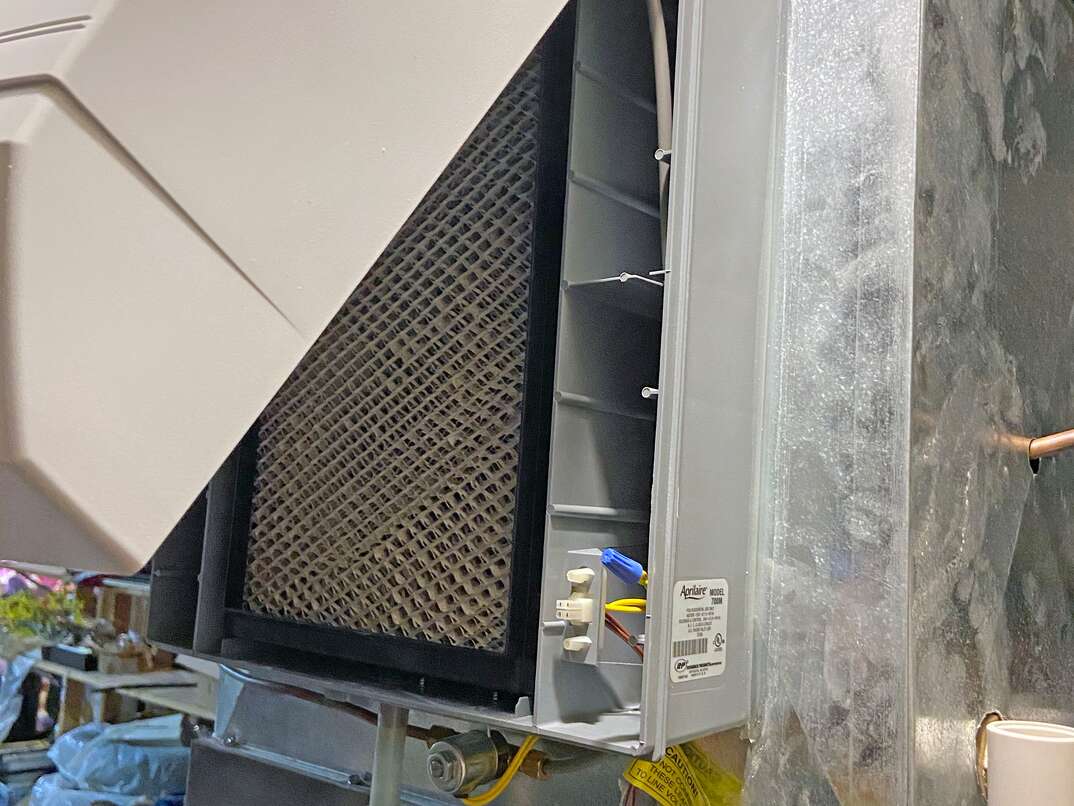
To access your humidifier’s filter pad, start by removing the fasteners that hold the top cover of your humidifier in place. Some models use removable nuts. Others use retaining side clips to fasten the top cover. As you remove the top cover, be sure to place any small parts in a secure location so you don’t lose them. Then, using an adjustable wrench, remove the nut that secures the water inlet feed tube (also called the water distributor). Once the tube is loosened, swing it out of the way of the top cover and lift the top cover from the housing cabinet. You should then be able to lift and remove the humidifier pad in the unit.
More Related Articles:
- A Mist Opportunity: 5 Ways a Humidifier Helps Your Home Be Healthier
- How to Set Your Whole-House Humidifier for Summer
- Get Rid of the Humidity: Here’s How to Use a Dehumidifier Effectively
- High Humidity Can Harm Your Home. Here’s How to Head Off Damage
- 5 Reasons You Need a Dehumidifier in Your Home
Step 3: Inspect the Pad and Clean
As we mentioned earlier, changing humidifier pads is only necessary once or twice a year. That said, it’s worth checking your filter monthly, as buildup of all kinds can accumulate on your filter. In many cases, you’ll be able to give your filter a quick cleaning and simultaneously lengthen its life. However, if it’s been over a year since your last replacement — or the filter seems clogged or calcified — you’ll need a replacement. To clean the pad, you can use a commercial cleaning product like Lime-Away or CLR Remover. You can also create a 1:3 white vinegar and water solution to soak the filter in until the calcification is removed.
Step 4: Replace Humidifier Pad
If your house humidifier’s pad is completely clogged, you’ll need to replace it. To replace the pad, remove the old pad from the unit housing and discard it. Before replacing the filter, you may want to take a moment to clean the humidifier housing as it may have accumulated dust, debris, and mineral deposits. Use a commercial mold and mildew spray to clean all sides of the tray. Once the tray is clean, insert a new evaporator pad into the housing. In most cases, there will be tracks on each side of the housing that will help guide the filter down into the unit.
Step 5: Reassemble the Unit
When you have correctly replaced your humidifier filter, place the top cover back in place over the pad and re-insert the retaining clips to secure it. Then, swing the water distributor back in place and tighten it with the adjustable wrench. From there, make sure all other connections are secured. Once everything is back where it belongs, it’s a good idea to give your humidifier a test run to make sure it's operating correctly and there aren’t any condensation leaks.
Stay on Top of Relative Humidity
Maintaining proper air moisture levels in your home can make a world of difference to the health and comfort of you and your family. Installing an automatic humidifier to your heating system can combat that dry indoor air that accompanies winter weather and help keep your entire family healthy. But, just like any major appliance, home humidifiers require regular cleaning and maintenance to function properly.

