How to Install Whole-House Surge Protection

Installing Whole-House Surge Protection at a Glance
- Tools & Materials: Personal protective equipment, non-contact voltage tester, double-pole circuit breaker, cable clamp, screwdriver or drill, wire strippers, hammer, nail punch
- Step 1: Shut off power
- Step 2: Prep panel
- Step 3: Mount surge protector
- Step 4: Connect wires
- Step 5: Reassemble electrical panel
Electrical surges — or large, brief spikes in electricity to your home’s electrical circuits — can occur for a number of reasons. They can destroy various electrical devices and appliances in your home. Lightning strikes, downed power lines, increased electrical demand from surrounding industrial plants and even temporary surges in large household appliances like air-conditioners can all cause these devastating surges, potentially resulting in thousands of dollars in damage.
This May Also Interest You: What’s a Whole-House Surge Protector?
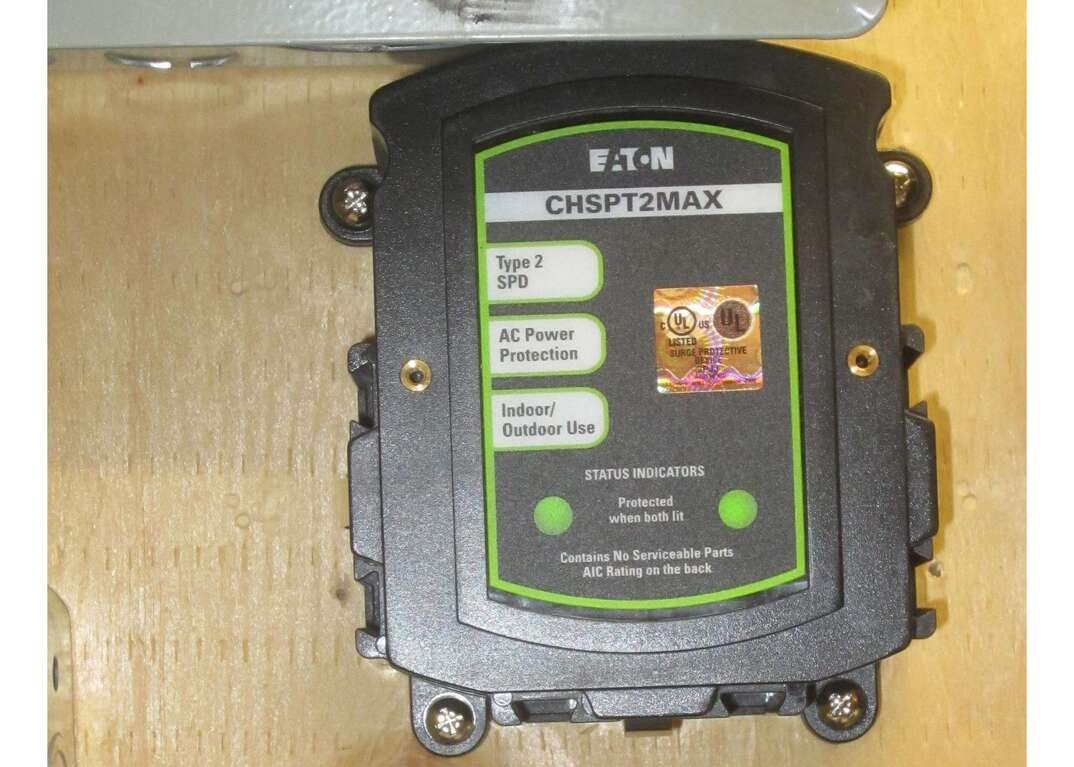
To avoid this fate, you can install a whole-house surge protection device (SPD). These devices continually monitor for large electrical surges in your home’s main electrical panel and safely diffuse excess electricity into the ground. If you’re interested in keeping your home protected from disastrous electrical surges, read on to learn how to install whole-house surge protection yourself.
Can I Install a Whole-House Surge Protector Myself?
There are two types of surge protection devices: Type 1 (meter-based surge protectors), which are installed outside on your home’s electrical meter, and Type 2 (panel-based surge protectors), which are installed inside on your home’s main electrical panel. While it’s possible for a skilled homeowner to install a Type 2 surge protector using the instructions in this guide, installation of Type 1 devices presents considerably more hazards and should be left to the pros.
Even when installing Type 2 devices, working in an electrical service panel can pose a serious risk of electrocution if you’re not careful. Although you’ll be shutting off the main breaker to de-energize each of the breakers in the panel, there are still high-voltage, live wires coming into the top of the panel that can cause serious injury or death if an exposed portion is accidentally contacted. If you don’t know how to identify and work around these wires, it’s best to leave this job to a licensed electrician.
That being said, if you possess the necessary skills and experience to safely operate around these wires and are equipped with the appropriate personal protective equipment, installing an SPD yourself can be a relatively simple and safe task.
Step-by-Step Instructions
Tools and Materials You’ll Need
- Personal Protective Equipment: insulated work boots, electrical safety gloves, and eye protection.
- Non-contact voltage tester
- Double-pole circuit breaker rated for your SPD
- Cable clamp
- Screwdriver or power drill
- Wire strippers
- Hammer and nail punch, or pair of pliers
Step 1: Shut Off the Power
Open the door on your home’s main electrical service panel and turn off the main breaker switch located at the top of the panel. This will de-energize all the breakers inside the panel and minimize the risk of electrocution.
Using a screwdriver or power drill, remove the screws holding the panel cover in place. The number and location of these screws will vary from panel to panel, but there’s usually at least one screw on each of the panel’s four corners. Once all the screws are removed, carefully remove the panel cover and set it aside.
Use a non-contact voltage tester to verify that there’s no electricity running to any of the circuit breakers in the panel. Simply touch the voltage tester to each of the black “live” wires going to each breaker. If the voltage tester lights up, there is electricity running to that circuit, and you shouldn’t proceed until the power has been successfully shut off. If you’re having difficulty shutting off the power to your panel, contact a licensed electrician for assistance.
As an additional safety step, you can make a cardboard cutout to place in front of the live wires coming into the top of the panel to minimize your risk of contacting them. You can also have an electrician de-energize the live wires at the electricity meter outside your home; do not attempt to do this yourself.
Step 2: Prep the Panel
In order for the SPD to operate, it needs to be connected to a dedicated double-pole breaker, which is equipped with two wire terminals, takes up two breaker slots and is installed directly next to the main breaker inside the panel. In most cases, this will be in the two breaker slots directly below the main breaker. If there are already breakers housed in those slots, they should be relocated to other available slots in the panel. If your panel is completely full and there are no available slots, you may have to hire an electrician to install a separate sub-panel.
Next, you’ll need to remove one of the “knockouts” — the small, round indentations designed to be removed for feeding wires into the panel — nearest to where the breaker will be installed. The knockout can be removed with a nail punch and hammer or pliers. Next, insert an appropriately sized cable clamp into the hole. Secure it in place using the instructions provided by the manufacturer.
More Related Articles:
- How Much Does a Whole-House Surge Protector Cost?
- How Much Does an AC Unit Lighting Surge Protector Cost?
- How Much Do Electrical Repairs Cost? A Comprehensive Guide
- Hiring for Wiring? 5 Tips for Finding a Trusted Electrician
- How Much Does It Cost to Replace an Electrical Panel?
Step 3: Mount the Surge Protector
There will be four color-coded wires coming from the surge protector: one green (ground), one white (neutral) and two black (hot). If the ends of these wires don’t come with a small section of insulation removed from the ends, use a wire stripper to remove about 1/2-inch (about 1 centimeter) of the insulation from the end of each wire. Fully insert the wires into the knockout and cable clamp and tighten the clamp. Use the screws provided with the surge protector to mount it onto the wall near the knockout where the wires were inserted.
Step 4: Connect the Wires
Depending on your electrical panel, there may be a single “bus bar” — a vertical metal strip with horizontally punched holes and screws on top — that the ground and neutral wires both connect to. There may also be two bus bars, one for the ground wires to connect to and one for the neutral wires to connect to. In either case, the stripped end of the ground and neutral wires will be inserted into one of the free horizontal holes. Secure them in place by tightening the screw on top. Once tightened, gently tug on the wire to verify it’s securely installed.
The two black wires will then be connected to the double-pole breaker that’s appropriately rated for the electrical demands in your panel. Refer to the manufacturer’s instructions for guidance on selecting an appropriate breaker.
The double-pole breaker will have two terminals where the wires will be inserted. Each terminal will have a set screw on top that needs to be loosened prior to inserting the wire, then tightened back down after the wire is inserted. Once the live wires are connected, install the breaker into the available slots you created in the second step. On most panels, the breaker will simply snap into place after pressing it onto the slot with moderate pressure.
Step 5: Reassemble the Electrical Panel and Test
Place the panel cover back onto the panel and reinstall the cover’s screws. Switch the main breaker back on, along with the SPD’s breaker if it’s not already on. If your SPD is equipped with an indicator light or digital display, you can use this to verify that the unit is fully operational. If so, your home should now be fully protected from electrical surges. If desired, you can also connect sensitive electronics like computers, tablets and televisions to a surge protection strip for additional protection and peace of mind.


