Exterior Water Service Line Coverage
$7.95/mo
$23.85/qtr
$95.40/yr
Need help figuring out the HomeServe App? We've got detailed answers and helpful tips to common FAQs - so you can get the most out of the best home maintenance app.

A HomeServe ID is a universal account that allows you easier access to your online account. When you see the HomeServe ID logo, just use the same sign-in information (email and password) for both HomeServe.com and the HomeServe App – from any device.
Nothing! You can still use your existing sign-in information (email and password) to access your online account (HomeServe.com) or the HomeServe App.
Having a HomeServe ID gives you immediate access to your online account. You can view your plans, update your payment information, request service, change your communication preferences, opt in for paperless documents and more. By accessing your account online, you can accomplish many account services without having to call our customer support team.
When you open the app and click Sign In after the introductory pages, please click on the “Sign Up” link, located under the blue Continue button. Enter your email address and password, then click the blue Continue button. You will be sent a verification email to confirm your ownership of the email address. In the email, click the blue Verify My Account button. Once your email is verified, close your email and re-open the app to continue to add your HomeServe plans and home inventory items.
If you forgot your password, or simply want to reset it, there are two ways you can do this:
We launched the HomeServe ID on December 14, 2021, along with some other system updates. If you did not sign in to your HomeServe online account between December 14, 2021 – January 31, 2022, you will need to reset your password for security purposes.
Please make sure your new password meets the requirements:
• At least 8 characters
• At least 3 of the following:
◦ Lowercase letters (a-z)
◦ Uppercase letters (A-Z)
◦ Numbers (0-9)
◦ Special characters (ex. !@#$%^&*)
• Cannot contain part of username
• Cannot be the same as the last 10 passwords
If you have forgotten your password, or entered the wrong password 5 times, your HomeServe ID will be locked. A Blocked Access email will be sent to you. Click the “Unblock your account” link to reset your password. Please make sure your new password meets the requirements:
• At least 8 characters
• At least 3 of the following:
◦ Lowercase letters (a-z)
◦ Uppercase letters (A-Z)
◦ Numbers (0-9)
◦ Special characters (ex. !@#$%^&*)
• Cannot contain part of username
• Cannot be the same as the last 10 passwords
When you first create your HomeServe ID and access the app, you will be prompted to enable your Face ID / Fingerprint ID. If you declined enabling Face ID / Fingerprint ID when you first signed up, you can enable or disable it at any time. In the navigation menu, tap on HomeServe ID settings. Then slide the toggle next to Face ID / Fingerprint ID – green is enabled, gray is disabled. Please note, you must have Face ID / Fingerprint ID enabled for use on your mobile device for it to work in the app.
Most phones have auto-update for apps turned on, which is the default setting. If you don’t, make sure you revisit the app store and have the current version installed.
HomeServe App at the Apple Store
HomeServe App at the Google Play Store
If you have the current version, the button will state OPEN. If you have an outdated version, the button will state UPDATE.
To add an item:
Please be aware the item recognition is not intended to be instant in the app. We want to send back quality results, so it may take 24 – 72 hours before all of your items are complete.
A product label, also called a product identification label or nameplate, is the label all manufacturers must affix, by law, to convey the make, model, serial number and safety certificate of an item. Everything with an on-switch has one.
When taking a photo of your product label, be sure to get a clear photo of the manufacturer and model number. If you can’t see this information clearly in your photo, we won’t be able to read it either.
**Note that we cannot identify items from a barcode scan, QR code, or from the serial number alone. We have to be able to fully visualize the model number in the image.
If you know the manufacturer/brand and model but are unable to get a photo of the product label, you can write it on a piece of paper and snap a photo of the piece of paper.Once you add an item, you will see that it is “Processing”. It can take anywhere from a few minutes to a few days to return a stock photo and information for you.
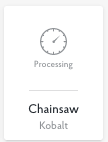
Any extended wait times are due to an overload of new users and requests for content. Please be assured that we process all items entered, or we send you a notification when we can’t process them. If the item still says “Processing”, we are still working on it. Nothing is broken.
If we can’t identify your item, you will receive an email with an explanation and a request for more information. Most times if you respond, we will be able to identify the item for you.
When you submit a content request, our team will work quickly to add that part, document or video to the lists that you see for the item in the app.
We will let you know when you should see the new content there, but also check back as you may receive it before we get the chance to notify you. If we can’t locate it, we will let you know.
You can also test us with those obscure things that you’ve been living with because they’re a pain to fix.
If you just added the item, and you are looking for common parts like a water filter for a refrigerator or toner for a printer, please know that they will be added to the item automatically as part of processing. You don’t need to request them separately. In most cases, it is best to wait until item is complete then check which content is returned. If you don’t see what you need, then you can send a request.
You can also submit requests if you need to have anything that needs a correction, you have a manual that you scanned that you want us to add, or if you want more information.
Follow these steps to requests parts, documents or videos through the app:
If you need to manually enter the manufacturer and model number for items, you can click the large black plus button, select the button to “Type Manually”, and type the information in the fields.
Just select the Add icon then choose the “Type Manually” button. If the brand name and model number match to something that we already have in our system, the item will be recognized and added immediately. If there is no match, our system does the research and will return information for you within 24 – 72 hours.
Log in to the app then navigate to the group or item where you want to add the receipt, navigate to the “My Receipts” section, the tap the “+ Add Receipt” icon. You can upload an image or PDF.
The app makes it easy to capture complex processes and expert instructions with video notes. Simply use the camera on your phone to take quick videos that will help you remember the details when you need them.
To add video notes:
At this time, we do not provide the ability to move items or other content between property addresses, but we are working on adding the feature very soon.
If you have moved or gotten another property and need to move items around, you can complete the following steps to reorganize your things:
Create a new property address.
Add the same items again by entering them manually.
If you enter the items manually by typing or pasting in the model numbers they will be added instantly (no processing wait time, because we can identify them). You can also copy and paste over the serial numbers, if they are on the items.
You can do this quickly by:
Re-Add the Product Label Photos
You can also re-add items to the new property by uploading the product label photos again. You will find the original product label photos stored in your account with each item. Simply save them to your camera roll and upload them again in the new property.
Once you submit a product label image, it may take our content team anywhere from 24 hours to a few days to retrieve the expert support content and send it back to you. This depends upon a variety of factors including whether it’s already in our database, how accessible quality content is, and the current demands on our processing systems.
The “Processing” indicator is our way of letting you know that we’re working on it and you’ll have it soon. When this indicator disappears, it means the expert support content is there.
Any extended wait times are due to an overload of new users and requests for content. Please be assured that we process all items entered, or we send you a notification when we can’t process them. If the item still says “Processing”, we are still working on it. Nothing is broken.
Export/Save/Back Up
We do not currently have a back-up or export feature in the app. We will eventually add the ability to export information out of the app to a PDF, onto a zip drive or flash drive, or download to a spreadsheet or csv file. We plan to add the ability to export your information in an upcoming release. Anything you add to the app now will be able to be exported after we add the feature.
If you request it, we can send you a spreadsheet of your inventory. Just send us a request at support@homeserveapp.com.
Where your Data is Stored
We keep all of your information backed up and secure in the cloud using Amazon Web Services (AWS), so you can access it from any supported mobile device through your account. Your information is attached to the account, not your device, so you do not have to worry about losing information if you lose your device or something happens to it.
Printing / Viewing / Downloading
If you need to see a bigger version of the manuals and other expert information which we provide for you in the app, you can view it using Centriq Online. From there you can download, print or save any of the files back to your computer. We do not currently have a way to print the information out of the mobile app.
Any extended wait times are due to an overload of new users and requests for content. Please be assured that we process all items entered, or we send you a notification when we can’t process them. If the item still says “Processing”, we are still working on it. Nothing is broken.
We apologize for your frustration and for the inconvenience. We know that you spent some time adding things to the app, and it’s disappointing not to see anything back yet.
No connection? No problem!
The app requires that you are connected to the internet to function properly, and especially to add product label photos or other content.
If you find that you don’t have a connection and you need to add photos, you can add them directly through your device camera app, and then add the photos or content into the app when you do have a signal again.
Don’t forget you can also use the web browser based app to add the photos later on.
In the app, tap on the item you would like to add this information for. Tap the pencil icon to the right of the item name. Scroll down to Manufacturing Date and input the month and year. Click Done. You will now see the Approximate Age of this item as well as the Expected Useful Life Remaining.
Currently, the manufacture date needs to be added by you in order to calculate the age of the item and the typical efficient life left. In the future, we are working to have this automatically populated for you.
Add a Group
To add a new group, click the “+ Add Group” icon at the end of all of the groups listed. You can create any name you want. We have made some guesses as to what icon you’d expect to see on each group, however please contact us if you notice any that need a change.
Delete a Group
To delete a group, click the Pencil (edit) icon that you see on the Home screen next to the Property Groups label. Click the “x” that appears on the group that you want to delete. Confirm and continue when prompted.
Rename a Group
To rename a group, open the Group then click the Pencil (edit) icon that you see at the top. You can retype the name when the Edit mode opens. Click the Pencil (edit) icon again to save the change.
Note, that the app keeps items separate for each address, and you can’t automatically move items between properties.