How to Build a Green House at Home
Building a Home Greenhouse at a Glance
- Step 1: Create floor
- Step 2: Build frame
- If you’re using a kit: Follow manufacturer’s instructions
- Step 3: Install glass panels and ventilation windows
- Step 4: Install doors and supports
- Step 5: Add accessories
- Step 6: Weatherize
If you’ve got a home garden that you want to protect from insects, animals, high wind and flooding, you should consider building a greenhouse or a greenhouse addition. Greenhouses let you control the climate conditions so your plants thrive under the best air quality and moisture levels suited to them while receiving an ample dose of sunlight each day. If you live in an area where you experience extreme heat in the summer or freezing temperatures during the winter, having a home greenhouse can help you extend the life of your plants as well.
This May Also Interest You: How Much Does It Cost to Build a Greenhouse?
Greenhouses pair well with solar panels because they provide you with more area to install them in a place that receives sunlight. You might also need a solar system to provide heat and ventilation to your plants, so if you’re already considering how to build a greenhouse at home, this may be a good companion project to mull over.
Here’s everything you need to know about building a home greenhouse.
Is It Cheaper to Build Your Own Greenhouse?
You can build a greenhouse with almost any material you wish. By using old windows and door frames in the construction, you can lower your material cost. Where you’ll save the most money is on the cost of labor. Labor costs can represent more than half of the total cost of any construction project. This is why many people choose DIY greenhouses over contracting the project through a builder.
What’s the Best Material to Use for a Greenhouse?
While you can certainly build a greenhouse with a wood frame, aluminum or PVC pipe will last longer and won’t be impacted by seasonal weather. Wood is more likely to deteriorate from moisture and temperature changes. PVC pipe and aluminum are also economical choices if you’re on a tight budget. If you select PVC pipe, purchase a brand that offers UV resistance to keep the color from fading.
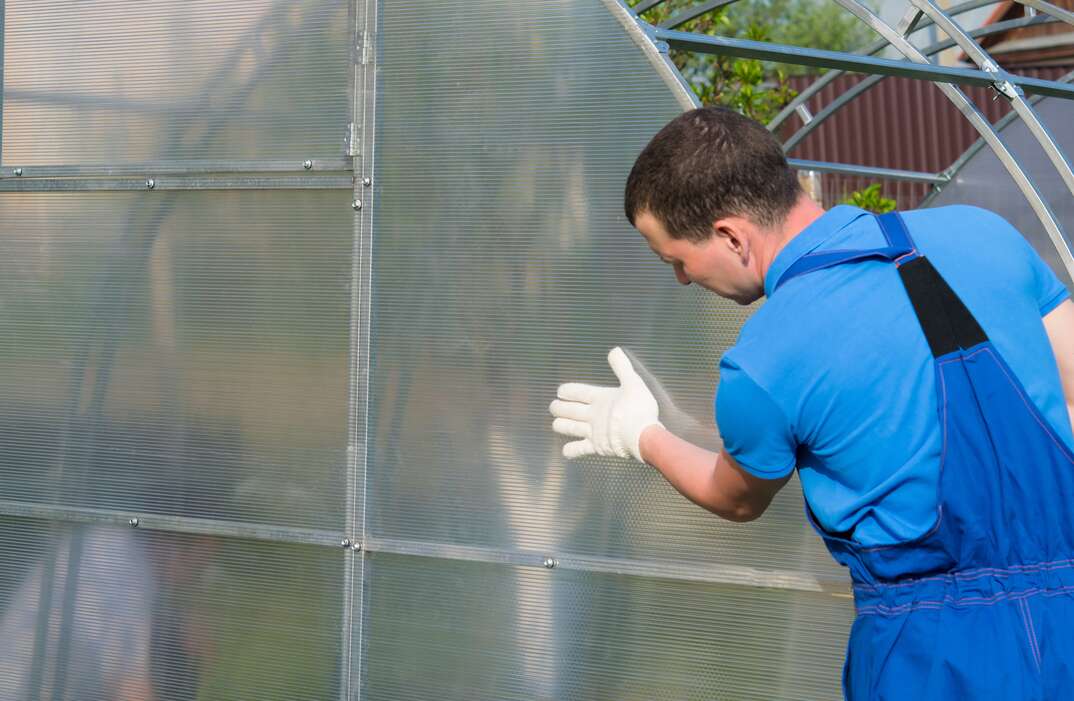
There are different materials you can choose for your covering, ranging from glass panels to polycarbonate or plastic sheeting. If you choose polyethylene sheeting (plastic), you should be advised that you’ll need to replace your greenhouse covering every year. This turns some people off, though it is the cheapest option if you’re in a budgetary pinch.
Glass is the most visually appealing option, but it’s more likely to break when hit by flying objects. Most people choose glass because it lets the most sunlight into their greenhouse, but UV-resistant polycarbonate is growing in popularity. It’s cheaper and able to endure more force without shattering. It’s also better for greenhouses located in extreme climates because it offers superior insulation.
How Can I Make a Simple Greenhouse at Home?
Because you’re building a structure on your property, you may need a building permit before you begin the project. Whether you need one will depend on local ordinances, so it’s better to check beforehand than to assume. You’re going to work with materials that can shatter into sharp pieces, so wearing safety glasses and cut-resistant gloves is important for your safety while you work. If you’re unsure whether you’ve got enough materials laying around for the project or don’t want to worry about planning out your own design, you can purchase a DIY greenhouse kit that comes with all of the materials you need and instructions to guide you.
This task is relatively easy as long as you’ve got one or two people to help you. Make sure the location you choose is on level ground. While you don’t need to build a concrete foundation, it might be a good idea if you’re unable to find a place that is already flat. Make sure to level the site before you proceed.
When planning this project, you’ll want to make sure you’re placing your greenhouse where it will receive the most sunlight. The long walls should be on the east and west sides of the greenhouse, or your structure will provide more shade than light. By positioning the greenhouse this way, you’re ensuring your plants will enjoy all the sunlight you want to provide them.
After you’re set on a location, follow these installation steps to get started:
Step 1: Create a Floor
For most people, this is a concrete foundation. However, some people may choose to skip that step if they are building on stable ground. You still need a floor, so if you’ve chosen not to pour a foundation, you can use gravel, landscape fabric or bricks to create a floor for your homemade greenhouse.
Step 2: Build Your Frame
Build the walls on the ground first, then raise them. The least complicated designs will have you build an A-frame with a roof and rafters. Don’t install glass panels into your walls until they’ve been raised, as this is a safety hazard.
If You’re Using a Kit: Follow Instructions
Follow the manufacturer’s recommendations if you’re using a kit. The instructions will tell you in which order to attach the walls and roof elements to the greenhouse. You’ll begin with the wall uprights and then attach the wall panels.
Step 3: Install Glass Panels and Ventilation Windows
Your homemade greenhouse design may include ventilation panels for the roof. If so, install them according to the manufacturer’s instructions and install the covering or window panels that came with your kit.
More Related Articles:
- How to Install Solar Panels: 6 Step to Daylight Savings
- When to Install Home Solar Panels
- 5 Ways to Conserve and Be Energy Efficient
- Backyard Composting 101
- Basic Lawn Care and Maintenance Tips
Step 4: Install Doors and Supports
At this point, you’re ready to install your doors, completing the structure. Once the structure is complete, you can move to the interior design.
Step 5: Add Accessories
Get creative with where you’d like to install hooks, shelving, benches, flowerpots and tables for your plants. You can continue to customize the interior of your greenhouse to suit your needs as time goes by, so don’t worry too much if you haven’t decided yet how you want to customize your interior.
Step 6: Weatherize
Now that you understand how to build a greenhouse at home, you need to know how to use it to maximize its effect. Depending on your climate, you may benefit from installing a dehumidifier, fans, added ventilation or a heating system. What you need will depend on the needs of the plants you intend to grow inside of your backyard greenhouse.
A lot of people install solar panels shortly after learning how to make a greenhouse at home. This helps you offset your energy bills and become greener, and you may need solar power to run the systems you’ve decided to use inside of your home garden.