How to Install a Chain-Link Fence

Installing a Chain-Link Fence at a Glance
- Tools & Materials: Fence kit, marking paint, stakes, string, concrete mix, post-hole digger, level, pipe cutter, wrenches, hacksaw, pliers, wire cutter, T-bar, hog-ring pliers, come-along
- Part 1: Determine location and dig post holes
- Part 2: Set and cut posts
- Part 3: Install brace clamps and tension bands
- Part 4: Add post caps
- Part 5: Install top rail
- Optional: Install tension wire
- Part 6: Unroll and install mesh
- Part 7: Tighten and secure
- Part 8: Install gate
Chain-link is a good choice for homeowners looking for an attractive fencing option that enhances curb appeal. Chain-link fences are especially helpful in areas where heavy snow or high winds may preclude the use of other types of fences. Chain-link fences are strong and durable, and they’re actually quite affordable when compared to options such as vinyl or wood.
This May Also Interest You: How Much Does It Cost to Build a Fence?
What’s more, a chain-link fence is a good option for fencing in a play area because it leaves you with a clear line of sight. It’s also a great material for use around an HVAC unit to prevent theft and damage.
Convinced chain-link is the fence for you? If you’re going to put the fence up yourself, follow this installation guide.
Is DIY Chain-Link Fence Installation Possible?
Maybe you’ve refinished the kitchen cabinets or built your own deck. Now, you’re wondering if DIY chain-link fence installation is within your skillset. Installing a chain-link fence requires a moderate level of DIY knowledge. You need to know how to measure, and you need to be able to use tools such as a post-hole digger. You also need to have the time available to invest in installing the fence. It can help to have a buddy or two beside you for some of the more cumbersome parts of the install. Chain-link fencing isn’t just heavy — it’s also notoriously difficult for one lone person to maneuver during installation.
When you’re doing a project such as installing a chain-link fence, it’s important to remember that you may be subject to local city ordinances or requirements of your homeowners or neighborhood association. Check with local zoning authorities to be sure you’re compliant and have the right permits in hand when erecting your own fence. (Make sure your contractor does the same if you decide to forego the DIY route). It’s also worth mentioning that it may be necessary to get your neighbors’ permission to erect a fence in some areas.
Installing a Chain-Link Fence
Tools and Materials
When installing a chain-link fence, it helps to start with a chain-link fence kit, which contains everything needed for the installation other than the tools and concrete. This includes tension bars and bends, brace clamps, rail-end fittings, outside sleeves, post caps, tie wires, hog rings, gate hinges, nuts and bolts.
In addition, you’ll need:
- Marking paint
- Stakes and string
- Concrete mix — one 60-pound bag per post
- Post-hole digger
- Level
- Wrenches — socket and pipe
- Hacksaw or pipe cutter
- Pliers
- Wire cutter
- T-bar
- Hog-ring pliers
- Come-along (winch and ratchet tool)
Getting Started
First things first: Never dig into the ground on your property if you’re unsure about buried utility lines. This can put you in grave danger, whether you strike a gas pipe or a utility line. Reach out to your utility company to find out where you can and cannot dig the holes for your fence posts. Call 811 or your local before-you-dig number.
Step-by-Step Instructions
Once you have all your fence installation supplies on hand, you’re ready to start. According to Hunker, the process goes like this:
1. Determine where the fence is to be installed. Using marking paint, designate the locations for the fence posts. Using stakes and strings, mark off the area where the fence will be installed.
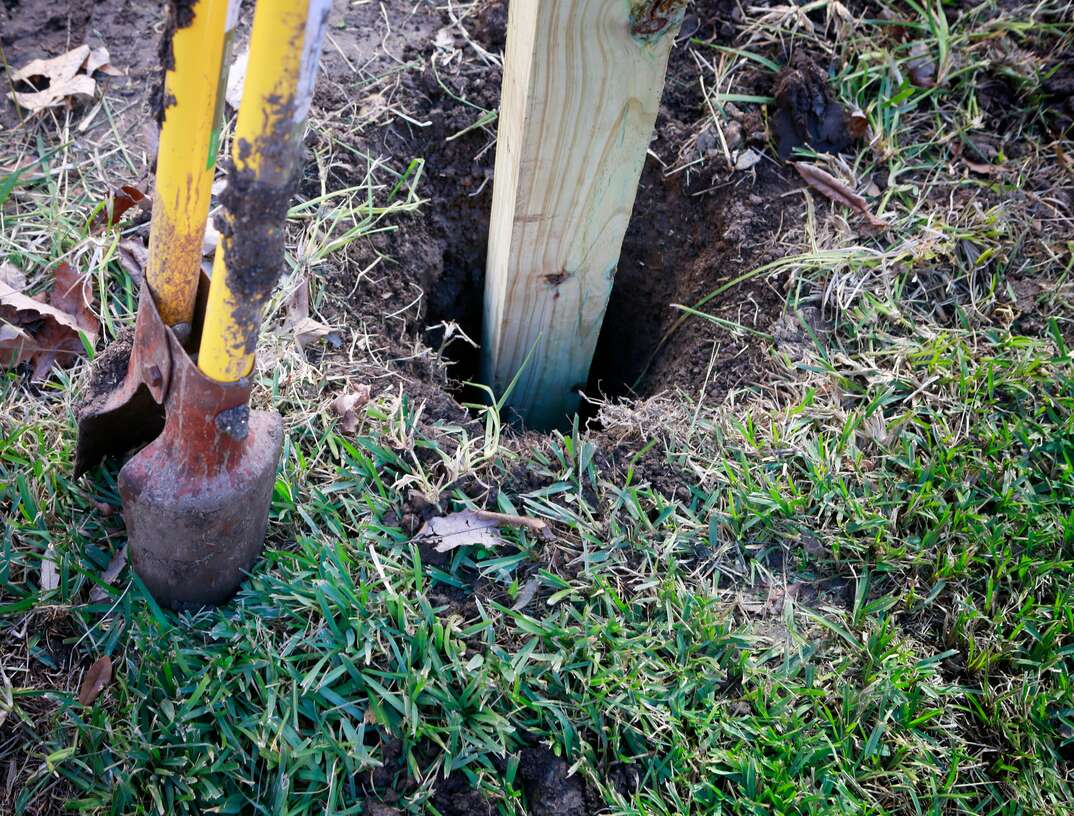
2. Dig a hole for each post using the post-hole digger. The hole should be one-third of the depth of your post and three times as wide. For example, a 6-foot post requires a hole that is 2 feet deep. Dig the holes for the gate posts slightly deeper to accommodate more concrete that’s required for optimal stability.
3. Using the level, plumb each fence post and keep it in position while filling the hole with concrete mix. (You may want an extra set of hands for this.) Fill the mix in the hole, leaving 4 inches of space at the top.
4. Stretch string between each pair of posts. Mark the positions of the posts along the string, and space them accordingly based on the gauge of the fencing: 10 feet for heavy-gauge fencing and 6 feet for lighter fencing.
5. Plumb each hole and fill with concrete. Allow time for the concrete to set based on the manufacturer’s recommendations.
6. Using a pipe cutter or hacksaw, cut the terminal posts at a height that allows for loop caps. As Hunker explains: For a 4-foot fence, you’ll want to cut terminal posts 50 inches from the ground. Cut line posts 46 inches from the ground. Have a buddy with a pipe wrench hold the pipe to keep it from turning while you cut it.
7. Add a brace clamp to each terminal post and then add tension bands. Fence installers say you should add as many tension bands as the fence post’s height, minus one. For a 6-foot post, for example, you’d add five tension bands.
8. Add a brace clamp to hold the top rail. Slip the round end cap on the post’s top.
9. Put a loop cap onto each line post, making sure to allow it to slant toward the fence’s outside.
10. Slide the top rail through the clamps on each line post. Join the rail sections with the outside sleeves. Slip the rail-end fitting onto the rail’s ends. Cut the sections of top railing as needed, using a hacksaw or pipe cutter.
11. Slip the top brace clamp up on the post, stopping about 2 inches from the top.
12. Attach the end fitting with nuts and bolts, then tighten the clamp.
13. If you’re installing the optional tension wires, move the bottom brace clamp up on the post, stopping when it is an equal distance from the top clamp as the mesh’s width. Secure it with a nut and bolt.
14. Wrap the tension wire around the end post, winding the end a few times around the wire with pliers to secure it. Then, snip the end of the wire.
15. Unroll the wire to the other terminal post. Give yourself an extra foot or so of wire to work with.
16. Push the end up through the brace clamp’s bolt. Insert it into the end of the T-bar. Turn the T-bar, moving it toward the post until the wire is taut. Then, wrap the T-bar around the wire. Remove the T-bar and use the pliers to keep wrapping the wire. Cut the end.
17. Unroll the fence mesh where it will be installed and prop it up against the posts.
18. Connect one end of the mesh roll to an end post. Add tension clamps on the post, inserting the tension bar and tightening the nuts and bolts using the socket wrench.
19. Continue working this way, pulling the fencing as taut as possible as you work.
20. Tie one end of the come-along to an end post, and hook the other end to the tension bar. Crank the come-along’s handle to pull the mesh tight.
21. Using aluminum ties, secure the top of the fence mesh to the top rail. Use pliers to tighten them. Use the hog rings to connect the tension wire (if used) to the bottom of the fence. Close the hog rings with pliers.
22. Lastly, you’ll install the gate by setting the gate onto the pre-installed hinges. This part definitely requires a second set of hands. Check the gate’s swing and make sure the latch engages with the post.
More Related Articles:
- How to Install a Vinyl Fence
- Good Fences Make Good Dogs: How to Install an Invisible Electric Pet Fence
- How Much Does an Invisible Electric Pet Fence Cost?
- How to Build a Deck
- How Much Does It Cost to Build a Deck?
How Much Does Chain-Link Fencing Cost?
On average, installation of a chain-link fence runs around $15 to $24 for both labor and materials per linear foot, based on data from Porch.com. Based on these figures, a standard 100-linear-foot fence costs about $1,900 on average, but may cost as little as $1,500 or as much as $2,400. Factors that affect the cost of chain-link fencing include:
- The type of materials used. The gauge of the fencing material makes a big difference, with heavy-duty materials obviously costing more than regular or light-purpose materials.
- Whether you hire a contractor. Labor costs make up a big chunk of the average costs for chain-link fence installation. If you want to do it yourself, materials alone run from about $8 to $10 per linear foot.
- Enhancements or improvements. If you want a chain-link fence that goes beyond the basic, vanilla variety, you’ll pay more. For instance, if you want a second access gate, the cost will be higher for obvious reasons. If you opt for an upgrade to a decorative screen to make the chain-link fence a privacy fence, this also affects the total project cost.
- Coated versus uncoated wire. Vinyl-coated chain-link fence wire costs around twice that of galvanized chain-link material.
- Geographic location. Chain-link installation services vary in price from one area to another.
Caring for Your Chain-link Fence
Chain-link fences require minimal maintenance because they are made from metal and are built to weather the elements. Still, when you’re creating a checklist for home maintenance, it doesn’t hurt to add chain-link fence inspection to the mix. During the inspection, cut back overgrown plants to avoid water pooling, as that can result in rust. Tighten the fence's screws and bolts, and replace any loose components as needed to keep your fence looking good and extend its lifespan.