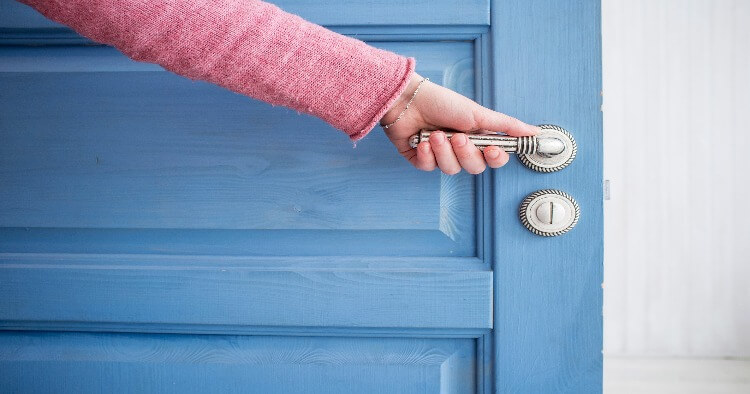
How to change a Door Knob
There's no question that I love being a homeowner. My days of being a renter of an apartment or in a condominium are long behind me and I’m so happy. (I wouldn't trade it for the world.) At the same time, adulting (and homeownership) means that I'm in charge – in charge of upkeep, maintenance and all the other things that go along with owning a home (can you say mortgage?)
When major repair issues arise, I leave them up to the professionals. But in the interest of being money-conscious, I try to handle small tasks on my own. Like when the old doorknob on my front door started loosening, and was literally about to fall off - I detached and replaced it. 1-2-3, easy peasy!
Here’s how to doorknob DIY repair:
On the nature of doorknob appearances
Start by asking a few simple questions: Are you replacing a doorknob because you have to, like I did, or as part of a broader home renovation - in other words, changing out a number of different doorknobs?
Before taking the knob off of any door, check to see if it has matching counterparts elsewhere in the house. If so, be sure to locate the same doorknob model and design used on the others, or something that looks to be almost identical. If this isn't the case, then it doesn't necessarily matter what the new knob looks like, as long as it isn't totally out of sync with the overall appearance of the door.
Knob removal 101
You've got to ditch the old before you can bring in the new - with doorknobs as well as a lot of other things in life. Let's review the critical steps of knob removal as outlined by DIY Network:
- Using a screwdriver, carefully loosen the interior knob first.
- Simultaneously take the knobs off of both sides of the door.
Learn More About Home Repair Plans Near You
Pretty easy, especially compared to changing a screen door. In the event your doorknob has hidden screws, follow Hunker.com's instructions:
- Look at the inner doorknob's "neck" to find the slot or hole that lies between the back of the knob and the door itself.
- Use a straightened out paper clip (or a similarly thin but strong object) to reach the retaining pin through the hole.
- Press down on the pin while pulling the outer doorknob, then remove the inner doorknob.
- Remove the inside doorknob's cover plate by using a Phillips head screwdriver.
- Pull the outer doorknob and spindle away from the door.
Replacement best practices
Hold onto the old knobs and screws for the moment. You'll need them when you take the next step: visiting the local hardware store to buy a replacement knob, as Better Homes and Gardens notes. Even if you aren't going to be changing all of the knobs for stylistic reasons, you still want to make sure you buy the right size, so take it with you.
Trust me on this one: When I had to replace my doorknob, I thought I had the perfect shape by eyeballing. WRONG. Not an issue of cost - even a nicer residential knob maxes out at around $30 or $35 - but wasting the time and effort was incredibly frustrating. Also, you'll have to buy a new latch and plate that fits perfectly with the replacement knob.
Attaching the new knob
After you've selected and bought your new doorknob and brought it home, there are just a few more steps, all of them simple:
- Unscrew the latch plate on the inside of the door so you can pull the latch out. (Some latches don't have plates, but most do.)
- Insert the new latch and then attach its corresponding plate.
- Take the new outer knob and spindle and insert that half first, aligning parts as necessary.
- Attach the inner knob, screw it tightly in place and voila! You're all set!
For household maintenance issues, you can be prepared for breakdowns. Look to plans from HomeServe to help with the cost of covered repairs.