How to Epoxy a Garage Floor
Installing an Epoxy Floor at a Glance
- Tools and materials: Two-part epoxy kit, five-gallon bucket, degreaser, floor patch, spackling knife, squeegee, painter’s tape, long-handled nap roller, paintbrush
- Step 1: Inspect floor
- Step 2: Check for moisture
- Step 3: Check weather
- Step 4: Clean floor
- Step 5: Repair floor
- Step 6: Etch floor
- Step 7: Tape off garage
- Step 8: Mix epoxy
- Step 9: Apply epoxy
- Step 10: Let cure
Applying epoxy to a cement floor can give your garage a clean, finished look, all while preventing water and mold damage. The coating can protect the cement underneath from cracks, chipping and erosion. Epoxy floors are also nonporous — goodbye oil stains!
This May Also Interest You: Considering an Epoxy Garage Floor? You’ll Want to Read This First...
Applying epoxy to your garage floor is a pretty straightforward process. Follow these steps.
Can I Epoxy My Garage Floor Myself?
Installing an epoxy floor can be a DIY project. The tools and materials you need are available at hardware and big-box stores. Read through this guide before you start to get a good idea of what’s involved in the process, the materials you’ll need and how long it will take.
 -------------------------------------------
Is It Hard to Epoxy a Garage Floor?
Applying epoxy to a garage or basement floor takes some time and involves following very specific steps, but with a little attention to detail, it shouldn’t be too challenging. It’s even easier if you enlist the help of a friend or family member who’s willing to lend a hand. You can take a lot of the guesswork out of the process by purchasing an epoxy floor kit that has all the materials you’ll need.
Tools and Materials
- A two-part epoxy kit with concrete etching solution and color chips
- Five-gallon bucket
- Degreaser
- Floor patch
- Spackling knife
- Large squeegee
- Painter’s tape
- Long-handled nap roller
- Paintbrush
- Respirator mask
How to Apply Epoxy to Your Garage Floor
Part 1: Prepare Your Floor
Epoxy can be applied to almost any concrete floor, but proper preparation is vital to get good results. If your concrete floor is already painted or has a sealant on it, the epoxy will not adhere to the surface. To see if there is any existing sealer, This Old House recommends dripping some water onto the floor. If the water beads up, there’s an existing sealer that must be removed.
1. Inspect the Floor
Remove all items from your garage or basement floor, including shelves and storage bins. Look at the floor closely and note any stains, grease or flaws in the concrete. Cracks or holes will have to be patched and sanded before you apply the epoxy. If you don’t fix cracks and other imperfections, they may stand out even more after you apply the epoxy sealer.
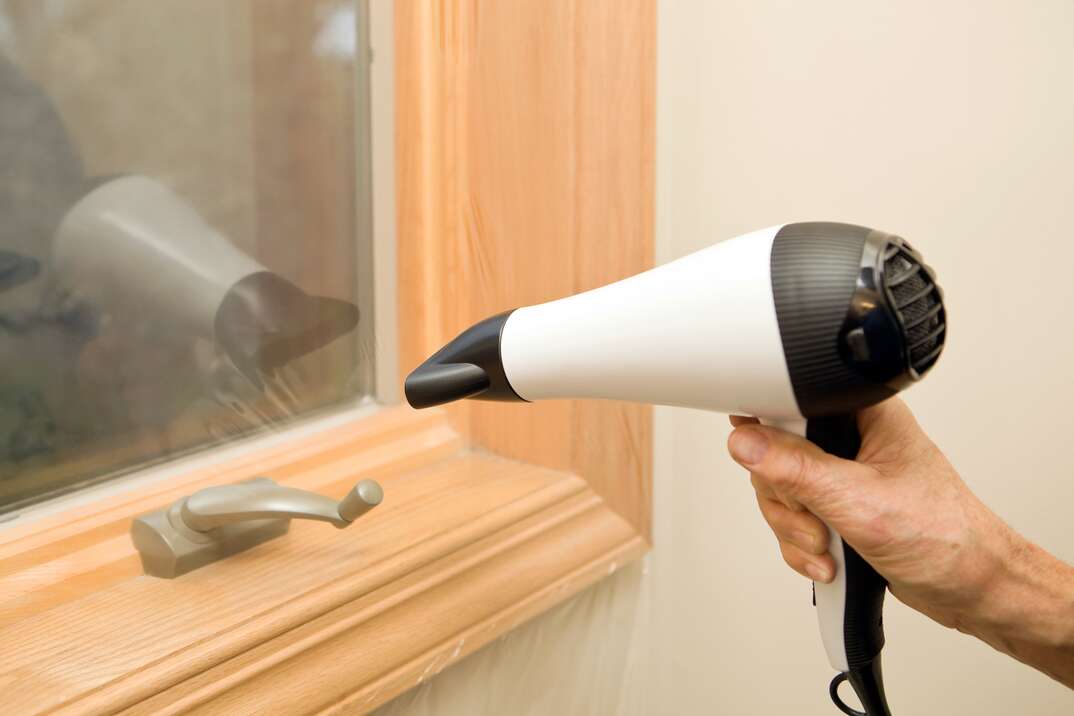
2. Check for Moisture
According to the DIY Network, another important step is to check for moisture that could affect the final finish. If you have high groundwater or the concrete was poured without an underlying vapor barrier, the epoxy may not adhere properly. One way to determine if you have moisture issues is to tape a piece of clear plastic over the floor for 24 hours. If the concrete darkens or droplets form, moisture is somehow getting through the floor. If this happens, it’s best to consult a professional about how to epoxy your garage floor.
3. Check the Weather
Before you get started on your epoxy project, ensure the temperature is 60 degrees or warmer and check that rain isn’t expected on the days you intend to epoxy and cure your floor. The warmer the temperature, the faster your epoxy will dry. At temperatures below 60 degrees, the epoxy may not set at all.
4. Clean the Floor
Next, you should thoroughly clean the floor. Give it a good sweeping with a broom, making sure to get dirt and dust out of corners and around garage door tracks. Scrape off as much dirt and grease as possible. If there are certain areas that contain grease stains, apply a full-strength degreaser and scrape the surface.
Clay cat litter also helps draw oils out of concrete. Unless grease is completely removed, those areas will repel the epoxy. Once you’re confident that the oil stains are gone, use a push broom to scrub the floor with a diluted degreaser, then rinse. Using a squeegee to remove any standing liquid will help it dry more quickly.
5. Fix Any Flaws
If there are any deep scratches, cracks, holes or chips in the floor, you’ll want to repair them before you apply the epoxy. Make sure to avoid latex-based fillers, as they may shrink over time. Fill any holes and cracks using a plastic spackling knife. Allow the filler to harden completely, then sand the area.
6. Etch the Floor
Most garage floor epoxy kits contain a citric acid solution that opens up the pores in the concrete. This gives the epoxy a good surface to stick to. Another way to accomplish this is to use a floor grinder, but most professionals prefer to etch with citric or muriatic acid. Mix the citric acid powder with warm water according to instructions. Apply the solution, scrub it in and squeegee the floor. Let the floor dry completely overnight or longer. Setting up fans will speed the drying process.
More Related Articles:
- How to Clean Your Garage Floor
- Backed Up in the Garage? Here’s How to Unclog Your Floor Drain
- The Ultimate Guide to Garage Storage Hacks
- 5 DIY Garage Door Makeover Ideas
- How to Program a Garage-Door Opener: A Step-by-Step Guide
Part 2: Apply Epoxy
Once the area is prepped, you’re ready to apply the epoxy.
7. Tape off Areas
Use painter’s tape to tape off any areas that you want to remain free of epoxy. If you’re keeping your garage door closed, make sure to tape off the bottom. Remove the tape about 30 minutes after the epoxy appears firm. If you wait any longer, you may not get a clean line when removing the tape.
8. Mix the Epoxy
Epoxy is available in a range of colors, but the most commonly used hues are gray and tan. Before you begin mixing, read the manufacturer’s instructions. Epoxy kits come with two cans — one large and one small. Usually, these are labeled “Part A” and “Part B.” Pour the smaller can into the larger one and mix until it is fully combined. If you’re using more than one kit, make sure to mix them all in one batch.
Read the instructions on the can and allow the epoxy to react for the recommended amount of time. This step is vital unless you want a gooey mess that never dries. It’s also a good idea to put a drop cloth underneath your mixing area to avoid getting any spills or splashes on the floor.
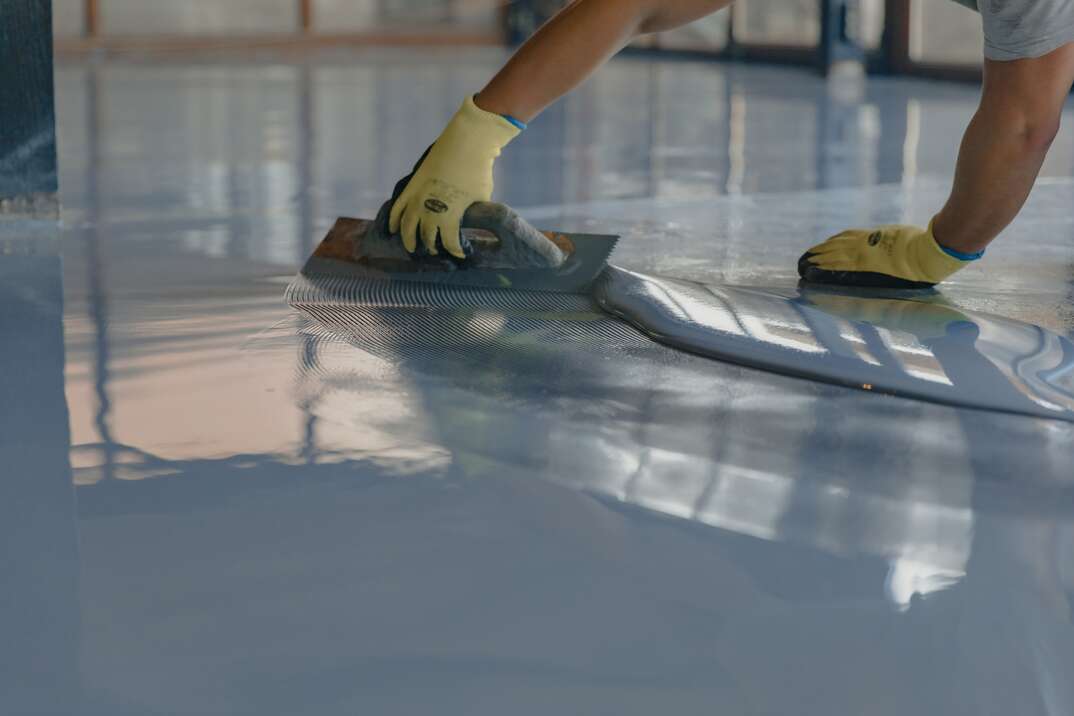
9. Apply the Epoxy
Once it’s ready, pour the epoxy into a tray. Use a paintbrush along the corners and edges of the garage. Do this immediately before rolling the rest on the floor because the epoxy must be wet when the colored flakes are applied.
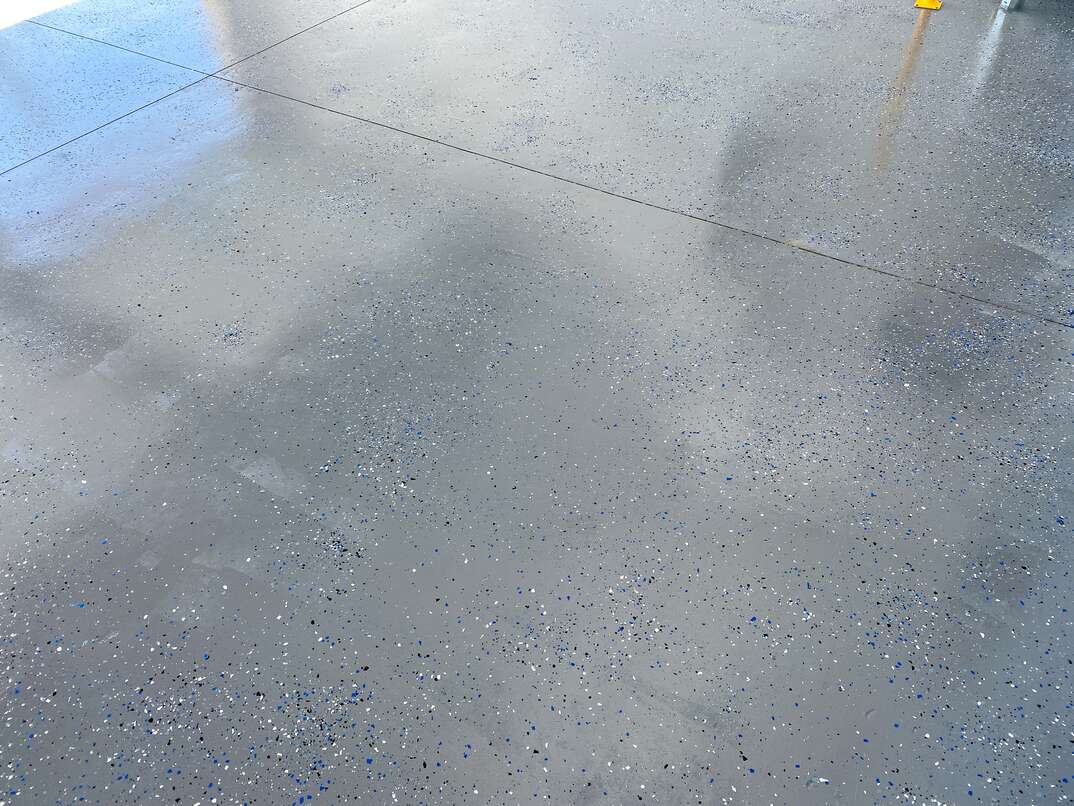
Start rolling generous amounts of epoxy. The DIY Network recommends working in 4-foot by 4-foot sections. The concrete will absorb a lot of the epoxy, so the floor won’t get a good gloss on it if the coating is too light. Sprinkle on the colored flakes as you go. Not only do these flakes create a colorful look, but they also add some grip to the floor.
10. Let the Floor Cure
After putting so much sweat equity into your new floor, you’ll want to make sure you let it fully cure. Wait at least 24 hours before walking on it or putting items back in the garage. You can pull your vehicles in after 72 hours.
Is It Worth It to Epoxy a Garage Floor?
Epoxy provides a durable, beautiful surface that’s easy to clean. It’s also great for basements and other concrete surfaces, like countertops. Depending on whether you DIY or hire a professional, the cost of applying epoxy to a garage floor can range from a few hundred to a few thousand dollars.
Being prepared with a home repair plan from HomeServe can give you peace of mind. With a plan in place, you can rest easy knowing you can simply call our 24/7 repair hotline for covered breakdowns. See what plans are available in your neighborhood.