How to Fix Nail Holes in Walls: A 7-Step Guide
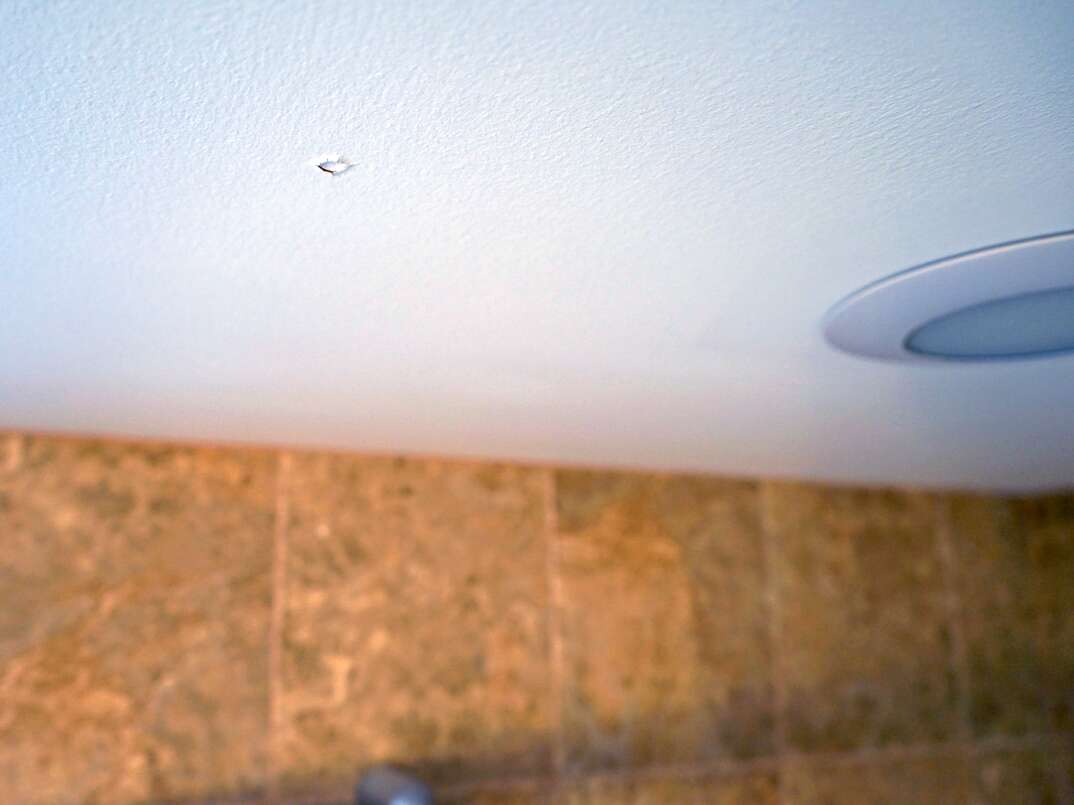
Nail holes or tiny dings in your walls. So small and insignificant and, yet, such a distracting eyesore. Even if guests in your home wouldn’t likely notice them, to you, these imperfections feel like your own personal edition of “The Tell-Tale Heart” — peering at you like a vulture-eye until you nervously point them out just to let your visitors know that you know that they know. It really doesn’t have to get so dark.
This May Also Interest You: How to Finish Drywall: Taping, Mudding and Sanding
Even if your home-maintenance involvement is typically limited to turning on the Roomba as you leave the house, trust us: You have what it takes to perform this simple repair job that’ll touch up your wall blemishes and spare you all that Poe-like paranoia.
Here are seven simple steps for repairing nail holes in your walls:
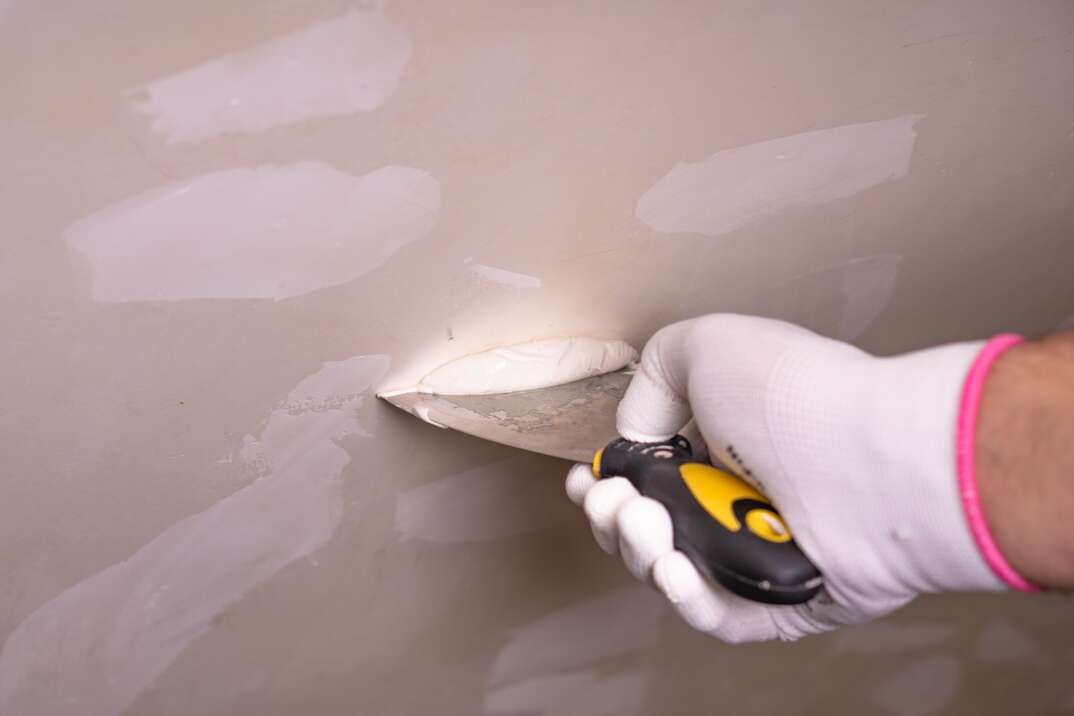
1. Gather Tools and Materials
You’ll need a putty knife, a container of pre-mixed spackling paste, fine-grit sandpaper and a damp utility rag, as well as matching paint, paint primer and a small paint roller.
2. Prep Area Around Hole
Gently clear away any larger loose debris with your putty knife and very lightly sand the surface immediately around the hole with your sandpaper. Then, wipe away any residual dust with your lightly dampened rag.
 -------------------------------------------
3. Apply Spackling Paste
Scoop a small amount of spackling paste onto the corner of your putty-knife blade (it doesn’t take much for nail holes) and smear it over the hole in one smooth motion so that it’s flat. It needn’t be perfect because you’re going to touch it up later anyway.
4. Let It Dry
Follow the manufacturer’s directions on the label of your spackling compound, but you should only have to wait for about 2 hours until it’s sufficiently dry to resume work.
5. Inspect and, If Necessary, Repeat
The spackling compound will shrink as it dries, and that could result in it recessing into the hole and creating an uneven surface. If so, you may need to repeat the application and wait for it to dry again. If not, you can move on.
6. Sand It Smooth
Use finer-grit sandpaper — anywhere from 80 to 220 should do — to smooth out the spackled area. Again, wipe away the resulting dust with your rag.
7. Touch It Up
Now, restore your wall to its former glory by priming and painting over the repaired area with a matching color using a small paint roller.
More Related Articles:
- How to Fix a Hole in the Wall like a Pro
- How to Hang Drywall: A 7-Step Overview
- How to Install Floating Shelves (It’s Not as Hard as It Looks)
- How to Mount a Flatscreen TV to a Wall
- How Much Does It Cost to Paint a Room?
Since we’re all home now more than ever, being prepared for unexpected home repairs with a plan from HomeServe is important. Having a plan in place gives you the peace of mind knowing that you can simply call our 24/7 repair hotline for covered breakdowns. See what plans are available in your neighborhood.