Radiator Leaking? Here Are 3 Fixes for Common Problems
Radiator leaks can accelerate corrosion and rust formation on the unit, reduce the unit’s efficiency, damage the surrounding flooring and lead to toxic mold formation under carpets. Yikes. It’s clear that you’ll want to fix any radiator problem sooner rather than later.
This May Also Interest You: It’s Too Hot in Here! How to Turn Down Your Radiator
Fortunately, most radiator leaks can be quickly and easily repaired, although some may require the aid of a professional plumber. Here’s what you need to know.
How to Find a Radiator Leak
To find the source of the leak, first turn off the radiator and wipe down the radiator’s body, valves and pipe connections until they’re completely dry. Then, begin touching each part and component of the radiator with a piece of toilet paper, checking the paper for moisture after each application. Wherever the toilet paper becomes moist is where the leak is coming from.
The majority of radiator leaks originate from one of the following areas:
Main Body of the Radiator
Corrosion from inside the radiator can cause leaks in and around the body of the radiator. These leaks are referred to as “pinhole leaks.”
Valves
Most radiators are equipped with two valves: a thermostatic valve on the left side of the unit that regulates the radiator’s temperature and a lockshield valve on the right side that controls the balance of hot water inside the radiator. The spindle and gland nuts inside those valves can loosen or deteriorate over time, causing leaks.
Pipe Connections
The union nuts on either side of each valve — one connecting the water line and the valve and the other connecting the valve to the radiator — can loosen and leak over time.
Before You Begin
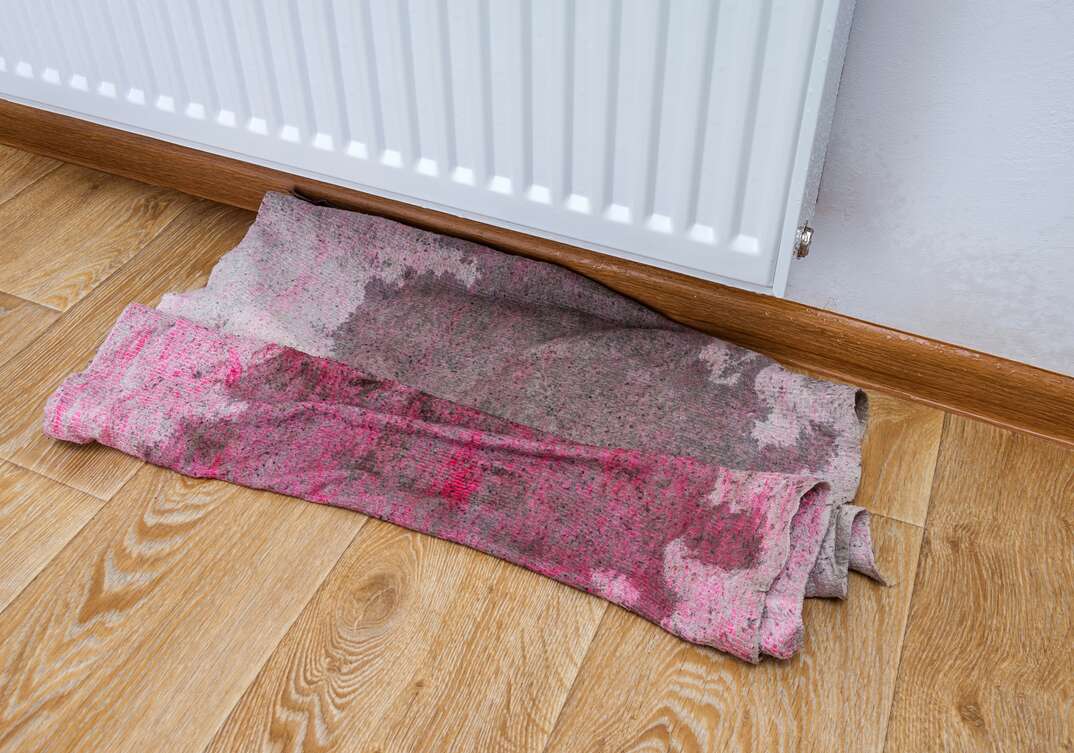
Before you get started, it’s a good idea to lay down towels on the floor around your radiator to protect it from water that may leak out during the course of your repair.
How to Drain Your Radiator
For certain repairs, you will first need to drain your radiator by taking the following steps:
1. Turn off the heat on the central heating system and allow it to cool down for about an hour.
2. Close the thermostatic valve.
3. Close the lockshield valve.
4. Place buckets underneath the thermostatic and lockshield valves.
5. Using an adjustable wrench or pliers, remove the nut connecting the thermostatic valve to the radiator and allow the water to drain. Repeat on the lockshield valve.
6. Open the bleeder valve with your radiator key to release any excess air and help the water flow out.
7. With both valves disconnected from the radiator, tilt your radiator to one side to allow the remaining water to drain out.
More Related Articles:
- Noisy Radiator: Why Does My Heating System Clang?
- Is It Safe to Put Things on or Near Your Radiator?
- 3 Reasons Your Radiator Is Hissing (and 3 Fixes You Can Try)
- How to Bleed Your Radiator
- How Much Does Boiler Repair Cost?
How to Fix a Radiator Leak
Things You’ll Need
- Adjustable wrench or pliers
- Towels and buckets
- Radiator key
- PTFE thread tape
- Compression fitting (if necessary)
- Flathead screwdriver
Leak at a Pipe Connection
Sometimes, fixing a leak at a pipe connection can be as simple as tightening down the union nut with an adjustable wrench or pliers. When tightening down the union nut, be careful not to overtighten it, which can damage the connection and make the leak worse.
If that doesn’t work, you will need to drain the radiator and disconnect the union nut from the pipe. Apply several wraps of PTFE thread tape around the pipe’s male threads (for threaded connections) or around the compression fitting (for compression connections), then reconnect the union and tighten it back down.
If your pipes use compression connections, inspect the condition of the compression fitting when you remove the nut. Compression fittings that break or become worn, which can allow water to leak out, so a damaged one needs to be replaced. Replace the old fitting with a new, matching one and wrap several layers of PTFE thread tape around the fitting. Reconnect the union nut, and tighten it down.
Leak at the Valve Gland and Spindle
Inside the thermostatic and lockshield valves is a vertical metal shaft (or “spindle”) that’s attached to the top of the valve with a gland nut. If your leak is coming from inside the valve, it’s likely that either the spindle or the gland nut is to blame. Remove the valve’s top cap by pulling it off by hand to access the spindle and gland nut. If your top cap is held in place with a screw, remove the screw from the cap before pulling it off.
With the cap removed, use an adjustable wrench to tighten the gland nut and see if that stops the leak. If not, completely remove the gland nut and wrap a few layers of PTFE thread tape around the male threads, then reconnect the nut.
If it’s still leaking, the cause may be deteriorated packing material around the base of the spindle. Wrap about 6 to 8 inches of PTFE thread tape around the base of the spindle, then use a small flathead screwdriver to press the tape down into the body of the valve.
If the above steps fail to fix the leak, you may need to replace the entire valve. Drain the radiator and disconnect the union nut from the water line to remove the old valve. With a new, matching valve, wrap a few layers of PTFE thread tape around the valve’s male threads or compression connections, then reconnect the union nuts on the water line and radiator. If you’re uncomfortable replacing the valve yourself, have a professional plumber do it instead.
Pinhole Leak in the Body of the Radiator
Pinhole leaks are usually caused by internal corrosion that often indicates that the radiator needs to be replaced by a professional plumber. However, you may be able to temporarily stop the leak by applying cold weld epoxy to the leak on the outside of the unit, or by adding a leak sealer solution to the inside of it.
If using a leak sealer solution, it’s important to use a formula that’s designed for your heating system. Some are meant to be applied to the boiler in a central heating system, while others are epoxy-based sealers only meant for stand-alone radiators. Applying an epoxy-based sealer to a central heating system can damage or destroy your boiler.