How to Install Crown Molding
Crown Molding Installation at a Glance
- Tools & equipment: Miter saw with table, tape measure, safety glasses, safety gloves, caulk gun, nail gun, ladder
- Step 1: Measure walls
- Step 2: Cut crown molding pieces
- Step 3: Check fit
- Step 4: Mark position
- Step 5: Repeat cut, check, positioning for outside corners
- Step 6: Nail pieces in place
- Step 7: Caulk and spackle
- Step 8: Paint
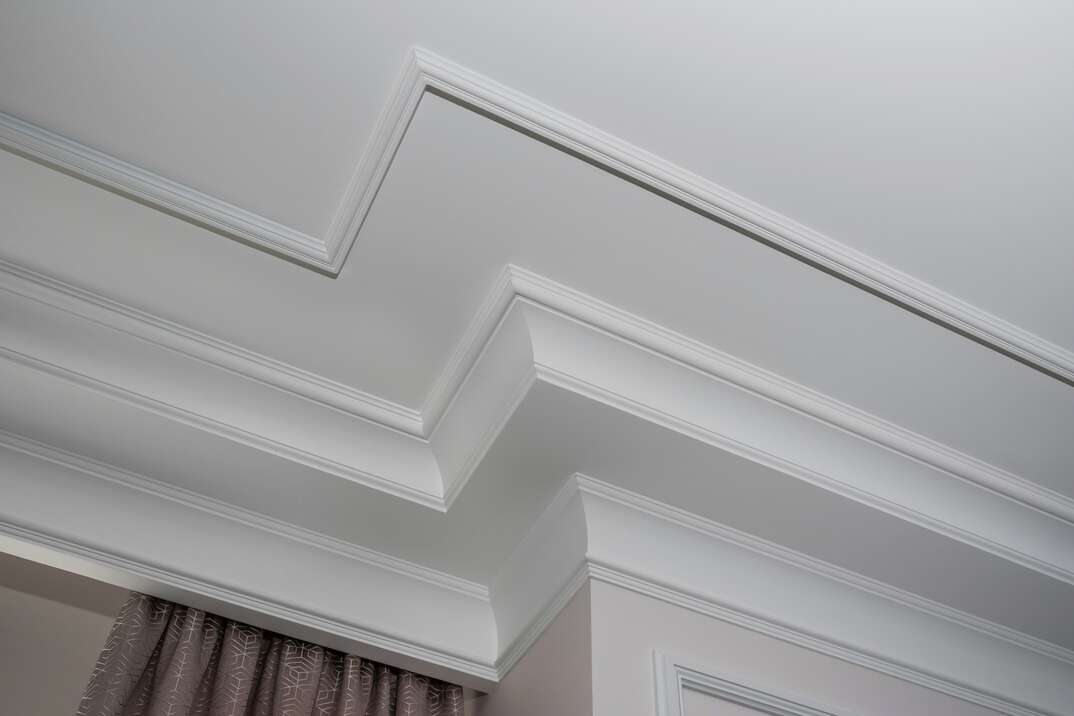
Crown molding originally started as a way to hide cracks where walls meet the ceiling and has evolved into a design feature that can make a ceiling more aesthetically pleasing and make an entire room feel more tasteful. The flourish makes ceilings appear higher than they actually are, making a living space feel bigger. While it’s common to use for walls and ceilings, another type of crown molding also exists exclusively for cabinets.
This May Also Interest You: How Much Does It Cost to Install Crown Molding?
There are many different styles and trends that anyone looking to use this as a home improvement project can choose from. Crown molding can be made of different materials, but one of the most popular options is wood.
If you’re looking to install crown molding as a home improvement project, it’s doable for a nonexpert but requires patience and attention to detail. Read on for a rundown of everything you need to know about crown molding — including a step-by-step guide to follow for installing it.
Is Crown Molding Easy to Install?
While crown molding isn’t the most challenging home improvement project, it does require specific tools and carefully following proper procedures. It’s typically a daylong project that can take 5 to 8 hours for someone with minimal experience and 2 to 4 hours for someone who’s more handy. The most difficult part about installing crown molding is getting the correct measurements and cutting it cleanly and precisely at a 45-degree angle so it fits seamlessly with the other pieces. If you’re not very comfortable using tools, consider hiring a professional to do it instead.
A Step-by-Step Guide to Installing Crown Molding
Start by gathering the necessary tools and equipment. The must-have implements for this project are a miter saw with a table, a tape measure, safety glasses, safety gloves, a caulk gun, a nail gun and a ladder.
1. Measure Your Walls
Measure the walls using your tape measure to get an accurate length you need your pieces to be. Once you have the measurements, you get to perhaps the most crucial part of the process. Cutting the crown molding at correct angles and lengths to fit tightly with one another is vital to a successful outcome. To ensure you get the right size, place the piece of crown molding against the wall and mark with a pencil where you want to cut it.
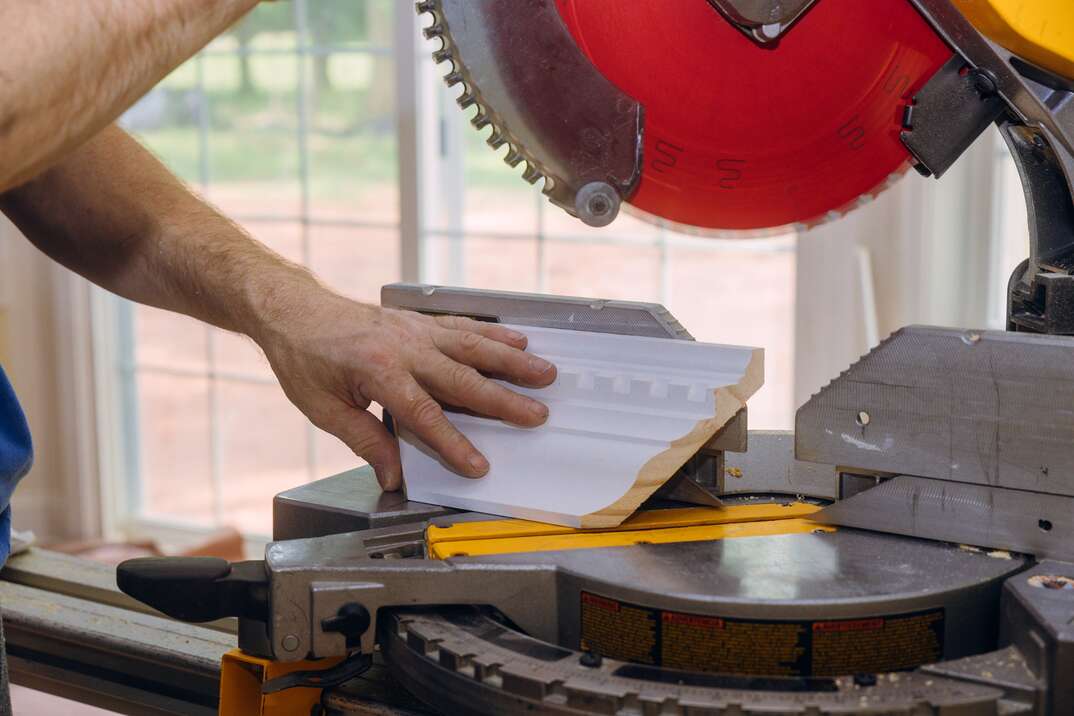
2. Make the Cuts
According to Home Depot, best practice is to use the miter saw to cut the crown molding in an upright position. For the inside cut of the left side of the piece, use a saw blade at a 45-degree angle to the right. Then switch to the other side, and cut at a 45-degree angle to the left.
Ensure that all cuts are clean all the way to the corner. Sometimes, the crown molding corner might not have been completely cut off, in which case you’ll want to put it back on the table and use the miter saw to trim off anything to get a clean angle.
3. Check the Fit
Once you have your cuts ready, place the piece of crown molding against the wall. If you have a helper on hand, have them hold it up. Now, take the two parts the molding was cut from and place them against the piece that’s being held up on both sides, as shown here. Ensure that both pieces fit tightly into one another and adjust the piece being held up until it does.
4. Mark Your Spot
Once the pieces are in the correct place, use a pencil to mark these spots. Since you’ll eventually be painting over it, you don’t have to worry about the marks. A common mistake people make is to skip this step and simply attach the piece in place, as is. What can happen if you do that is, when you try to put the other inside piece against the current one being held up, it doesn’t fit as tightly as it should.
5. Repeat Process for Outside Corners
When a room has more than four walls on which you want to install crown molding, you’ll also need to cut outside corners. Like inside cuts, you’ll cut it at a 45-degree angle, but this time you’ll cut it at an outward angle. Just like the process for inside corners, place the outside crown molding piece against another piece and adjust its placement until there’s a tight fit.
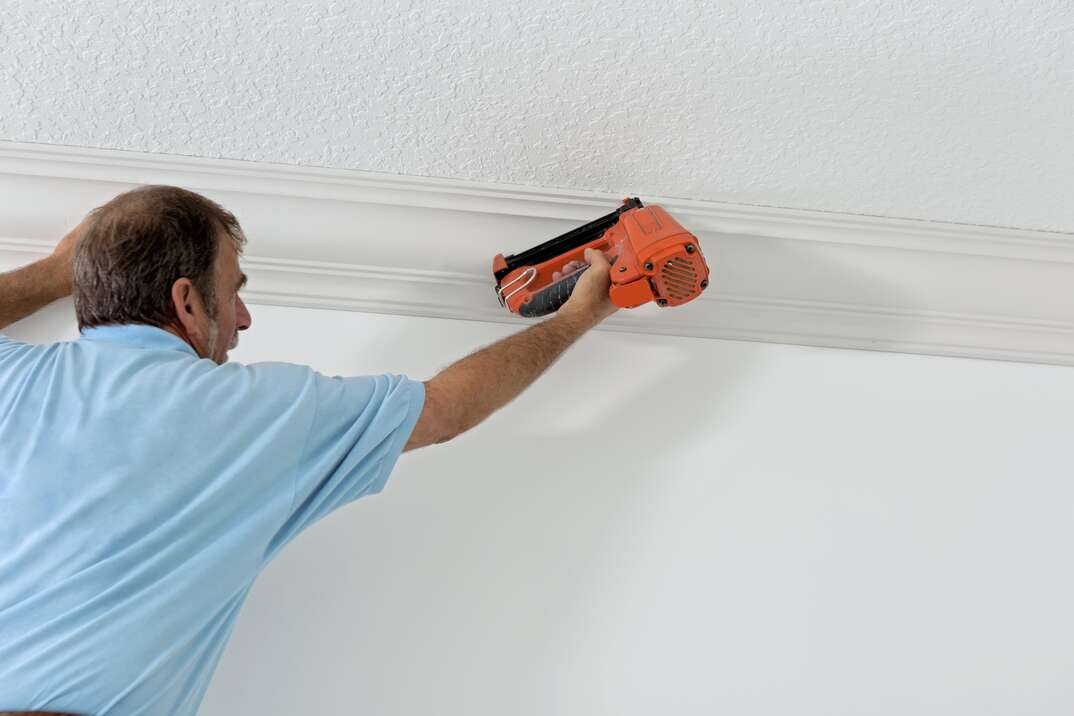
6. Nail ’Em!
At last, it’s time to affix your crown molding to the wall. Here’s where those initial marks you drew on the wall come in handy; you can add caulk just below them before you place the crown molding. Adding caulk and then putting the crown molding in place will help make it more durable in the long run. Once you have the crown molding pieces in their correct positions, drive two nails at opposing angles through the top-middle portion and two through the low-middle portion of each crown molding piece, as shown here. Do the same for the opposite ends.
More Related Articles:
- Ensure Your Shiplap Walls Are Shipshape With This Step-by-Step Installation Guide
- What Is Wainscoting?
- How to Install Floating Shelves (It’s Not as Hard as It Looks)
- How to Hang Drywall: A 7-Step Overview
- How to Fix a Hole in the Wall like a Pro
7. Caulk ’n’ Spackle
After the crown molding has been nailed to the wall, take your caulk gun and apply caulk from one side of the molding to the other side. Follow the same procedure for the top and bottom. If you’re tempted to add caulk to the nail holes, stop yourself; once the caulk dries, that'll leave noticeable dents on the wall after you paint over it. Instead, use spackle or drywall compound to fill in the nail holes.
8. Paint at Your Pleasure
There are no hard-and-fast rules when it comes to choosing a paint color for crown molding. You can paint it the same color as the wall to make the ceilings look higher, or you can paint it a completely different color than the wall or ceiling to draw attention to it. If there are any imperfections in your ceilings or walls, having crown molding that stands out can easily divert the eye away from them.
Since we’re all home now more than ever, being prepared for unexpected home repairs with a plan from HomeServe is important. Having a plan in place gives you the peace of mind knowing that you can simply call our 24/7 repair hotline for covered breakdowns. See what plans are available in your neighborhood.