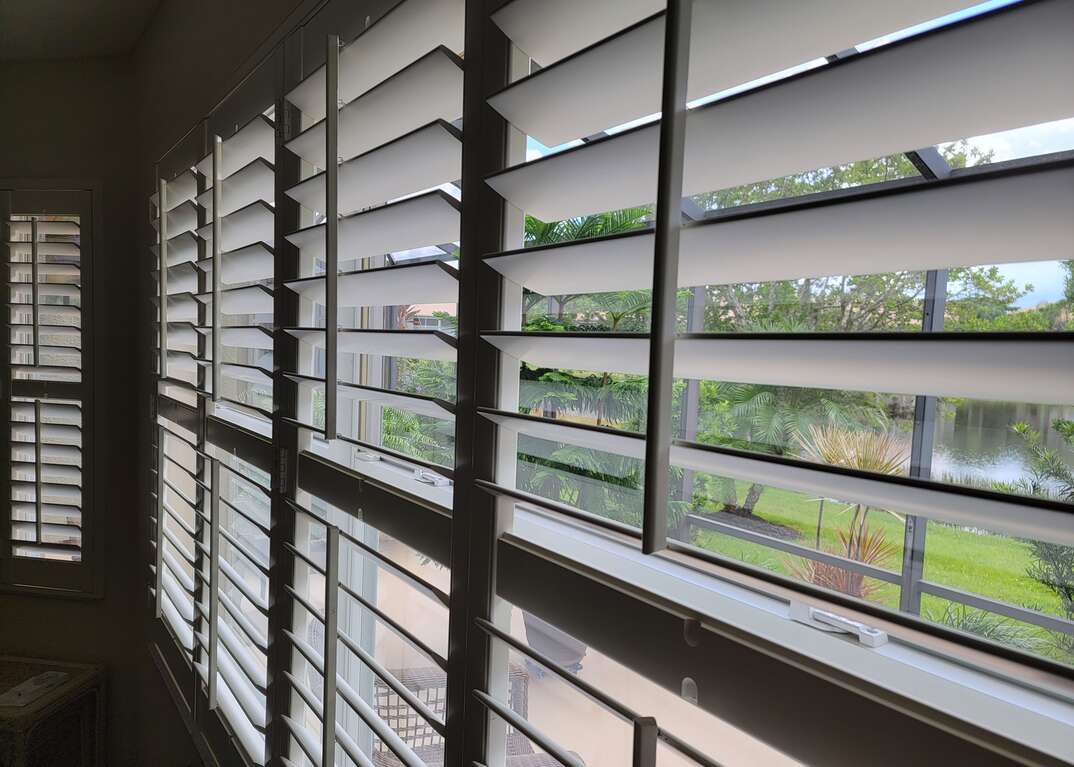
How to Install Plantation Shutters
HomeServe photo by Matt Schmitz
Installing Plantation Shutters at a Glance
- Tools & Materials: Measuring tape, hammer, level, drill, filler strips, window fillers
- Step 1: Measure windows
- Step 2: Assemble frame
- Step 3: Mount frame
- Step 4: Hang shutters
- Step 5: Make adjustments
When you think of window coverings, curtains and blinds are probably the first things that pop into your mind. However, there are some unique and attractive alternatives for adding privacy and insulation to your windows. A notable example is plantation shutters. They look great, are easy to install and offer all the advantages of conventional blinds and curtains.
This May Also Interest You: What Are ‘Plantation Shutters’ ... and What’s Up With That Name?
If you’re interested in adding plantation shutters to your windows, use this installation guide to get started.
Types of Plantation Shutters
There are two main types of plantation shutters: inside-mount and outside-mount. Inside-mount shutters are installed directly onto the window jamb — between the window trim — and sit flush with the surrounding wall when closed. Outside-mount shutters are installed onto the wall — outside the window trim — and slightly protrude into the room when closed.
Inside-mount shutters offer a sleeker and cleaner appearance than outside-mount shutters, so they’re usually the type preferred by most homeowners. However, inside-mount shutters can’t be used under certain circumstances, such as:
- On windows that are recessed into the wall less than 3 inches.
- On windows that open by tilting into the room
- On windows equipped with a hand-crank for opening and closing the window
At the end of the day, the type of shutters you choose will largely depend on what your window will accommodate and what style you personally prefer.
HomeServe photo by Matt Schmitz
How to Install Plantation Shutters
Tools & Materials
- Measuring tape
- Hammer
- Electric drill
- Spirit level
- Filler strips (optional)
- Window fillers (optional)
Step 1: Measure Your Windows
The most important step in successfully installing plantation shutters is purchasing shutters that will fit your window. This involves taking accurate measurements.
For inside-mount shutters, measure the height of the recessed area — in between the window trim — in three locations: the left side, middle and right side. For outside-mount shutters, measure in those same three locations, but measure from the outside of the window trim (where it meets the wall) instead of the inside.
Next, measure the width by measuring at the bottom, middle and top. Again, measure between the window trim for inside-mount shutters and outside window trim for outside-mount shutters.
Use the smallest of the three length and width measurements to either purchase standard-sized plantation shutters, or have them custom made based on your window’s specific dimensions.
Step 2: Assemble the Frame
While some plantation shutters can be purchased with pre-assembled frames, many come with individual frame pieces that need to be assembled prior to installation.
Lay the frame pieces out on the floor with the 45-degree angles (“miters”) of two adjoining pieces facing each other. Depending on the frame, there will either be one or two grooves on each miter where a Hoffmann key — a small, double-sided V-shaped piece — is inserted to secure the two frame pieces together. These Hoffman keys should be included with the frame.
Line up the miters so the Hoffman key grooves are aligned, and insert a Hoffman key into one of the grooves. If there are two grooves, with one being deeper than the other to accommodate a larger Hoffman key, then insert the larger key first.
Use a hammer to lightly tap on the Hoffman key until it’s fully inserted. Repeat this on the second, smaller Hoffman key if included. Repeat these steps on all the mitered frame pieces.
On some frames, the bottom piece won’t be mitered or have grooves for a Hoffman key, but will instead use screws to secure each of the bottom piece’s ends to the frame’s two side pieces. In many cases, the screw holes (or “pilot holes”) will come pre-drilled from the factory. When that’s the case, line up the pilot holes on the bottom piece with the corresponding pilot holes on each side piece and drive the provided screws into the pilot holes with an electric drill.
If the pilot holes aren’t pre-drilled, use an electric drill equipped with the drill bit recommended by the manufacturer to drill the pilot holes in the locations they recommend. Then, drive the screws into the pilot holes.
More Related Articles:
- How Much Does It Cost to Install Plantation Shutters?
- Here’s How to Apply Plastic Film to Insulate Your Windows
- How to Replace Your Windows
- Make Sure Your Window Wells are Well Maintained With This Checklist
- How Much Do Different Types of Window Treatments Cost?
Step 3: Mount the Frame
Inside-Mount Shutters
Place the assembled frame inside the window jamb. If there are large gaps between the jamb and the frame, use filler strips to close the gaps. Many plantation shutters will come with a bundle of filler strips, but they can also be purchased at most home improvement stores if they’re not included with the frame.
Once placed inside the window jamb, lay a spirit level on each side of the frame to ensure it’s level. If not, use window packers (U-shaped shims made for leveling window frames) at unlevel sections to adjust the frame until it’s level.
If the mounting screw holes aren’t pre-drilled into the frame pieces, use the drill bit recommended by the manufacturer to drill the pilot holes at the top, bottom and middle of each frame piece.
Beginning with either the top frame piece or a side piece (whichever is easiest for you), drive a screw into the center of the piece. Use a spirit level to verify it’s still level, and drive the remaining screws into the top and bottom. Repeat these steps on each frame piece until the frame is fully mounted.
Outside-Mount Shutters
Use a helper to center the frame around the window opening. Beginning with the top of the frame, drive a screw into the middle of the frame piece to secure it in place.
Place a spirit level onto the top of the frame, and adjust it until it’s level. Then, drive a screw into both ends to lock it in place. Place the spirit level onto one of the side pieces and adjust until level. Drive a screw into the center of that piece, verify it’s still level and drive a screw into the top and bottom. Repeat these steps on the remaining frame piece until it’s fully mounted.
Step 4: Hang the Shutters
Many plantation shutters come with pre-installed hinges on the frame and shutters, and will have each shutter labeled to indicate which side of the frame it should be installed on.
Line up the hinge’s cylindrical tubes (“knuckles”) on the shutters with the knuckles on the frame. Insert a hinge pin through the top of the knuckles on both hinges to connect the shutter to the frame. Repeat these steps on the second shutter.
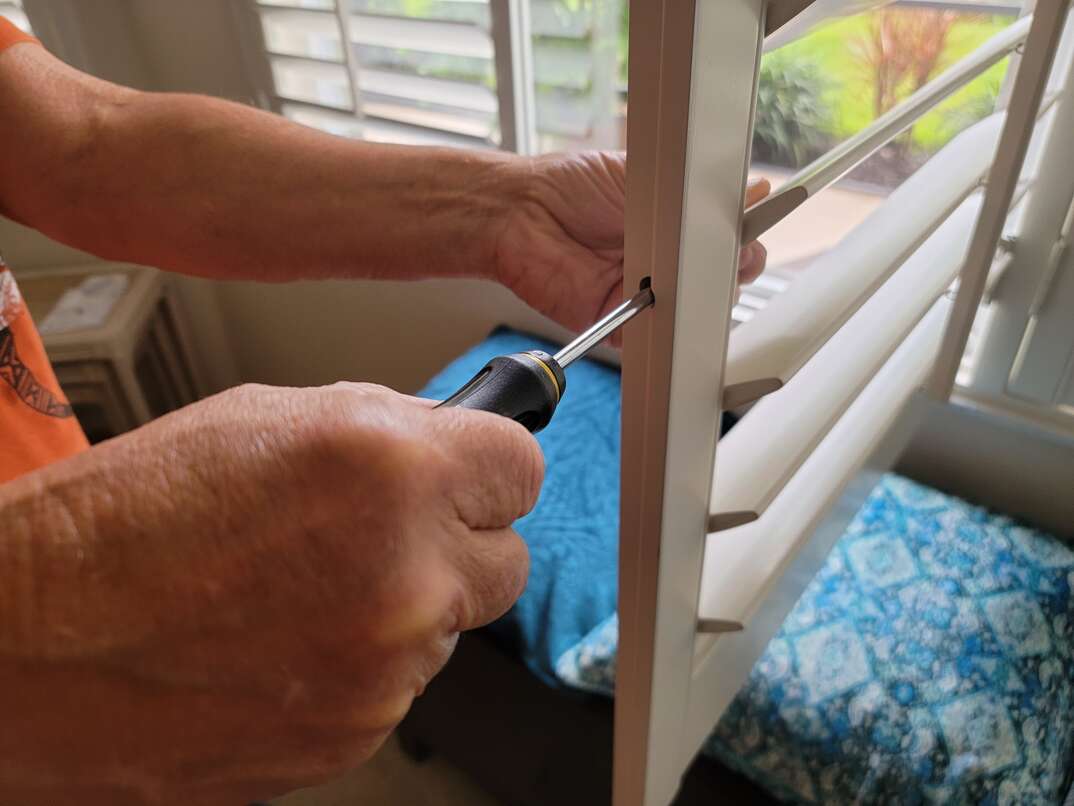
Step 5: Make Final Adjustments
Close the shutters and examine the vertical gap (“reveal”) where the edges of the two shutters meet. If the reveal isn’t even and consistent from top to bottom, you can correct it by adjusting the hinges on each shutter.
Most hinges have adjustment screws that allow the shutter to move vertically and horizontally. Simply experiment with loosening and tightening these adjustment screws until the reveal is perfectly even.
Once you’re satisfied with the reveal, drive the provided screw into the remaining hole on each hinge. This will lock in the adjustment and prevent the shutters from getting misaligned with everyday use.
Finally, open and close the shutters to make sure they’re functioning properly. Your installation is now complete.