How to Install or Replace a Bathtub Drain
Installing or Replacing a Bathtub Drain at a Glance
- Tools & Materials: New drain assembly, drain key, flathead screwdriver, plumber’s putty, putty knife, rubbing alcohol
- Step 1: Remove old stopper
- Step 2: Take out drain flange
- Step 3: Install new drain flange
- Step 4: Insert new stopper
Slow drains are one of the most common household plumbing issues, and they can cause significant annoyance and inconvenience. If your tub is draining slowly or you notice that your drain is damaged, it's probably time for a bathtub drain replacement.
This May Also Interest You: How to Remove a Bathtub Drain
While you can always ask a professional plumber to remove your bathtub drain and install a new one, it's a lot cheaper to do the job yourself. Replacing a bathtub drain is a reasonably easy task, even for plumbing rookies. Just follow the instructions below and invest in the right equipment for the job.
Bathtub Drain Replacement: Step-by-Step Instructions
Removing and replacing your bathtub drain is a quick and straightforward job that should only take about an hour. Before you start, make sure you have the following parts and equipment at hand:
- New drain assembly
- Drain key
- Flathead screwdriver
- Plumber's putty
- Putty knife
- Rubbing alcohol
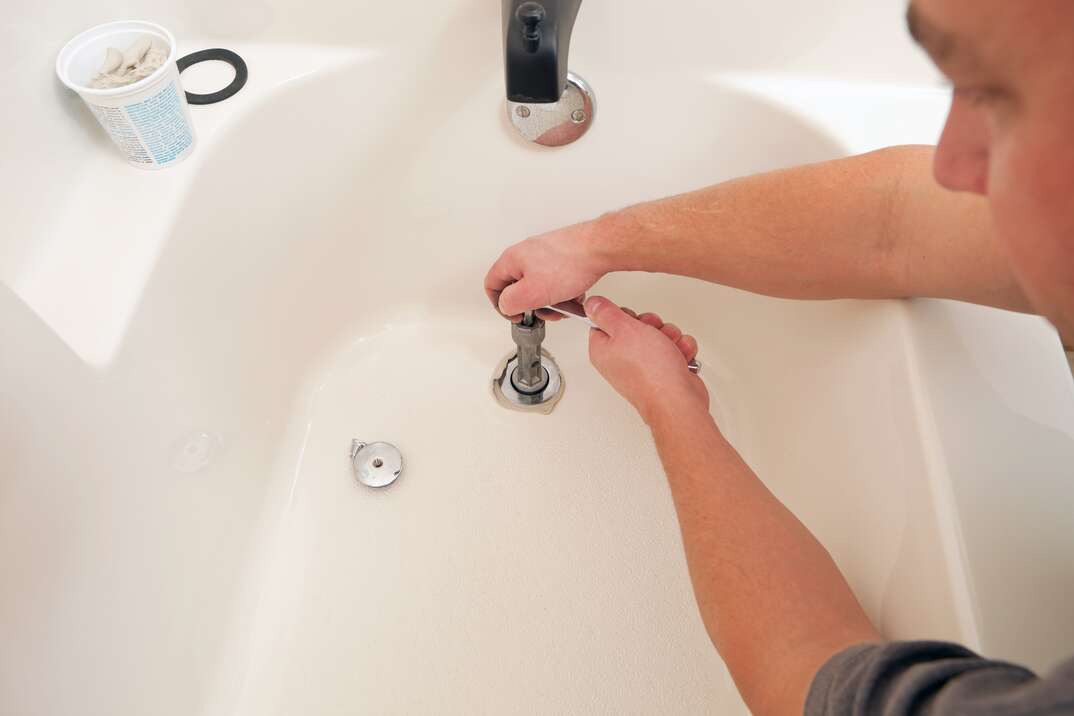
Step 1: Remove the Old Stopper
Start by taking out the old bathtub drain assembly, making sure it's unclogged first. If you have a foot lock stopper, open the drain and turn it to the left (counter-clockwise) until it becomes detached. You can then lift the stopper out.
Lift-and-turn drain stoppers are also straightforward to remove. If your model has screws, unscrew them until you can pull the stopper free. If you don't see any screws, try twisting the entire stopper counter-clockwise to see if you can loosen it that way.
If you have a lever stopper, take out the screws and then remove the overflow plate, linkage rod and plunger. You can then unscrew and remove the drain plate.
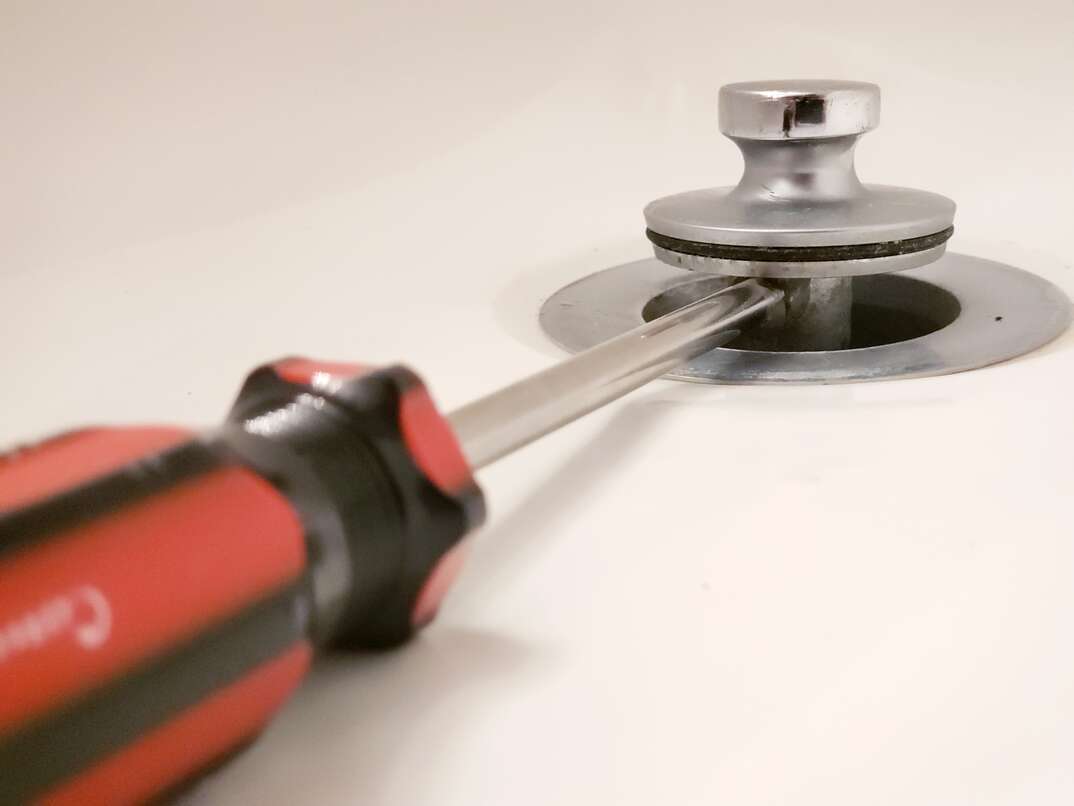
Step 2: Take Out the Drain Flange
You should now be able to see the drain flange, and you'll need to remove it before installing a new drain assembly. The easiest way to do this is with a specialized drain key. Turn the flange counter-clockwise until you can pull it out. You can buy a drain key relatively cheaply at most DIY stores.
Once the flange is out, carefully remove the plumber's putty around the drain with a putty knife. It's fine to rinse small putty particles down the drain, but you should dispose of any large pieces in the trash. Take care while scraping the putty away to avoid scratching your bathtub. If the putty is stubborn to remove, applying some rubbing alcohol can loosen it.
Step 3: Install the New Flange
Start by rolling out a thin sausage-shaped piece of plumber's putty. Then, place it around the perimeter of your new flange, pressing it down firmly to help create a secure, waterproof seal.
Some bathtub drain assemblies come with a rubber gasket. If yours has one, install it around the edge of the drain and then place the new flange inside. Using your drain key, screw the flange clockwise until you have a tight seal connecting the drain to the drain pipe. Avoid overtightening the flange, or it will be very difficult to remove when you next need to repair or replace it.
Step 4: Insert the New Stopper
If your new assembly has a separate bathtub drain stopper, connect it by twisting it clockwise into the flange. You may need to attach it using screws, so take care not to drop them down the drain. Lever drains come with a plunger and linkage that you need to push into the overflow pipe. Every drain assembly has a slightly different installation protocol, so it's important to defer to the manufacturer's instructions. Check carefully that the assembly you plan on buying is the correct size for your bathtub.
Finally, it's time to check that your bathtub drain assembly is watertight. Close the bathtub drain stopper and turn on the faucet to run a few inches of water into the tub. Leave it for a few hours, observing now and then to check that the water remains at the same level. If it doesn't, check the seal for any gaps or loose connections and reseal with more plumber's putty if necessary.
More Related Articles:
- How to Remove a Bathtub Stopper
- How to Remove a Bathtub in 4 Simple Steps
- Scrub-a-Dub-Dub: How to Clean Your Bathtub
- How to Install or Replace a Bathtub
- How Much Does It Cost to Replace or Install a Bathtub?
Do I Need Plumber's Putty for a Bathtub Drain?
Applying plumber's putty is an important part of the process because it helps form a watertight seal between the drain and the drainpipe. If you skip this step, water will constantly trickle down the drain, eventually leaving you with an empty bath. Fortunately, you can pick up plumber's putty reasonably cheaply online or from a hardware store.
Does a Bathtub Drain Need a P-Trap?
A P-trap is a curved section of drain pipe that traps water, helping flush away debris every time you empty the bath. You should always use a P-trap when installing a bathtub or any other plumbing fixture. If you don't, your system could get very smelly and allow harmful sewer gases into your home, which could have serious health consequences. Not installing a P-trap could even allow small pests to climb through your pipes and into your living space.