Ensure Your Shiplap Walls Are Shipshape With This Step-by-Step Installation Guide
What if you could the look of reclaimed wood at a fraction of the cost? Perhaps you’re looking to do an accent wall in your living room, or to cover the walls in your home office. No matter which walls you’re looking to dress up, shiplap is a stylish option to consider.
This May Also Interest You: How to Fix a Hole in the Wall like a Pro
Shiplap gives your home a rustic, timeless touch. But, you may be asking yourself, what exactly is shiplap? Read on.
What Is Shiplap
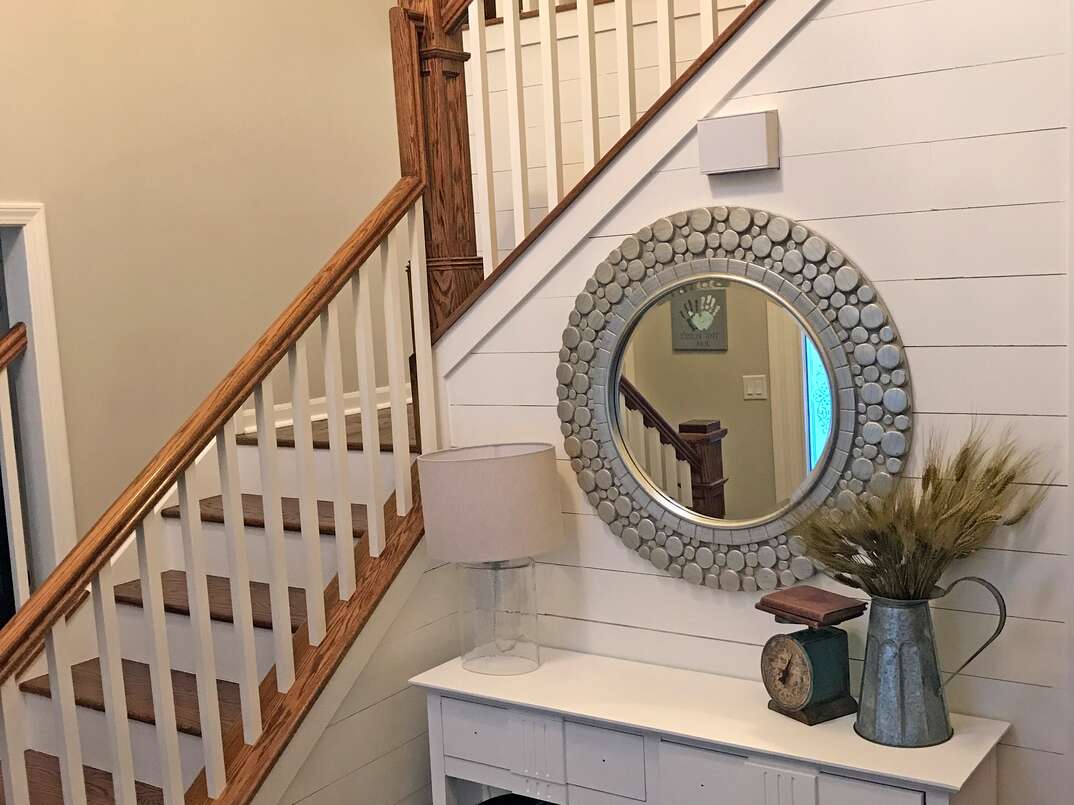
Shiplap is simply the term for the a wall treatment composed of boards that have grooves cut into their edges for a tight, overlapping fit. In interior-design terms, it’s a style of wooden siding characterized by long planks that are normally painted white and mounted horizontally with slight gaps between them. The manner in which they’re hung is intended to resemble exterior shiplap walls.
Shiplap walls can be used to create a focal point in any room and can play up the rustic look with a few simple accessories. They’re also an easy do-it-yourself job.
How to Measure a Wall for Shiplap
Measuring your wall for shiplap is the first step for a successful installation. Proper wall measurements will allow you to calculate the amount of shiplap needed to ensure a proper fit.
Here are four steps for determining how much shiplap you need:
Step 1
Using a tape measure, measure along the bottom of your wall for the width, and from the floor to the ceiling for the height. Make sure you measure in multiple areas, as ceilings and floors can be uneven.
Step 2
After finding the height and width, multiply them together to find the square footage of the area you wish to cover.
Step 3
You’ll then need to decide on what type of shiplap board you want to use. After that, you’ll need to calculate the square footage of one board. The most common is 5 inches x 12 feet, covering 5 square feet.
Step 4
Next, take the total square footage you calculated for your needs and divide it by the square footage of an individual plank to get the total amount of planks needed to complete your project.
Example: If the room is 96 square foot and you’re using the 5x12 boards, divide 96 by 5, which comes out to 19.2 boards. So you would round up and buy 20 boards. Consider purchasing one or two extra boards in case one is damaged or in case you make a bad cut.
Where to Buy Shiplap
You can purchase shiplap from most home-improvement stores, and the big-box stores typically offer a wide variety. You could also go online and order from a direct supplier. Wherever you decide to buy, make sure you compare prices and quality indicators.
Average Cost of Shiplap
Shiplap prices range from $2.50 to $7 per square foot for real boards. Those prices can vary depending on the length and width of the board you’re using for your project.
More Related Articles:
- How Much Does Drywall Cost?
- What Is Wainscoting?
- How to Finish Drywall: Taping, Mudding and Sanding
- Need an Extra Hand? Here’s How to Hire a Handyman
- How Much Do Professional Painters Charge?
Tools and Materials
OK! Now that you’ve measured your room, and picked out and purchased your shiplap after determining how much you need, you’re ready to start hanging it — and creating a whole new look for your room.
The tools you’ll need include:
- A saw
- A level
- A stud finder
- A hammer and nails
Installation Steps
Step1: Prep
The first step is to get your walls ready. Remove everything from your walls, including all trim, molding and baseboards.
Step 2: Paint
Shiplap has gaps in between the joints that let the wall color show through, so you’ll need to paint the walls the same color as your shiplap planks, or if you are going for a bolder look, you could paint them a contrasting color.
Step 3: Mark Studs
Use a stud finder to determine where your wall studs are, and mark them with a chalk line to make installation easier. According to The Home Depot, you’ll want to find and mark vertical studs.
Step 4: Mark Guidelines
Using a long level, draw a horizontal line near the bottom of your wall to serve as a starting point for your installation.
Step 5: Line It Up
Line up the top edge of the bottom row of boards with the horizontal guideline you created. Make sure your boards are level.
Step 6: Attach Planks
Use a nail gun to nail the top and bottom of each plank where it crosses a vertical stud. If you prefer, you can also use an adhesive hold the planks in place as you nail them.
Step 7: Insert Spacers
You can use nickels or other spacers between each row of shiplap to give it a more authentic look, or you can simply butt the boards together.
Step 8: Finish
Make sure you cut and arrange the planks such that they’re staggered from row to row. Repeat nailing and gluing until the entire wall is covered.
Since we’re all home now more than ever, being prepared for unexpected home repairs with a plan from HomeServe is important. Having a plan in place gives you peace of mind knowing that you can simply call our 24/7 repair hotline for covered breakdowns. See what plans are available in your neighborhood.