How to Stain and Seal Your Deck
Deck Staining and Sealing at a Glance
- Step 1: Check weather
- Step 2: Pressure wash deck
- Step 3: Let dry for 24 hours
- Step 4: Tape off edges where deck meets house or railings
- Step 5: Clean with specially formulated cleaner. then rinse
- Step 6: Make necessary repairs and, if necessary, sand then remove dust
- Step 7: Tape off edges again
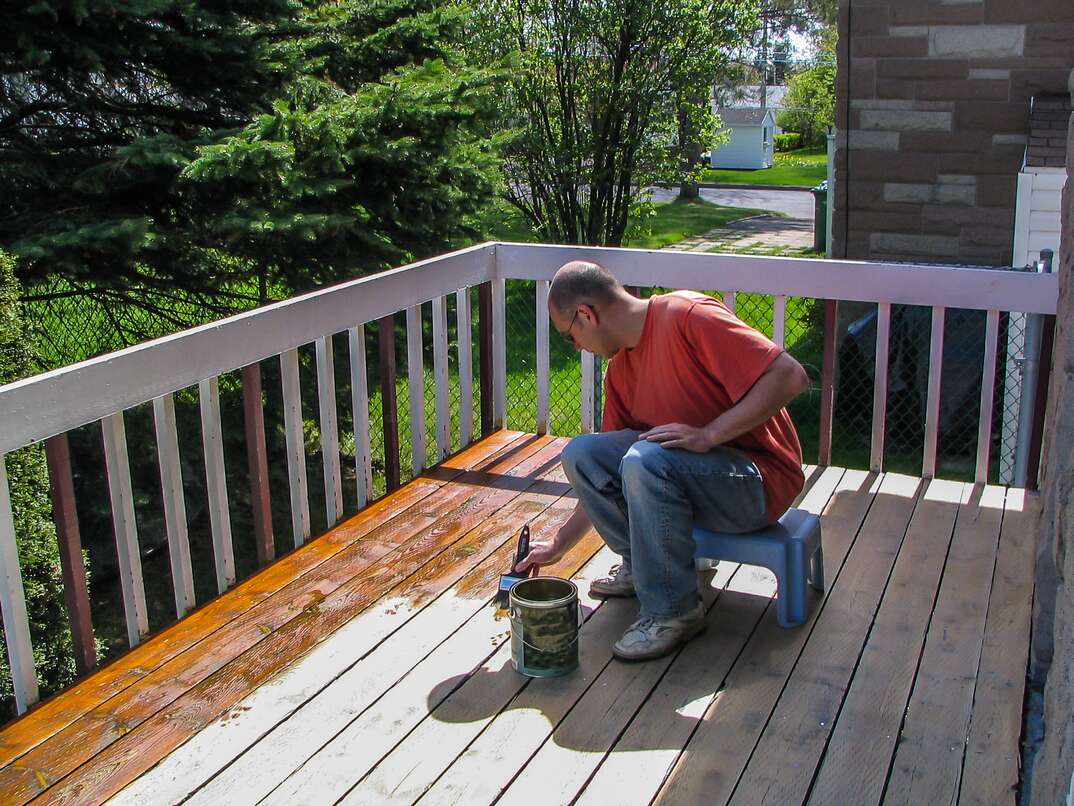
- Step 8: Apply stain and/or sealant
- Step 9: Let dry
Decks can be relaxing sanctuaries that allow you to step straight out of your house and into the fresh air — but, if decks aren't properly maintained, they can quickly go from sanctuary to shambles. You can breathe easy knowing that restoring a wood deck usually takes little more than giving it a good cleaning and then staining or sealing it.
This May Also Interest You: How Much Does It Cost To Build a Deck?
If you’ve added a new deck to your home (congratulations!), then you'll also want to be sure that you stain and/or seal it to preserve its longevity — but not too soon after it’s constructed. Read on to learn what you’ll need to know.
Pro Tip: Check the Weather
You might have your own opinions about the reliability of weather forecasts, but when it comes to staining and sealing your deck, it really is important to have an inkling about what conditions will be like for the next few days so that all your hard work doesn't get washed away. You’ll want to find a window of time with no rain in sight and temperatures between 50 degrees and 90 degrees.
For New Decks...
If you’ve recently added a deck to your home, bought a home with a new deck, or rebuilt an existing deck with pressure-treated lumber, you may need to wait a bit before the deck is ready for sealing. That's because it can take a while for pressure-treated lumber to dry out after it’s installed. The old thinking was that you would need to wait at least three months before staining pressure-treated wood, but the reality is that it could take much less time, and it might even be stainable or sealable right after installation.
The way to check is to drip some water onto the boards. If it beads up, the wood isn’t ready to be sealed or stained. If it soaks in, then you're good to go. After determining that your deck is ready for treatment, follow the guidelines below — and you can skip the prep part we’ve included for older decks.
 -------------------------------------------
For Existing Decks...
Chances are good that if you already have a deck that's older than a year or so, you'll need to do a little prep work before staining or sealing it.
A good place to start is with a thorough pressure washing. If you don't already have a pressure washer, you can rent one from a local home improvement store. You shouldn't need anything more than a machine that can pump out 1,550 pounds per square inch, or psi, of pressure. Any more than that and you risk damaging soft wood like pine or cedar. Be sure to use a fan-shaped nozzle on your power washer so that you don't carve grooves into the wood from too forceful a stream, and wash in the direction of the wood grain.
Once your pressure washing is done, allow the deck a full 24 hours to dry before taking the next step.
Clean It
You might be thinking: "Wait a minute, didn’t I literally just clean my deck with all that pressure washing?" Well, yes and no. Using a pressure washer will certainly get a lot of the surface grime off your deck, but if you really want to do the job right, you'll need to use a cleaner specially formulated to get out the deeper dirt hiding in your deck boards. A variety of cleaners are available and they all do pretty much the same thing, so the one you choose comes down to personal preference.
After your deck is dry from the pressure washing, tape off any areas where your house or railings come in contact with the deck to protect against potential discoloration from the cleaning chemicals. Also, be sure to carefully read the instructions accompanying your cleaner. Some require that your deck be lightly moistened before beginning.
After donning protective gloves, glasses and a respirator or facemask, spray the cleaner on a relatively small portion of your deck using a garden sprayer. Then, follow up by scrubbing the area with a bristle brush to work the cleaner into the boards. Continue until you've done the whole deck, and let the cleaner sink in according to the package directions (usually 10 minutes or so) before rinsing the entire area with clean water.
Make Repairs
In addition to getting your deck clean and bright, also use this time to replace any rotten boards, patch holes with wood filler and tap down nail pops. Depending on the condition of your deck after the pressure washing and cleaning, you may want to give the entire surface a light sanding using a pole sander. This will remove any grime that rises to the surface from the cleaner, and it’ll also ensure that your boards are ready to soak up your stain or sealer. When the sanding is complete, sweep well or use a leaf blower to get all the dust out of the way.
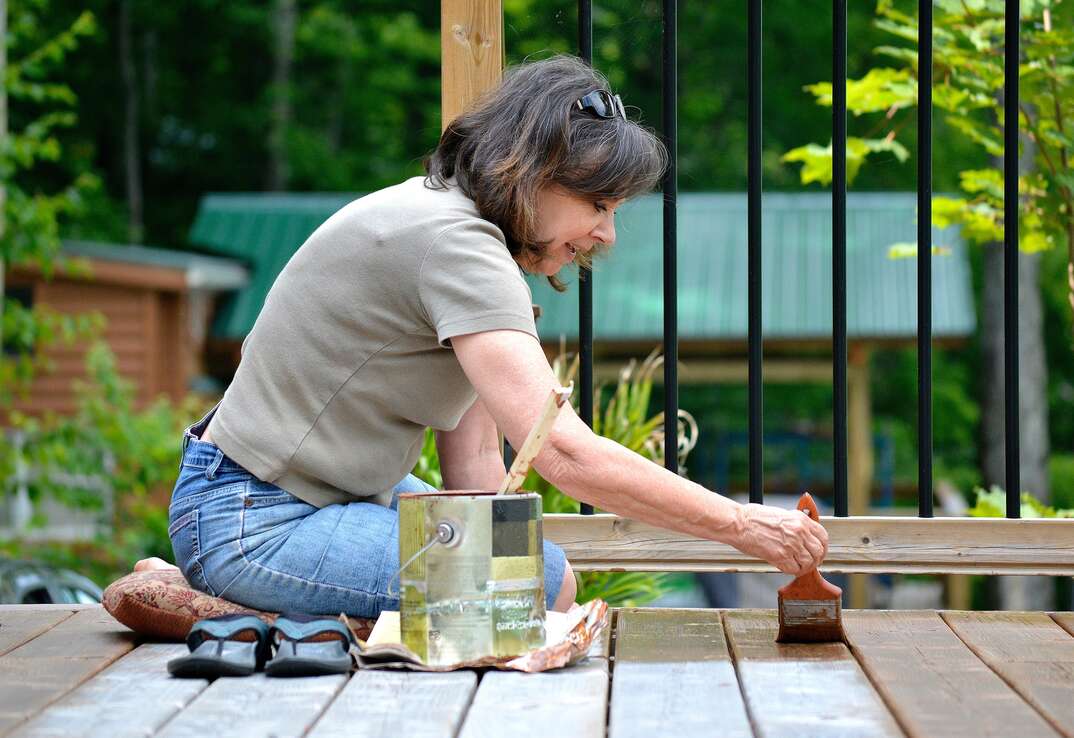
Stain, Seal or Both
As with many painting-type projects, most of the work here comes from the prep. Once all the cleaning, fixing and sanding is done, the final step is pretty straightforward: Apply your stain or sealer.
Choosing your sealer or stain is a matter of personal preference. If you want the look of your wood to shine through, then a clear sealer will get the job done. If you want to change the look of your deck, then a stain in the color of your choice is the way to go. These days, there’s a huge variety of stains with sealers mixed in, so you won't need to apply one product and then the other. One coat of any of these products is usually enough, but if you want to give your deck a little extra TLC or hide major blemishes or woodgrain issues, a second coat will be all that's needed.
You can use a paint roller on an extension pole to apply the stain and sealer to your deck, but a specially designed stain applicator tends to work better, and it has a unique edge that lets you apply your product between boards. Remember to tape off the areas you don't want covered with stain or sealer, and use a paint brush to do all your edges and smaller areas.
After the stain or sealer has been applied, let your deck dry thoroughly according to the directions on the product you've chosen. Then, it’s time to break out those comfy chairs and enjoy the pleasures of a deck that will look virtually brand new.
Improving the surface look of your deck can go a long way toward improving your home's curb appeal. You'll likely also want to look after things beneath the surface, such as plumbing and sewer lines. That's why being prepared with a plan from HomeServe might be something to consider. When an issue arises, you can call our 24/7 repair hotline, and we’ll send a local, expert technician to handle repairs, up to the benefitted amount. Learn more about plans from HomeServe today.