How to Install a USB Outlet to Charge Your Devices
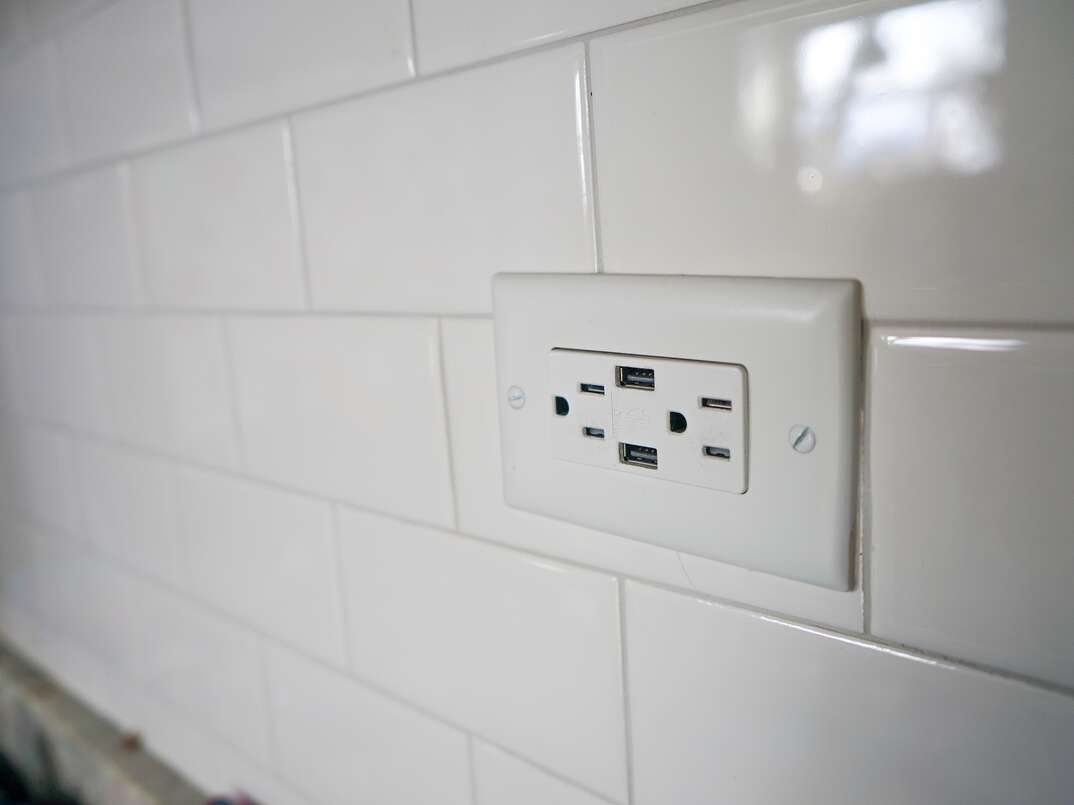
Virtually everyone owns a smartphone, tablet and similar electronics these days — most of which are charged with a universal serial bus, or “USB.” Unfortunately, if your home just has standard electrical outlets with three-prong plugs, you need to use a bulky USB adapter that takes up an entire electrical socket in order to charge those devices. Wouldn’t it be nice if you could just plug your USB cord directly into a designated port on the outlet and leave the standard outlets free for other purposes? Well, now you can: Just install a USB outlet.
This May Also Interest You: 8 Different Types of Electrical Outlets Homeowners Should Know
In addition to having the regular three-prong electrical plugs, a USB outlet has several designated USB ports that you can plug your cables directly into. Perhaps best of all, installing a USB is a quick and easy job that requires minimal tools or electrical know-how. So if you’re ready to bring your wall outlets into the modern day, read on.
Choosing a USB Outlet
When shopping for a USB outlet, it’s helpful to know what the different types of USB ports are so you can make the most informed decision for your specific needs. The most common types are:
Type-A USB
Type-A USB ports are the original type of USB connector. They have a flat rectangular end that plugs into your power adapter (like a wall outlet or computer), and on the opposite end, they have another type of connector for plugging into your electronic devices. The end that plugs into the device is usually a mini- or micro-USB that looks like a miniature version of the standard Type-A connector. They’re commonly used for phones and cameras. Type-A USB connectors are non-reversible, meaning that they can only be inserted into the power adapter or device in a single direction. The main limitation of Type-A connectors is their relatively low power output and data transfer capabilities, which makes them only suitable for smaller electronics.
Type-C USB
Type-C USB connectors were introduced in 2014 with the intention of eventually replacing all other forms of USB connectors. In other words, to create a truly “universal” universal serial bus. Type-C connectors have a symmetrical shape that allows you to plug it into a device in any direction and are capable of handling much larger electrical loads than Type-A connectors. As a result, they can be used to power larger devices like laptops and printers, along with phones and cameras. They can also charge your devices significantly faster than Type-A USB connectors. Although some USB cables can have a Type-A connector on one end and a Type-C on the other, cables with Type-C connectors on both ends are increasingly becoming the norm.
USB outlets are available with Type-A USB, Type-C USB and a combination of the two. Since Type-A USBs remain the most common, but Type-C connectors are now the standard variety being incorporated into electronics, it’s generally recommended to purchase an outlet with both types of connectors.
More Related Articles:
- How Much Does It Cost to Replace an Electrical Panel and Ground Outlets with GCFI?
- Socket to Me: How Much Does It Cost to Install or Replace Electrical Outlets?
- How to Replace an Electrical Outlet: A Step-by-Step Guide
- Watt’s Too Much? How Much You Can Plug Into One Outlet
- How Your Home’s Electrical System Works
Installing a USB Outlet
Things You’ll Need
- USB outlet with faceplate
- Screwdriver
- Non-contact voltage tester (optional)
- Needle-nose pliers (optional)
How to Install a USB Outlet: Step-by-Step Instructions
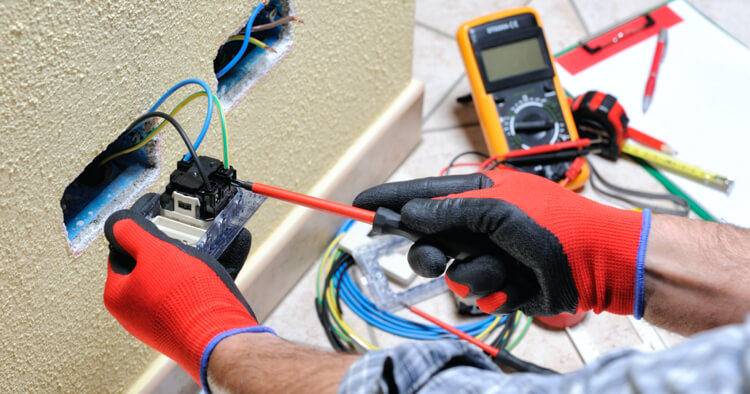
Step 1: Shut Off the Electricity to the Outlet
To avoid the risk of electrocution while you’re installing your USB outlet, shut off the breaker to the electrical outlet you’ll be replacing in your home’s main electrical panel. Once the breaker is off, verify that there’s no electrical current at the outlet by using a non-contact voltage tester or by plugging an electrical device into it.
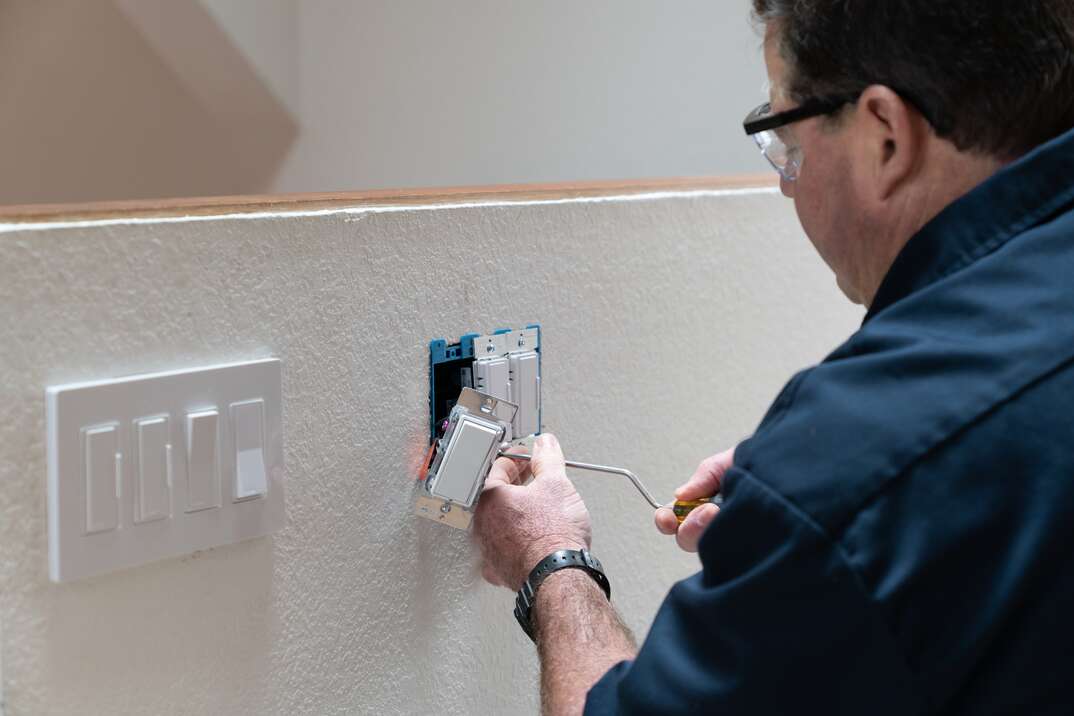
Step 2: Remove the Old Outlet
Use a screwdriver to remove the screw holding the decorative faceplate on the front of the old outlet and pull the faceplate off. Then, use your screwdriver to remove the top and bottom screws holding the electrical outlet to the plastic box recessed in the wall — the “junction box.” Carefully pull the outlet out from the junction box to expose the wires connected to it.
Use a screwdriver to loosen the screws on the side of that outlet that hold the wires in place — the “terminal screws.” You don’t need to completely remove the terminal screws; they just need to be loosened until the wires come loose and can be easily pulled out. Repeat these steps on all the wires and set the old outlet aside.
Step 3: Wire the USB Outlet
Connect the wires coming from the wall to the corresponding terminal screws on the side of the USB outlet.
The black “hot” wire will connect to the brass-colored screw, the white “neutral” wire will connect to the silver screw and the bare copper “ground” wire will connect to the green screw.
Depending on the number of plugs on your USB outlet, there may be one or two white and black wires, but there will always be a single ground wire. The terminals may also be labeled as well as color-coded on some outlets.
Many outlets will require that the wires are wrapped around the terminal screw before tightening it down to secure the wire in place. When that’s the case, it’s often helpful to use needle-nose pliers to create a u-shaped “hook” on the exposed end of the wire so that it can curve around the screw. Some outlets will have a small slot where the exposed end of the wires is inserted. In that case, just insert the bare wire into the slot and tighten down the terminal screw.
Step 4: Install the USB Outlet on the Wall
Carefully press the electrical wires and USB outlet into the junction box. Line up the screws on the top and bottom of the USB outlet with the corresponding screw holes on the junction box, and drive the screws with a screwdriver until the outlet is firmly attached to the junction box.
Finally, attach the new faceplate to the USB outlet. Some faceplates may be secured to the outlet with a single screw in the middle, while others have a series of tabs around the outside perimeter that clips into matching slots on the outlet.
Step 5: Turn Power on and Test
Turn the breaker back on at your main electrical panel, and test the outlet by either plugging in an electrical device or using a non-contact voltage tester.